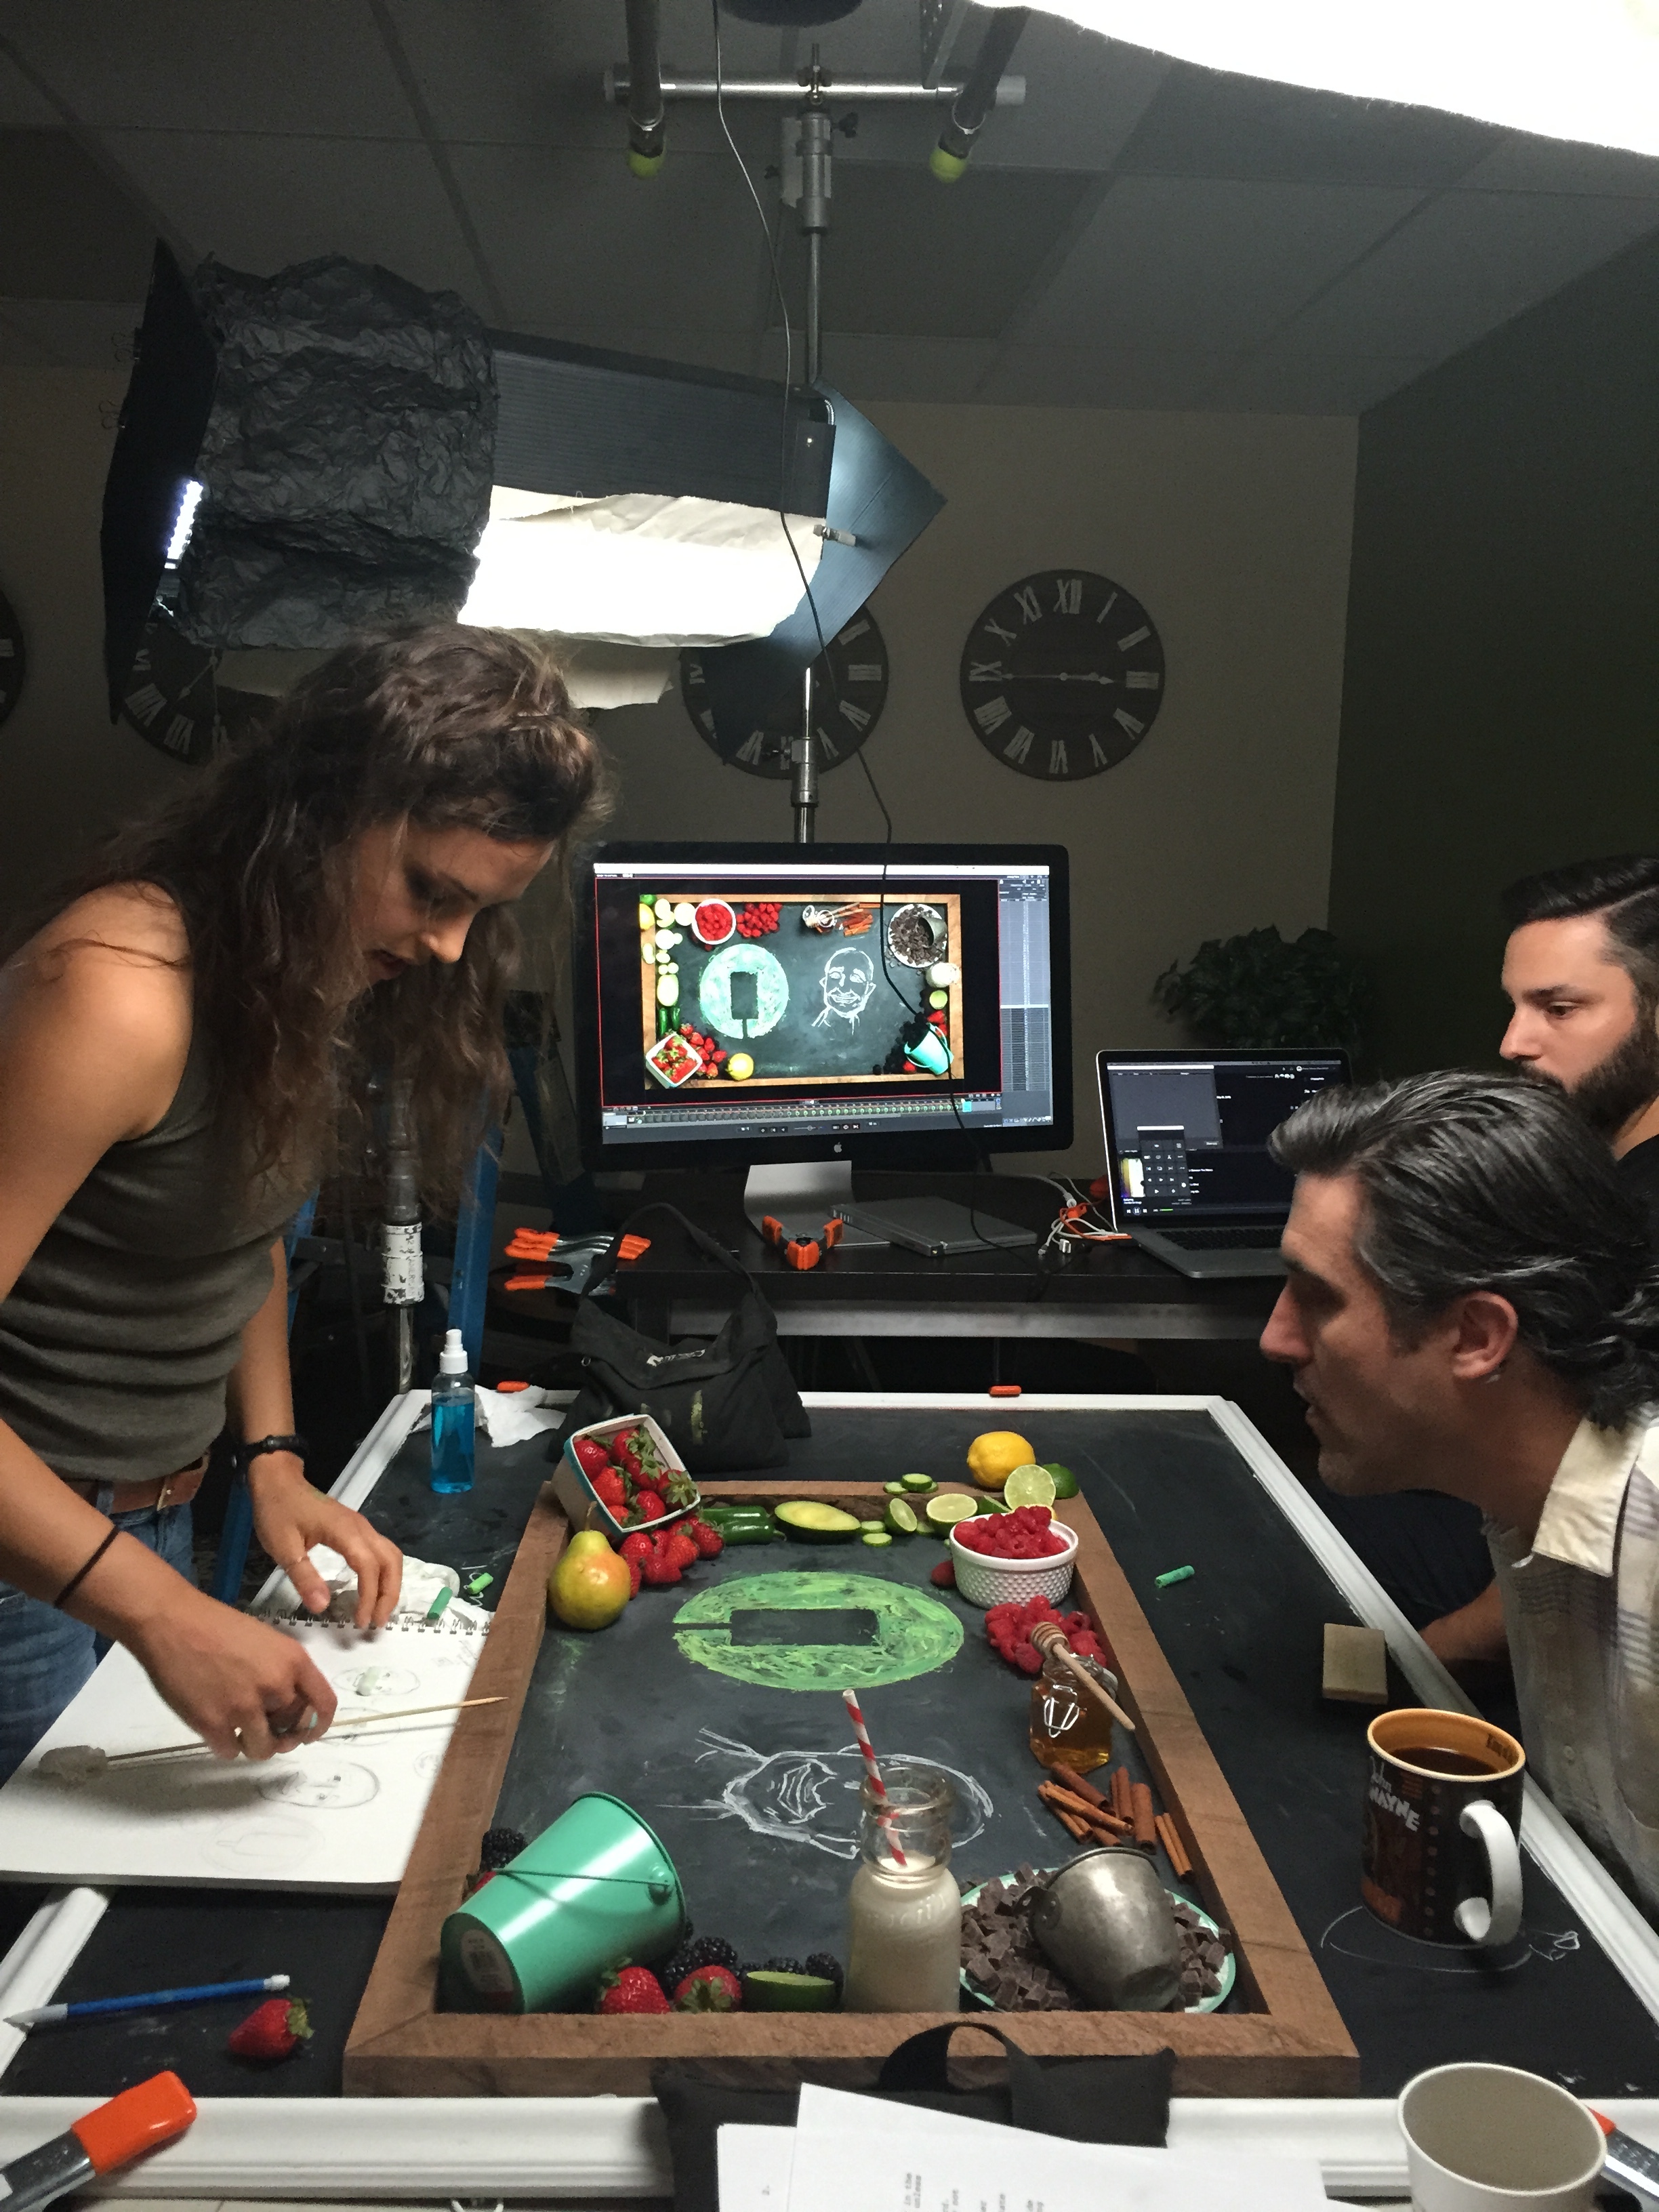
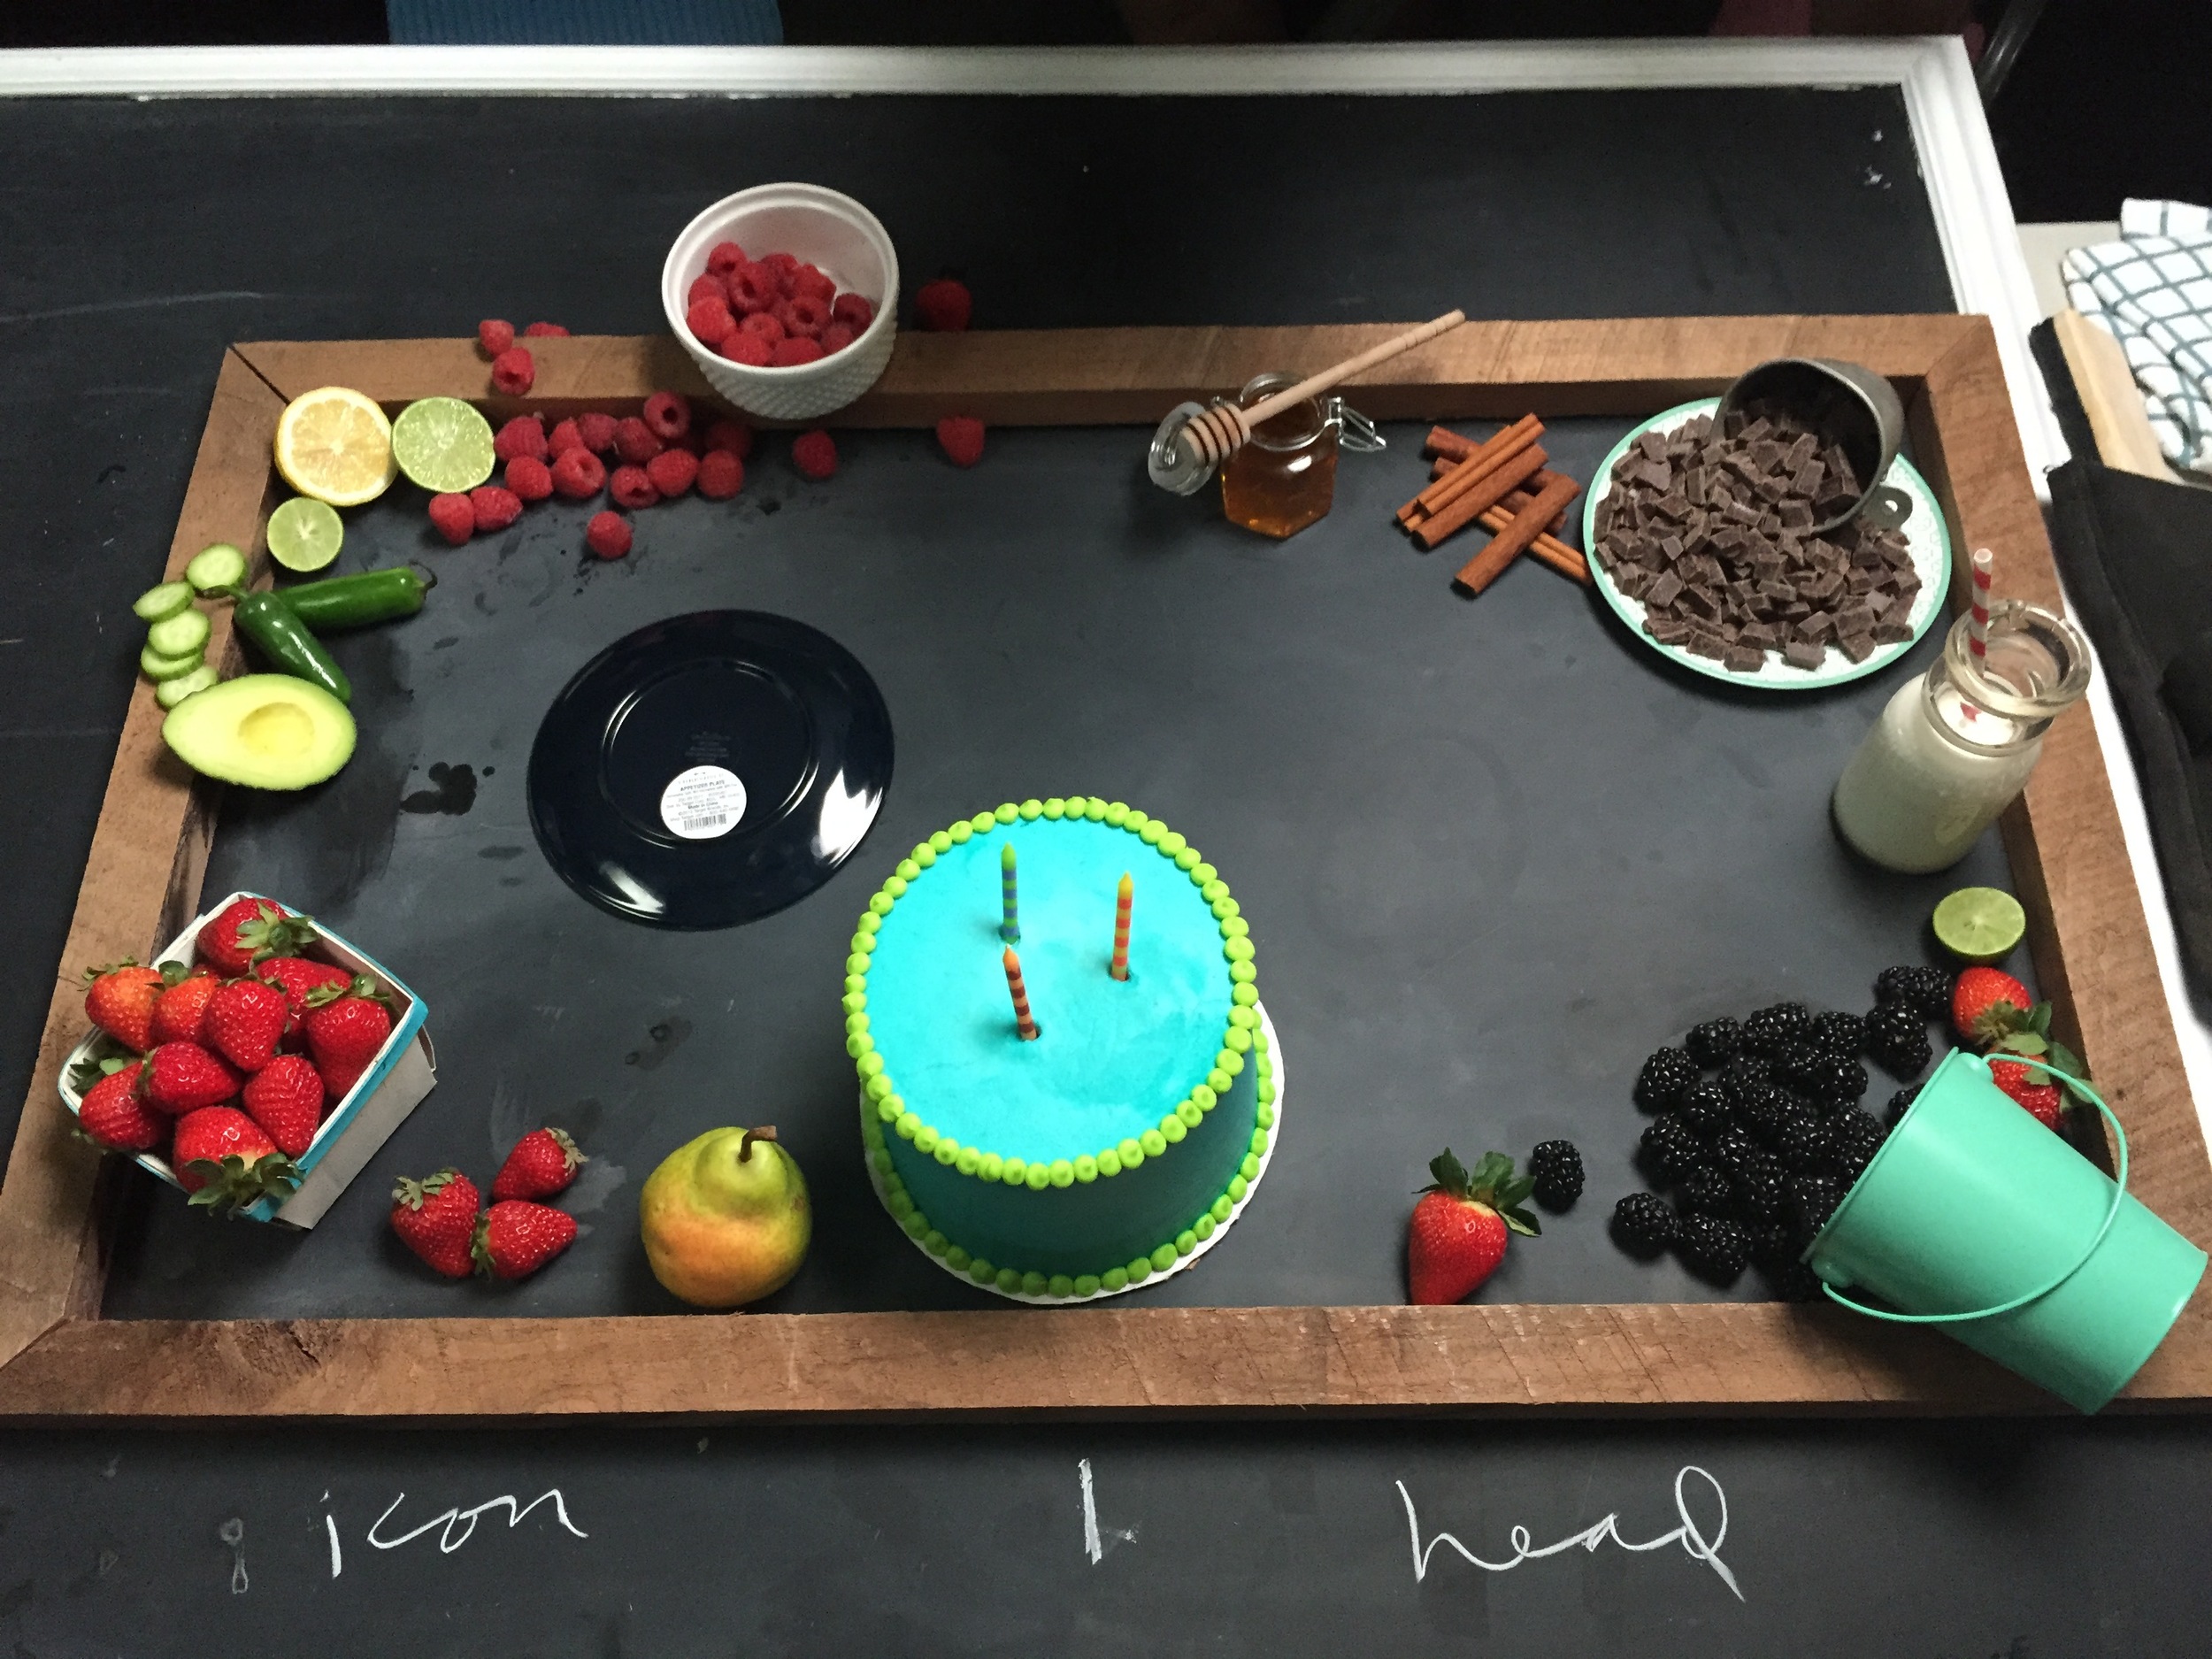
a fresh batch of stop motion commercials for Jo-Ann Crafts
in march i had a great time in Atlanta with Stephen DeVries shooting a few stop motion commercials for Jo-Ann Fabrics & Craft Stores . make + style + shoot for daayyyyyz = so good.


katherine tucker ::: prop stylist // production designer // artist
prop stylist, production designer, content creator, and producer.
in march i had a great time in Atlanta with Stephen DeVries shooting a few stop motion commercials for Jo-Ann Fabrics & Craft Stores . make + style + shoot for daayyyyyz = so good.
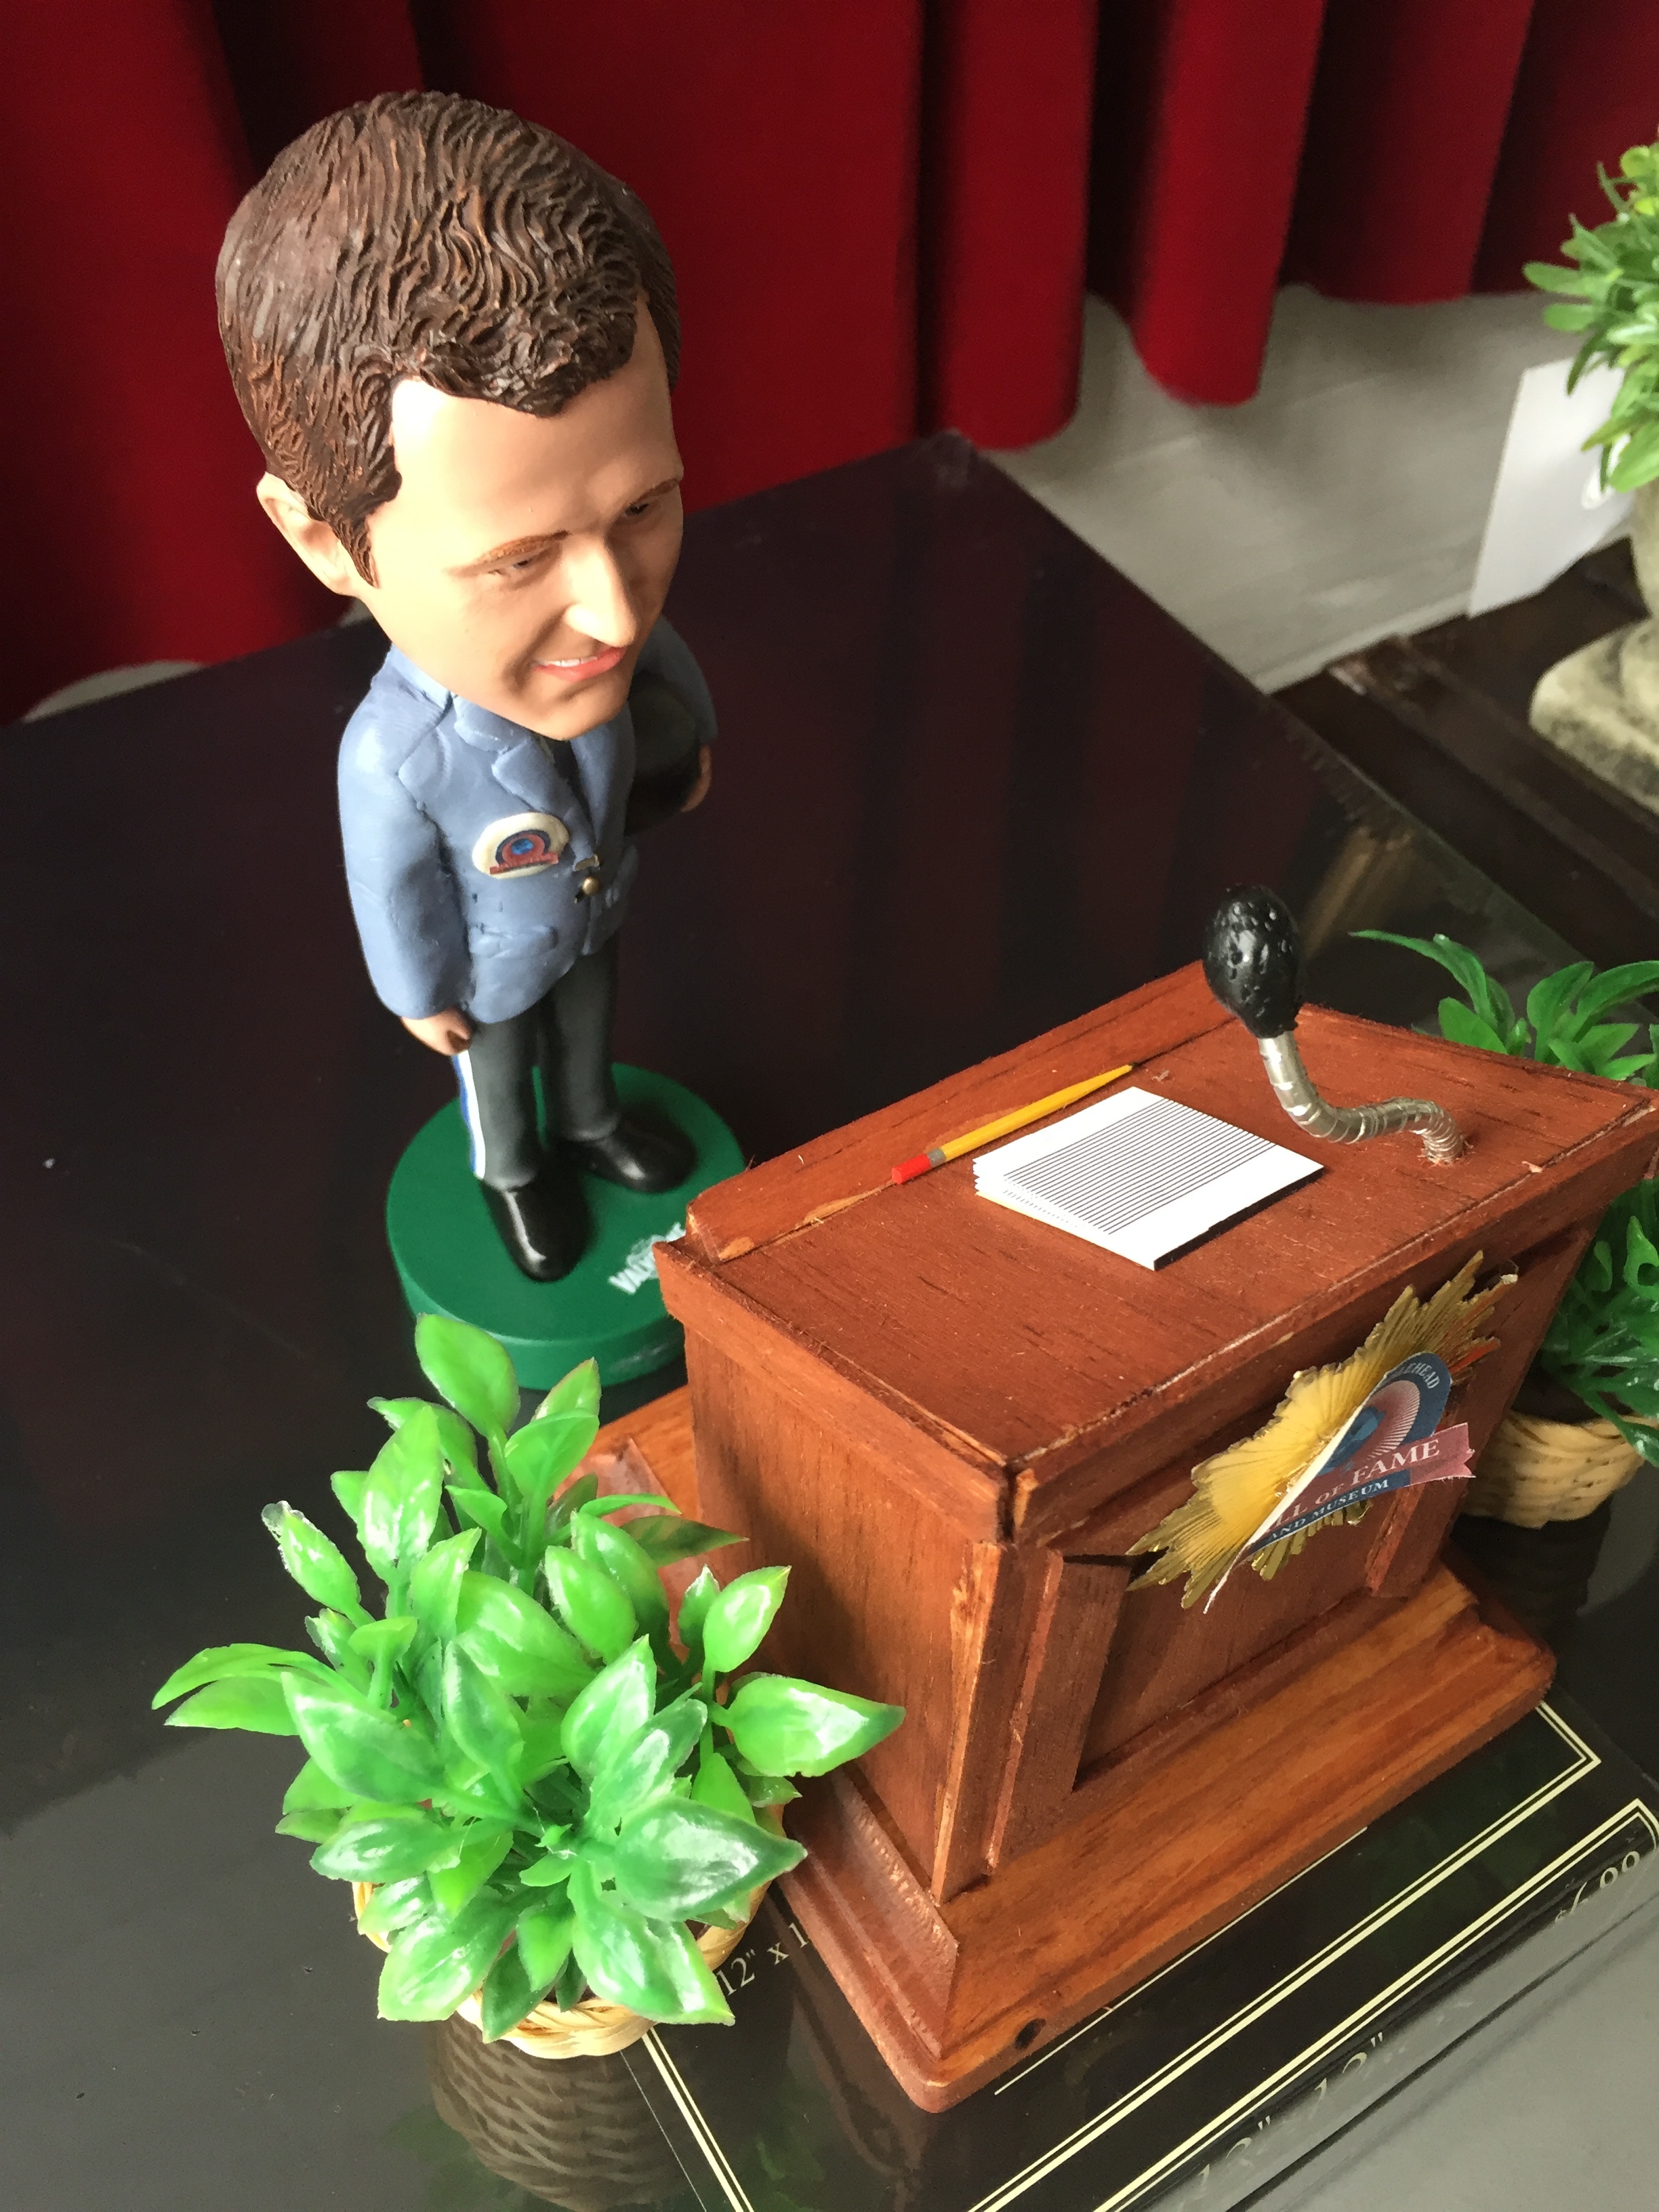
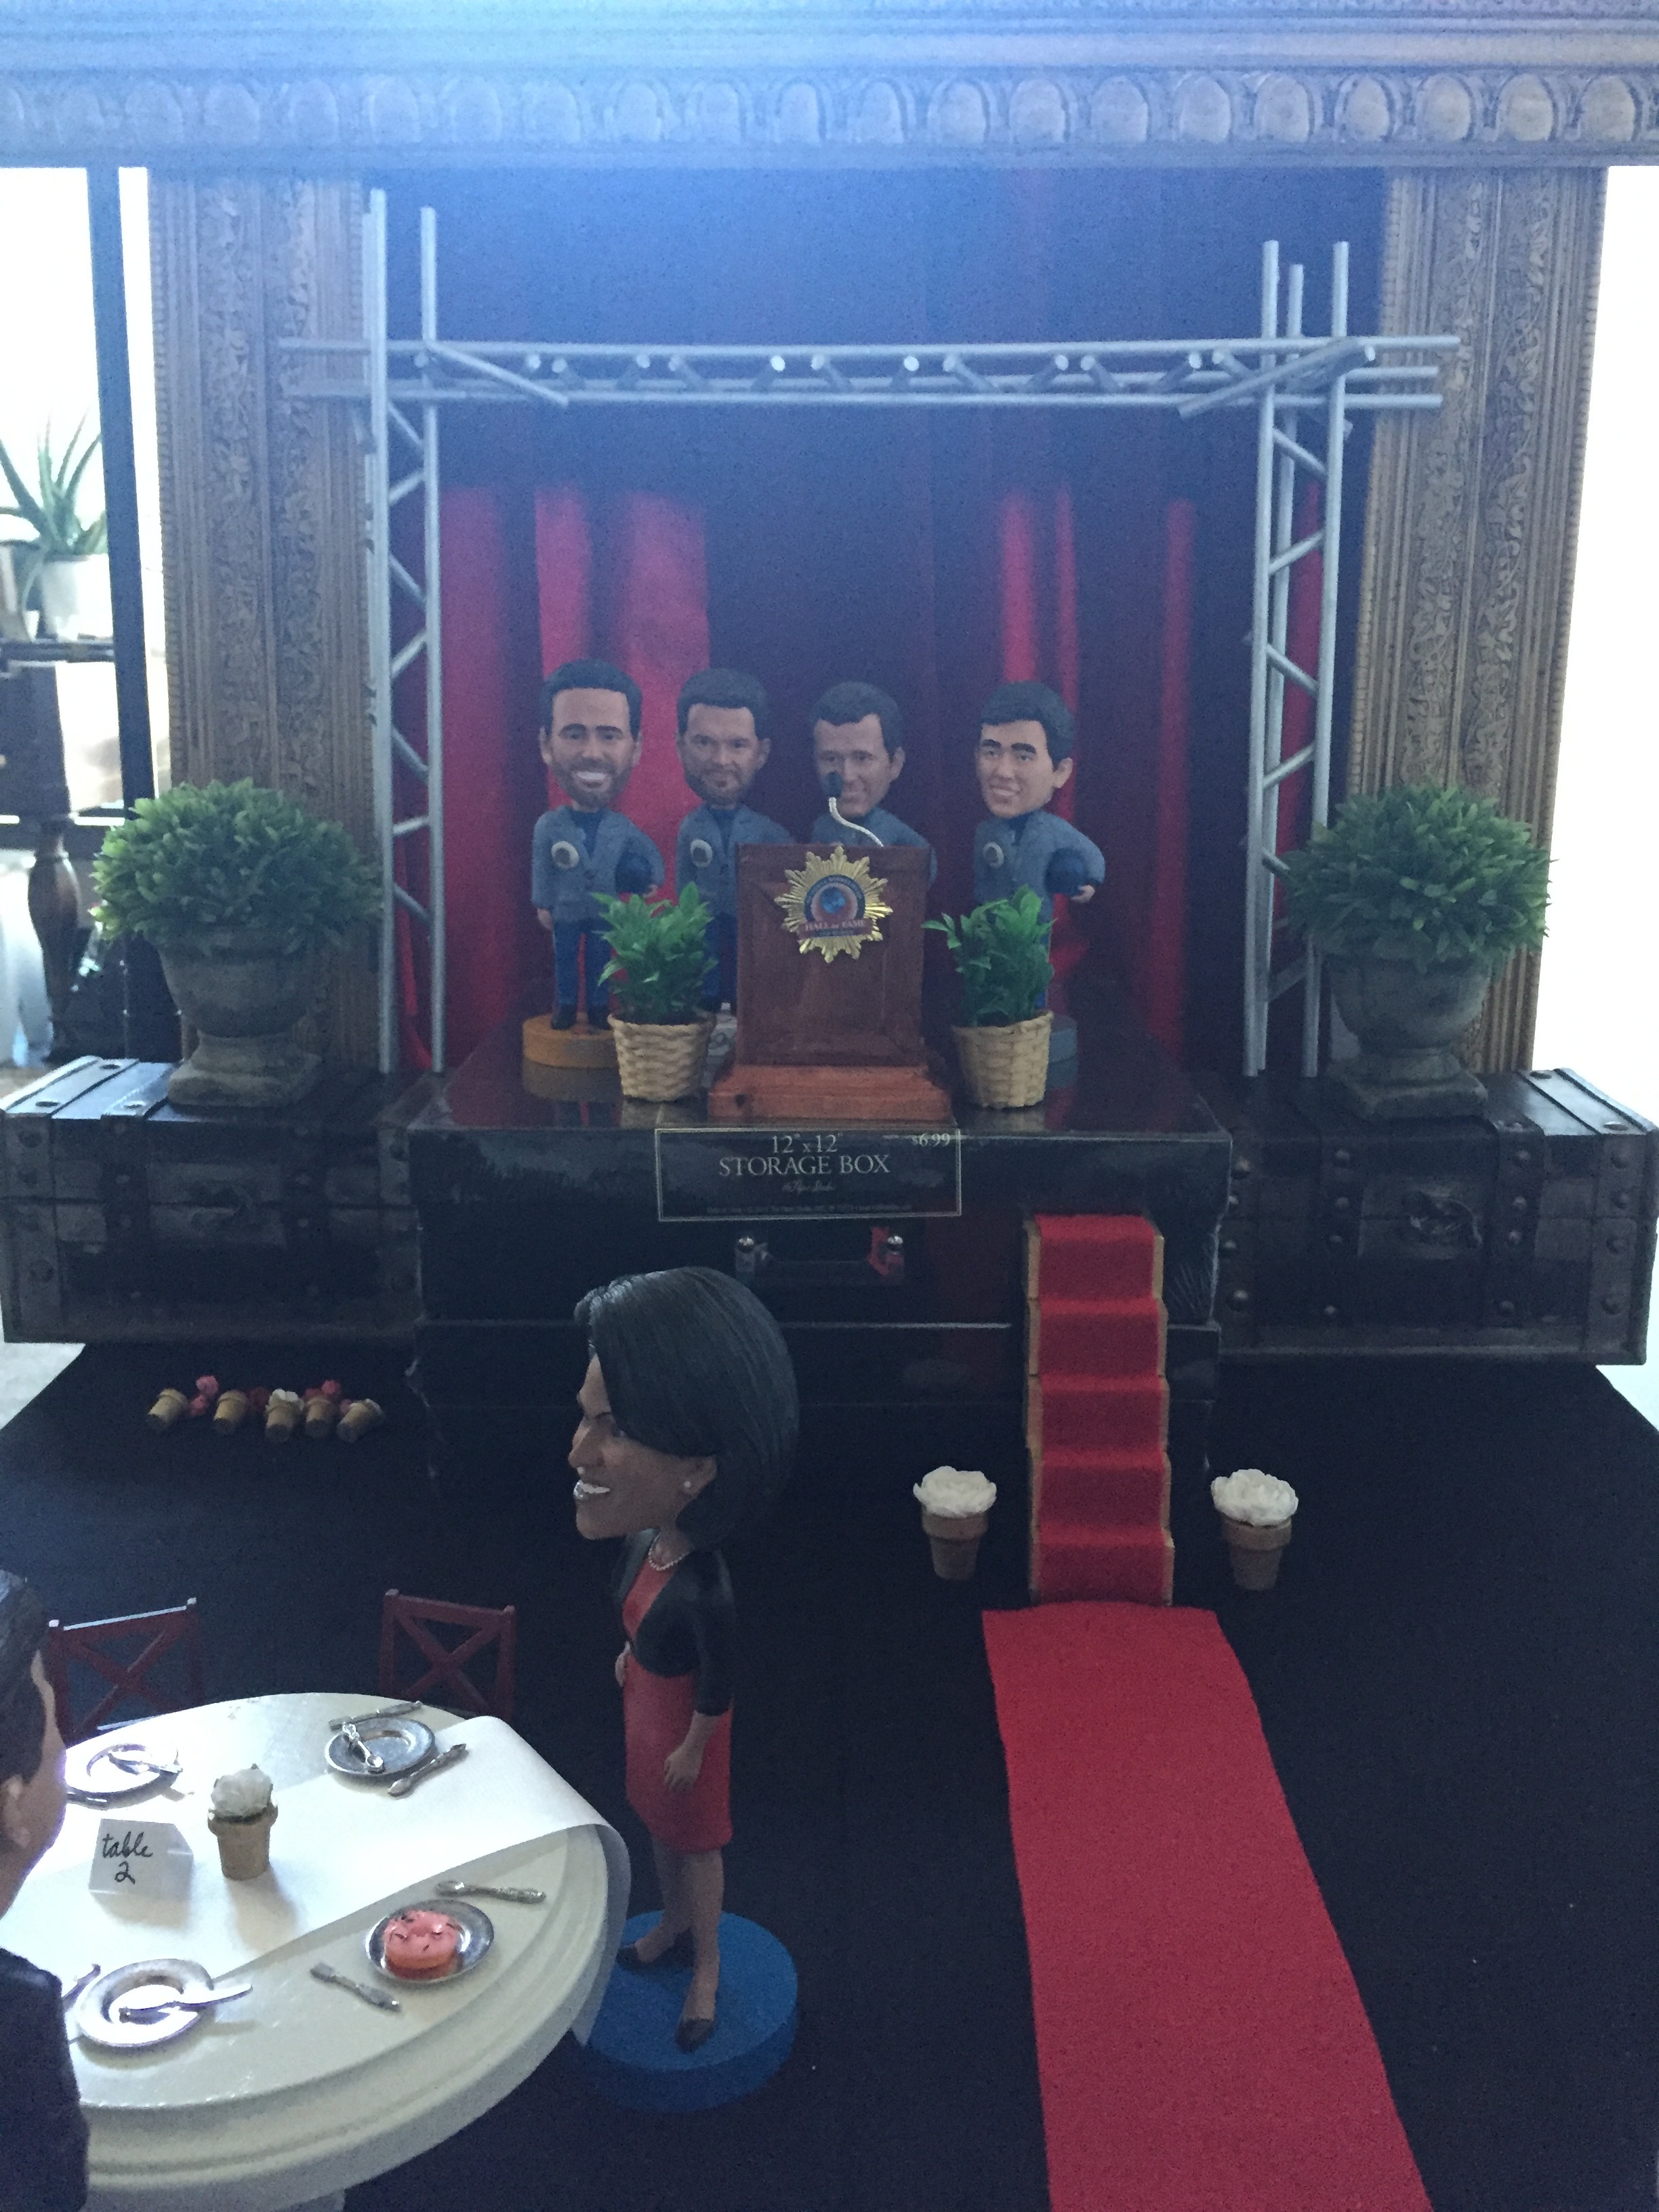
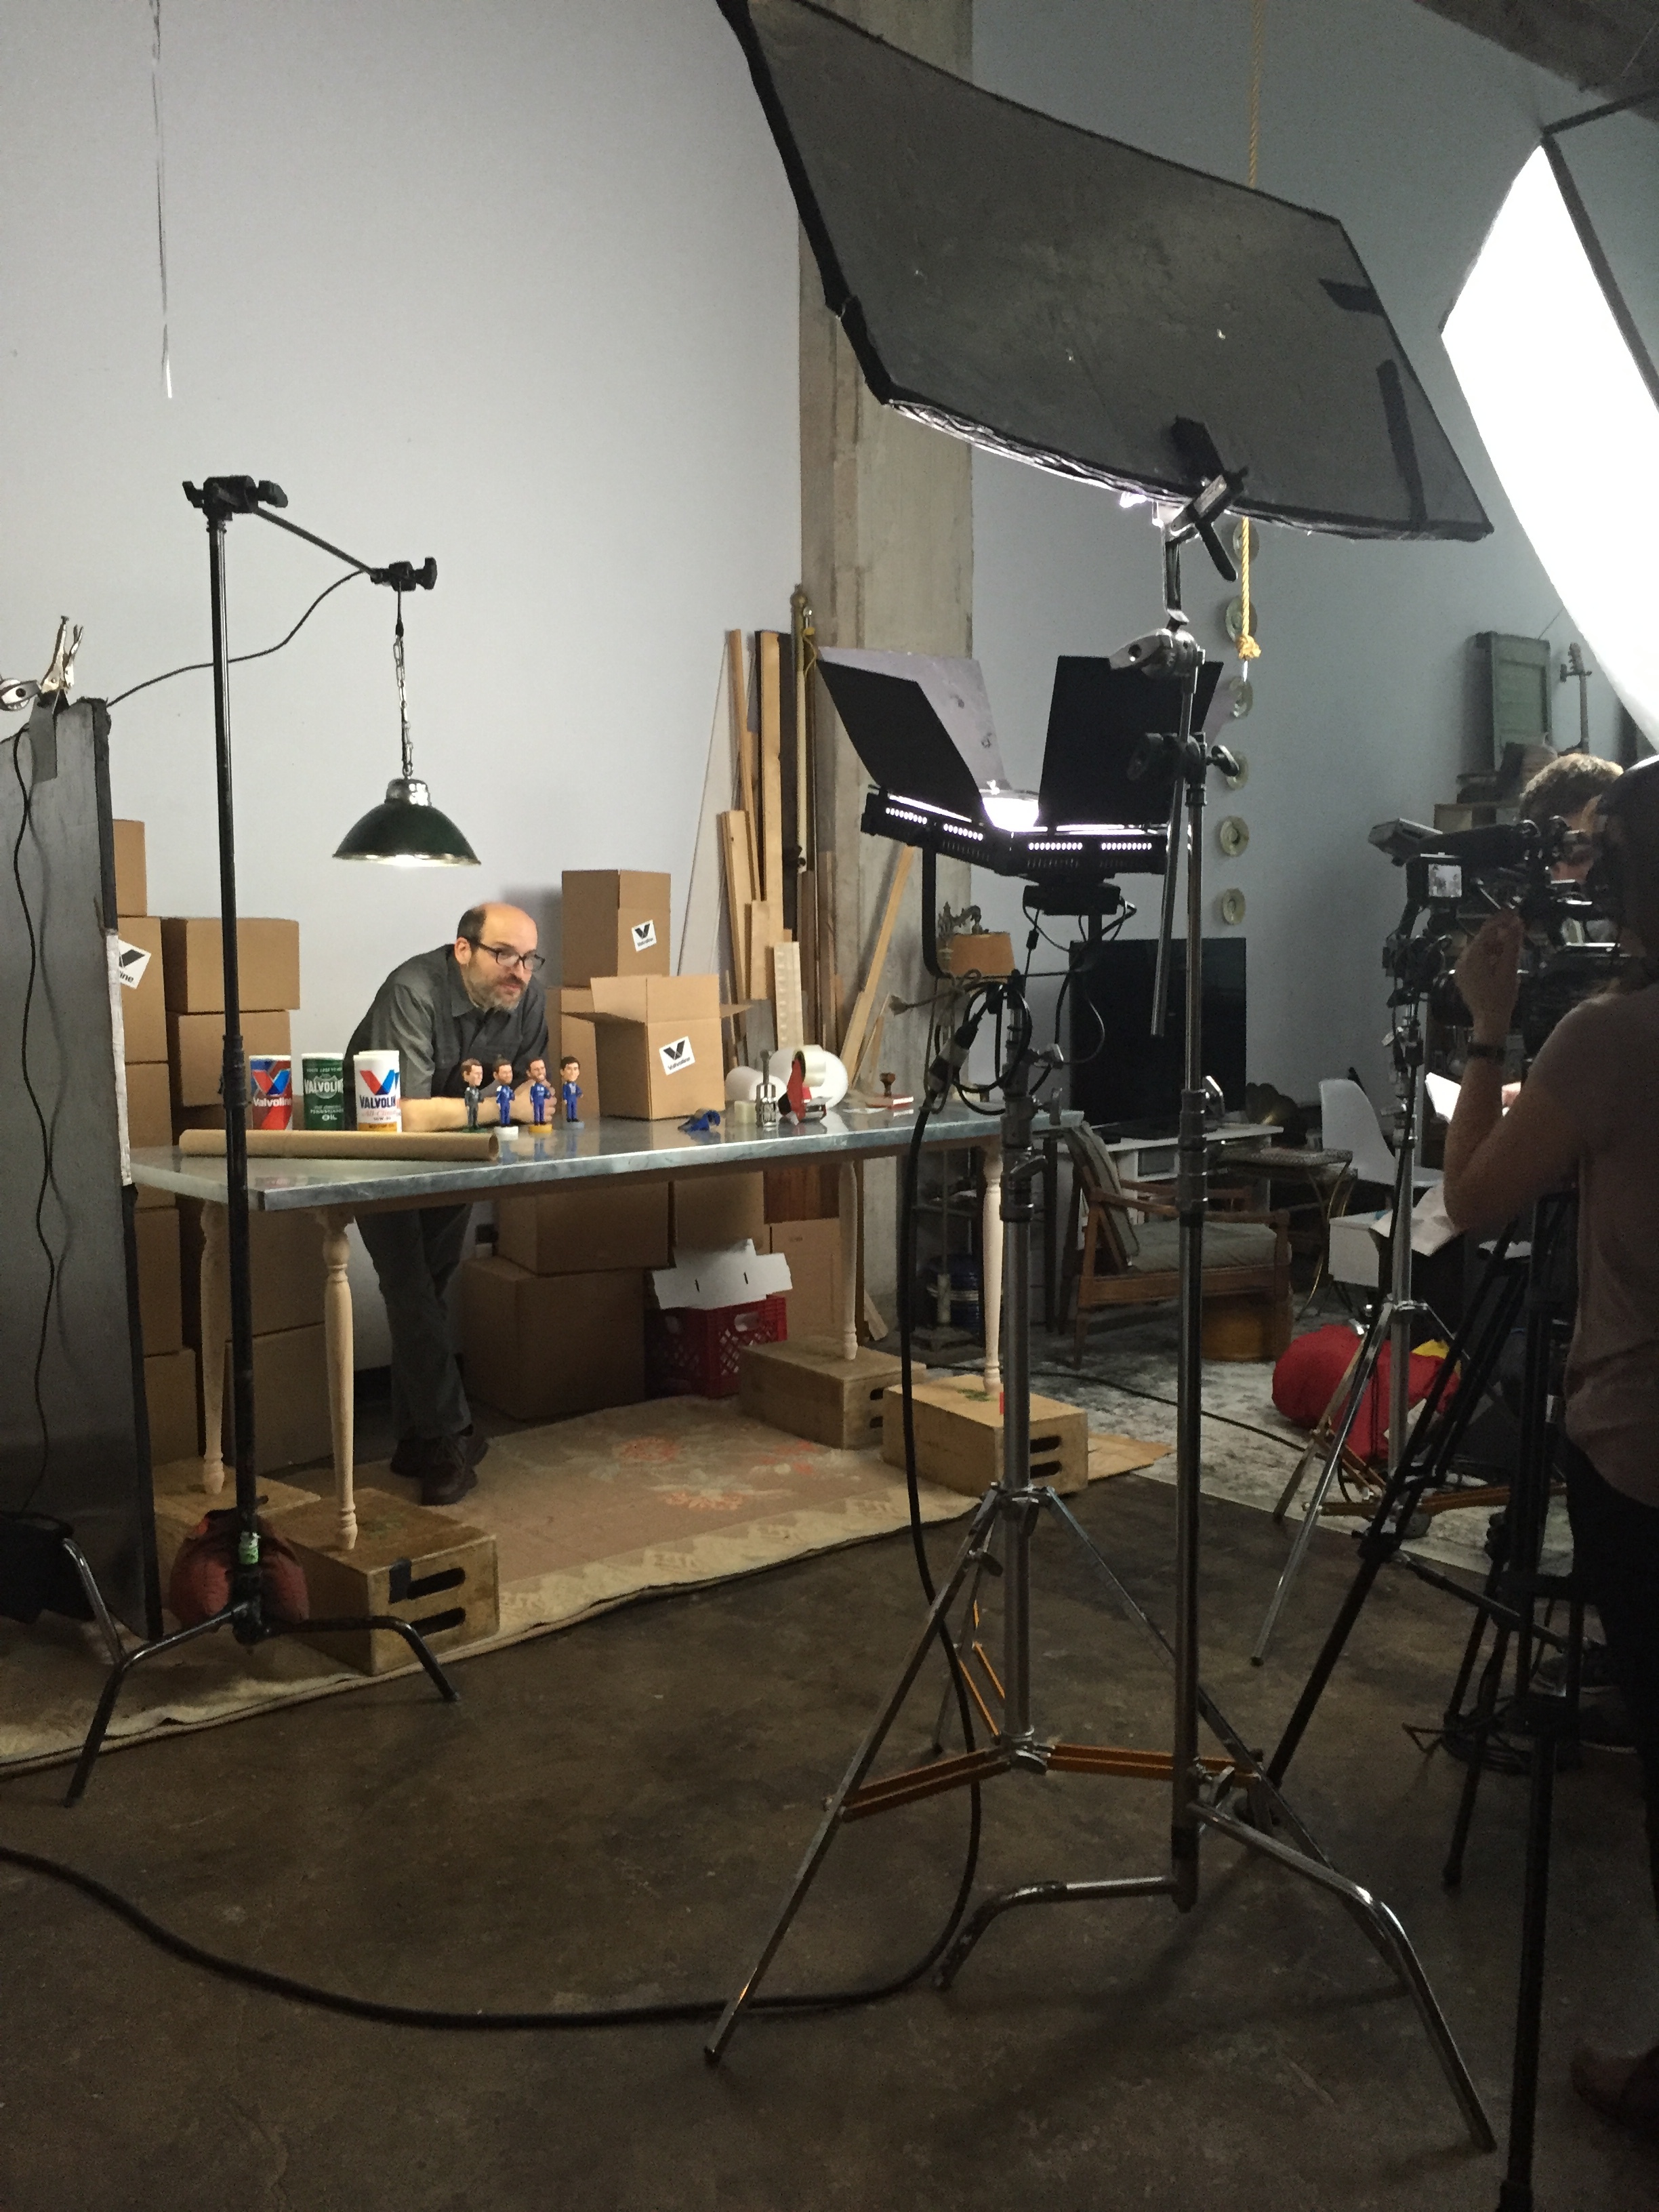
the beauty of freelance work is you never know what surprises wait around the corner & this surprise of a job brought to life my inner child as i created & sourced teeny props + designed a miniature set for the Valvoline Bobbleheads. Its always a good time working with the talented folks at Big Communications.
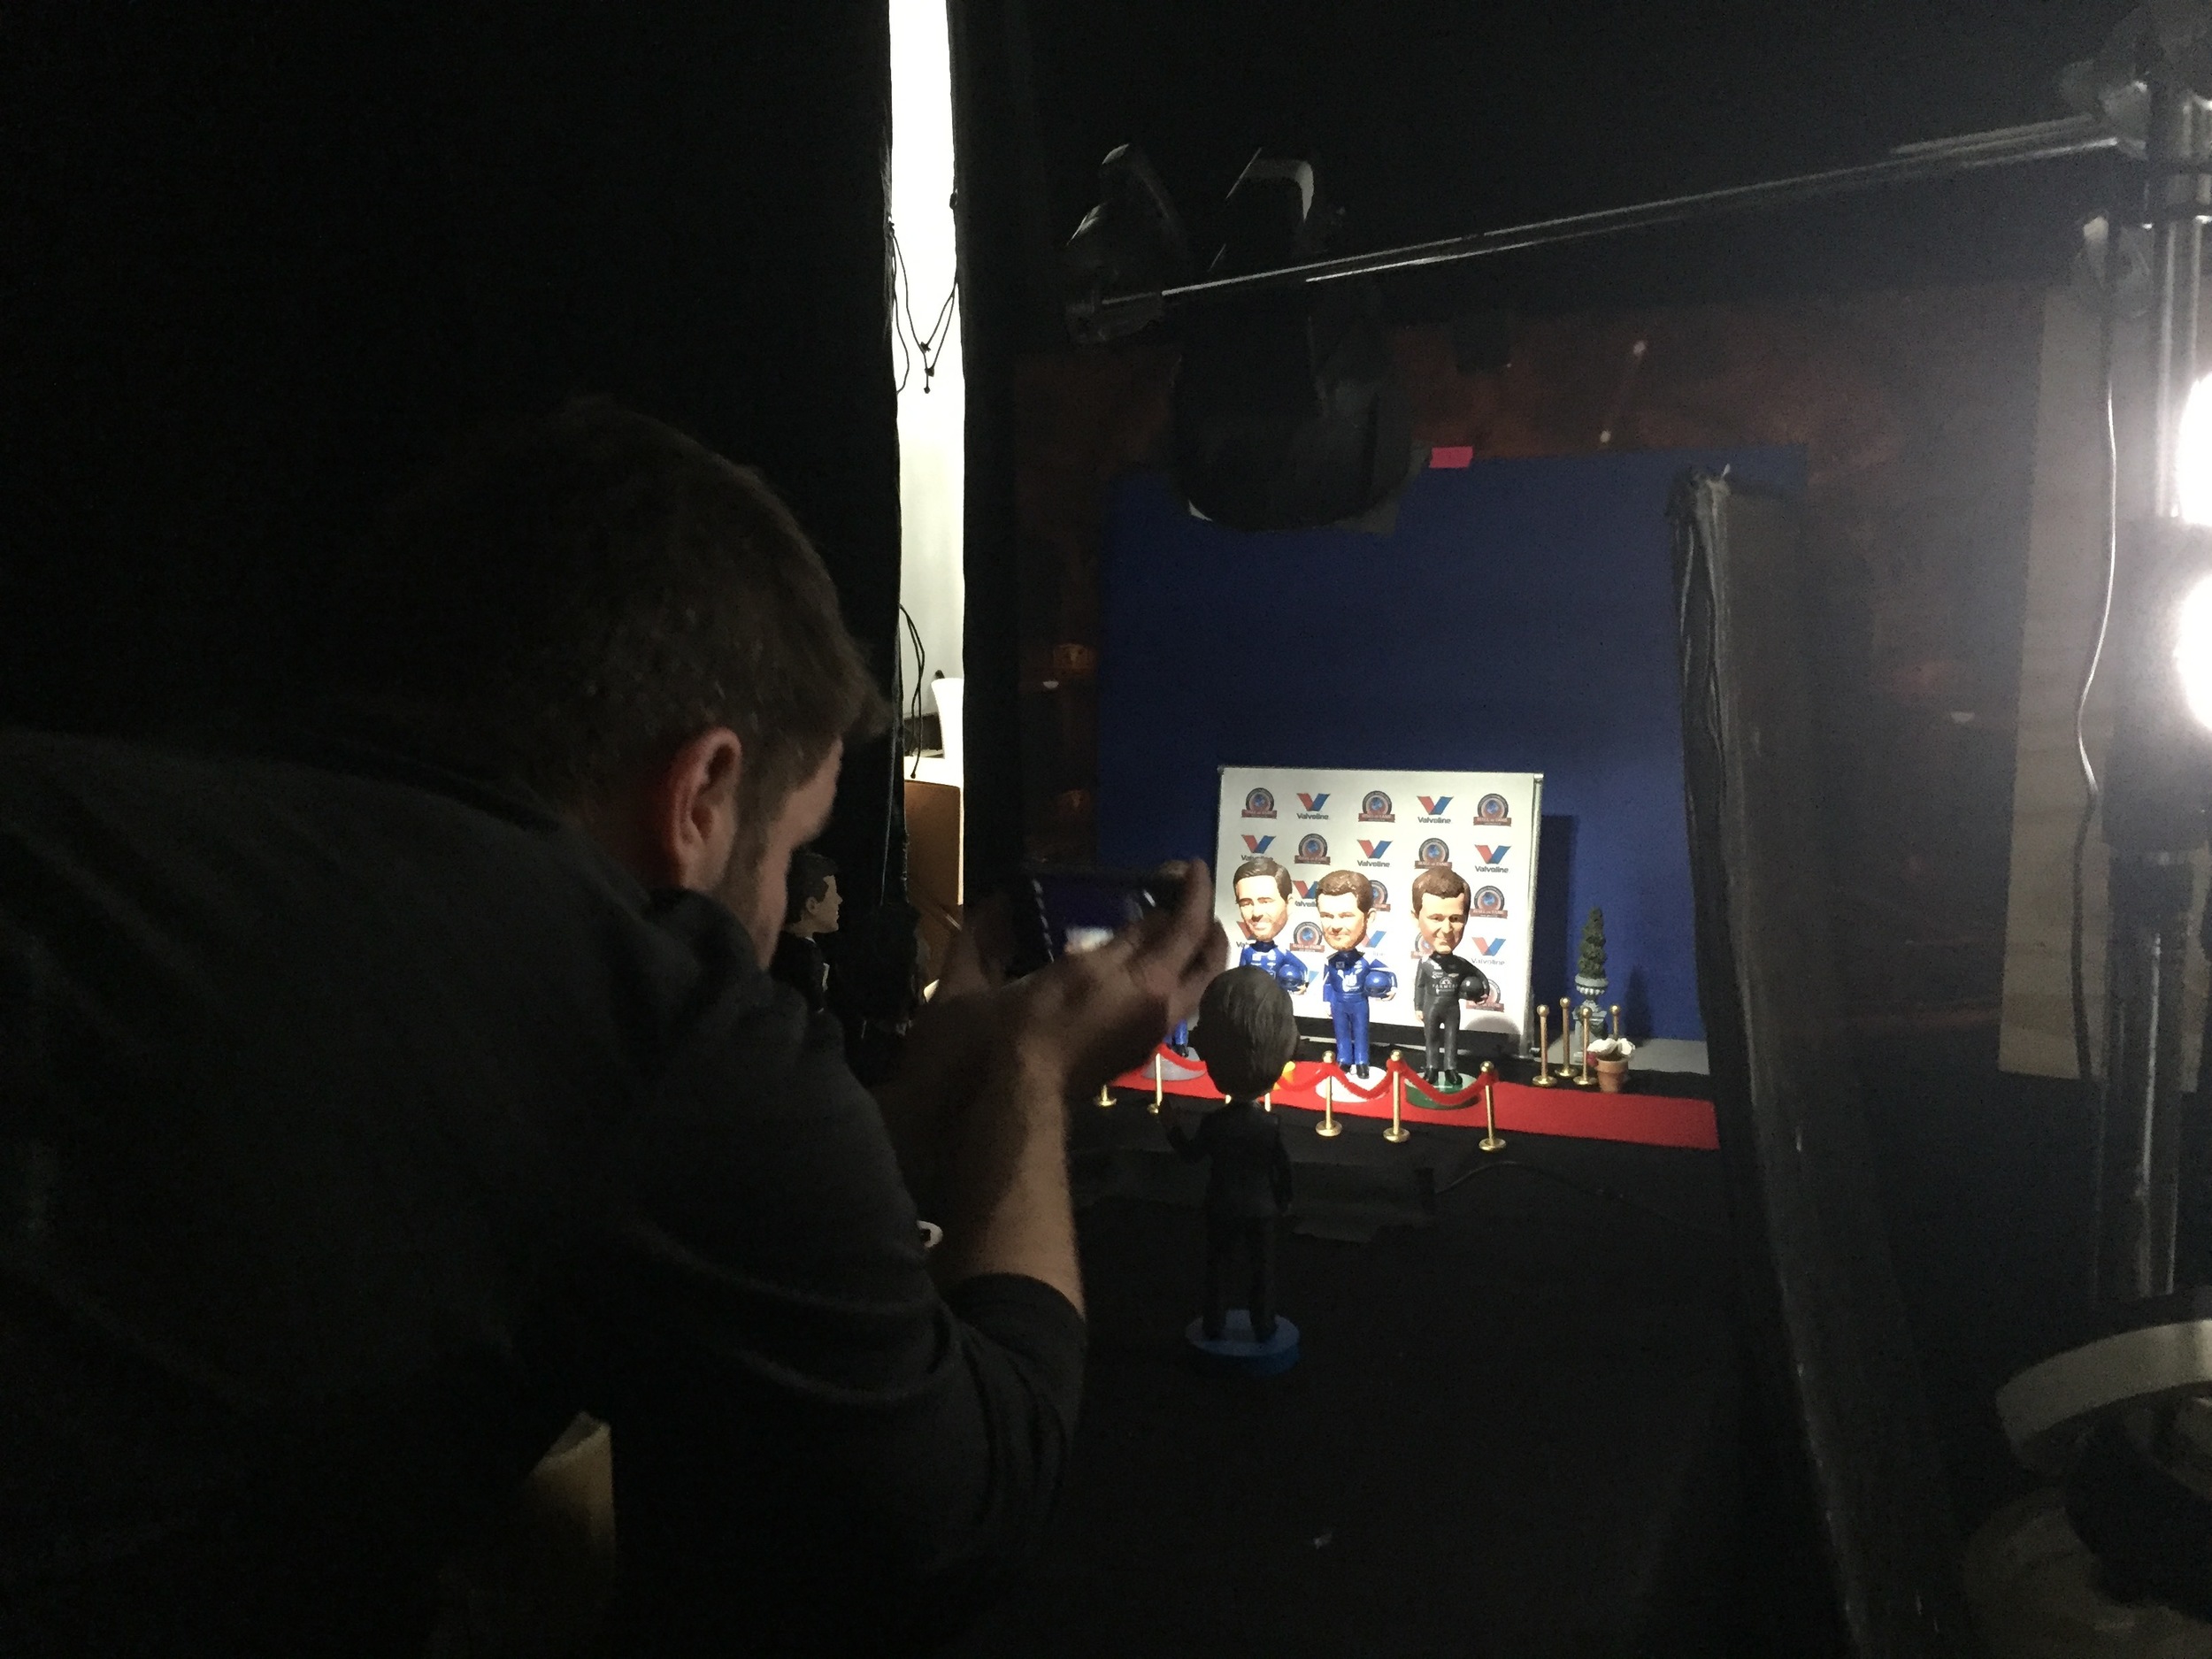
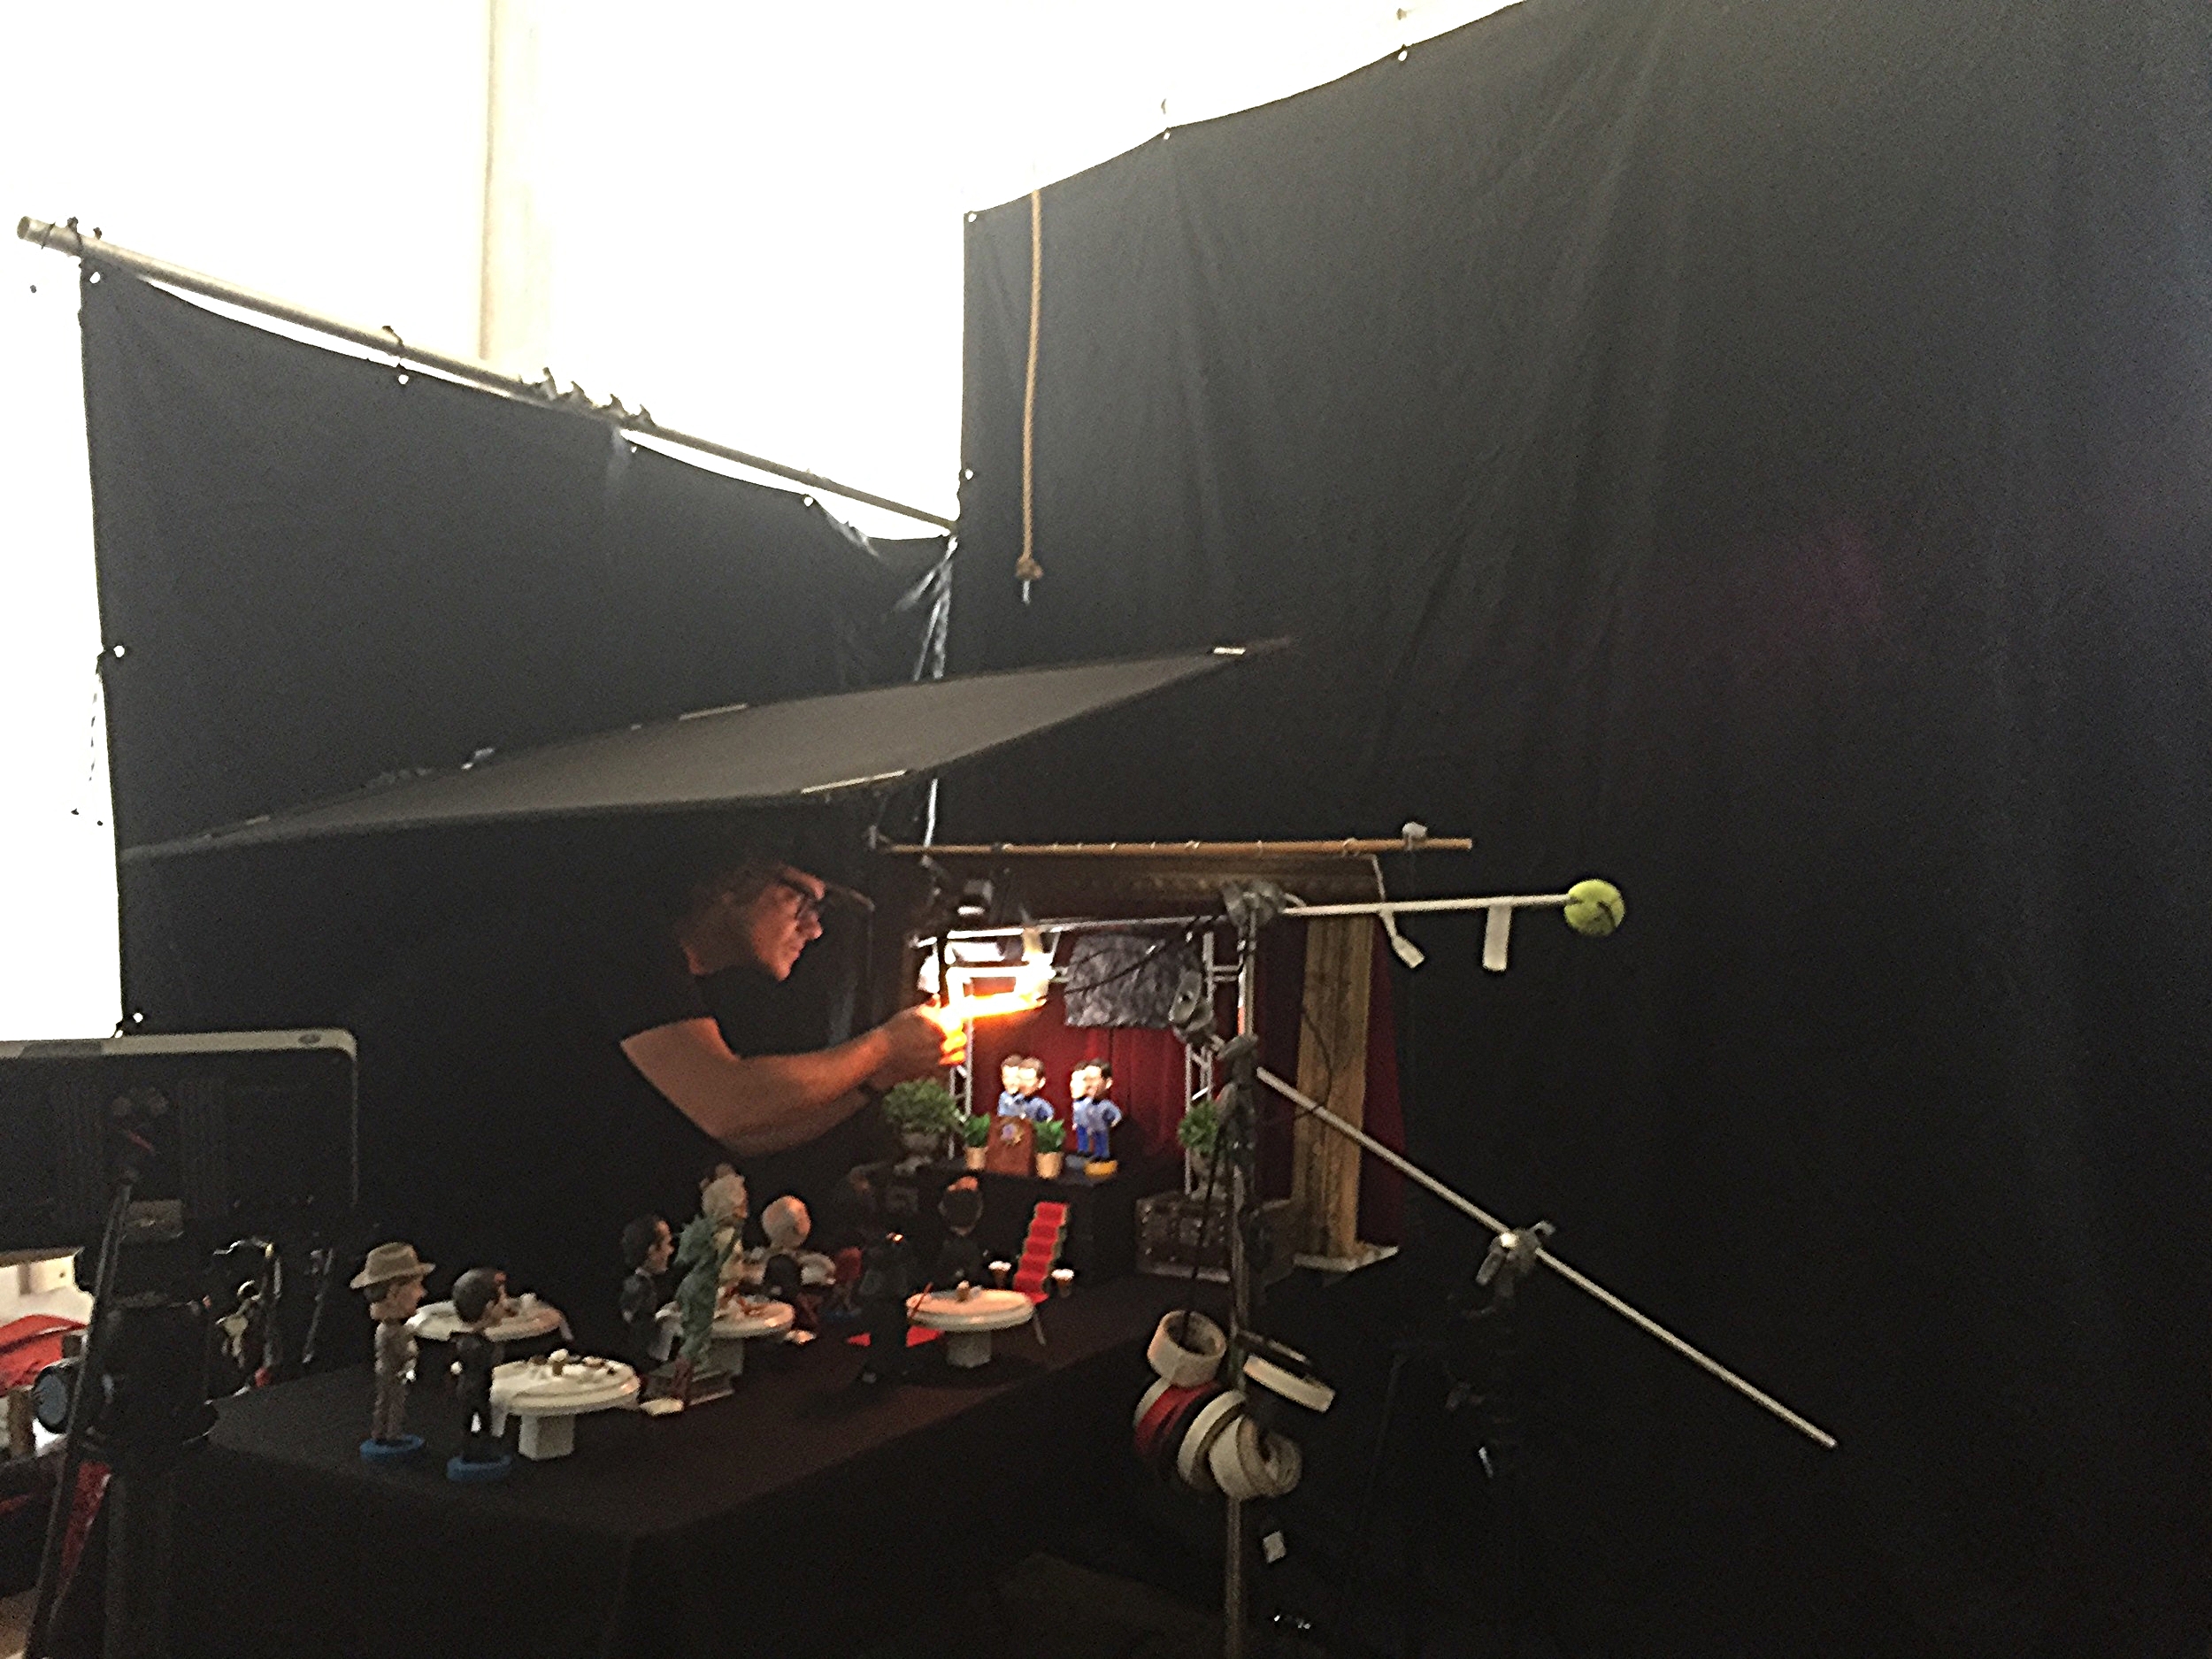
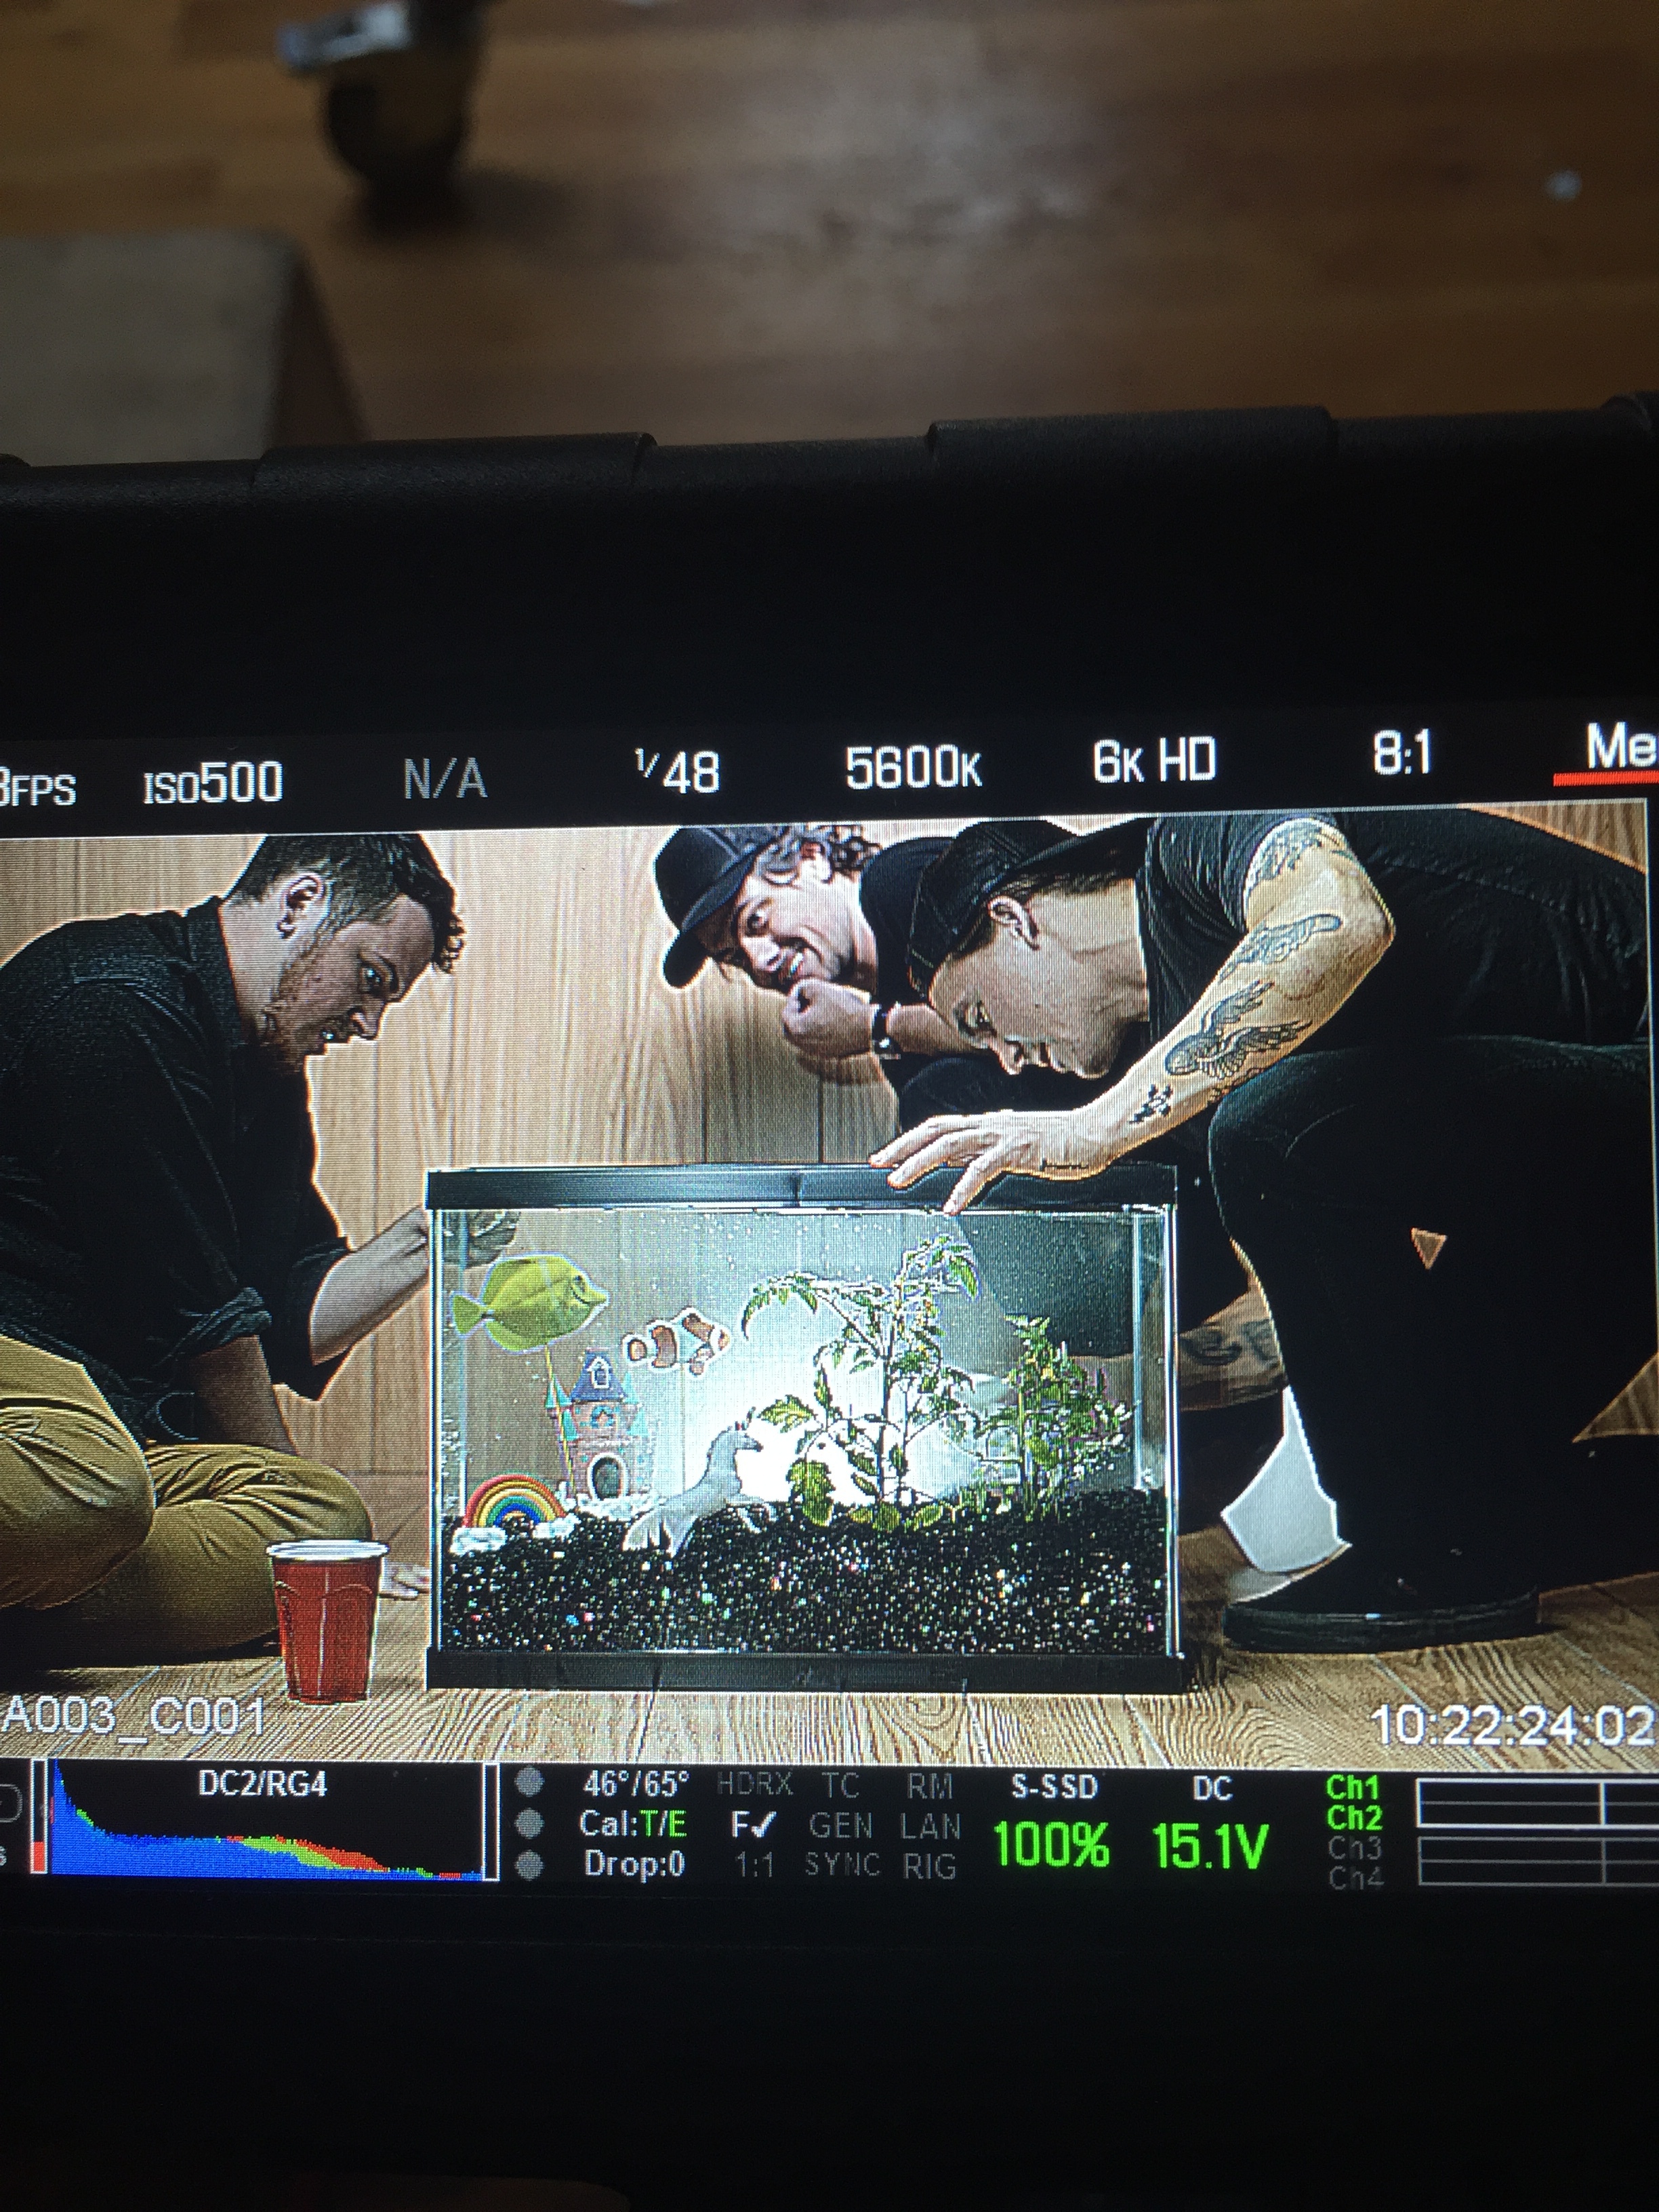
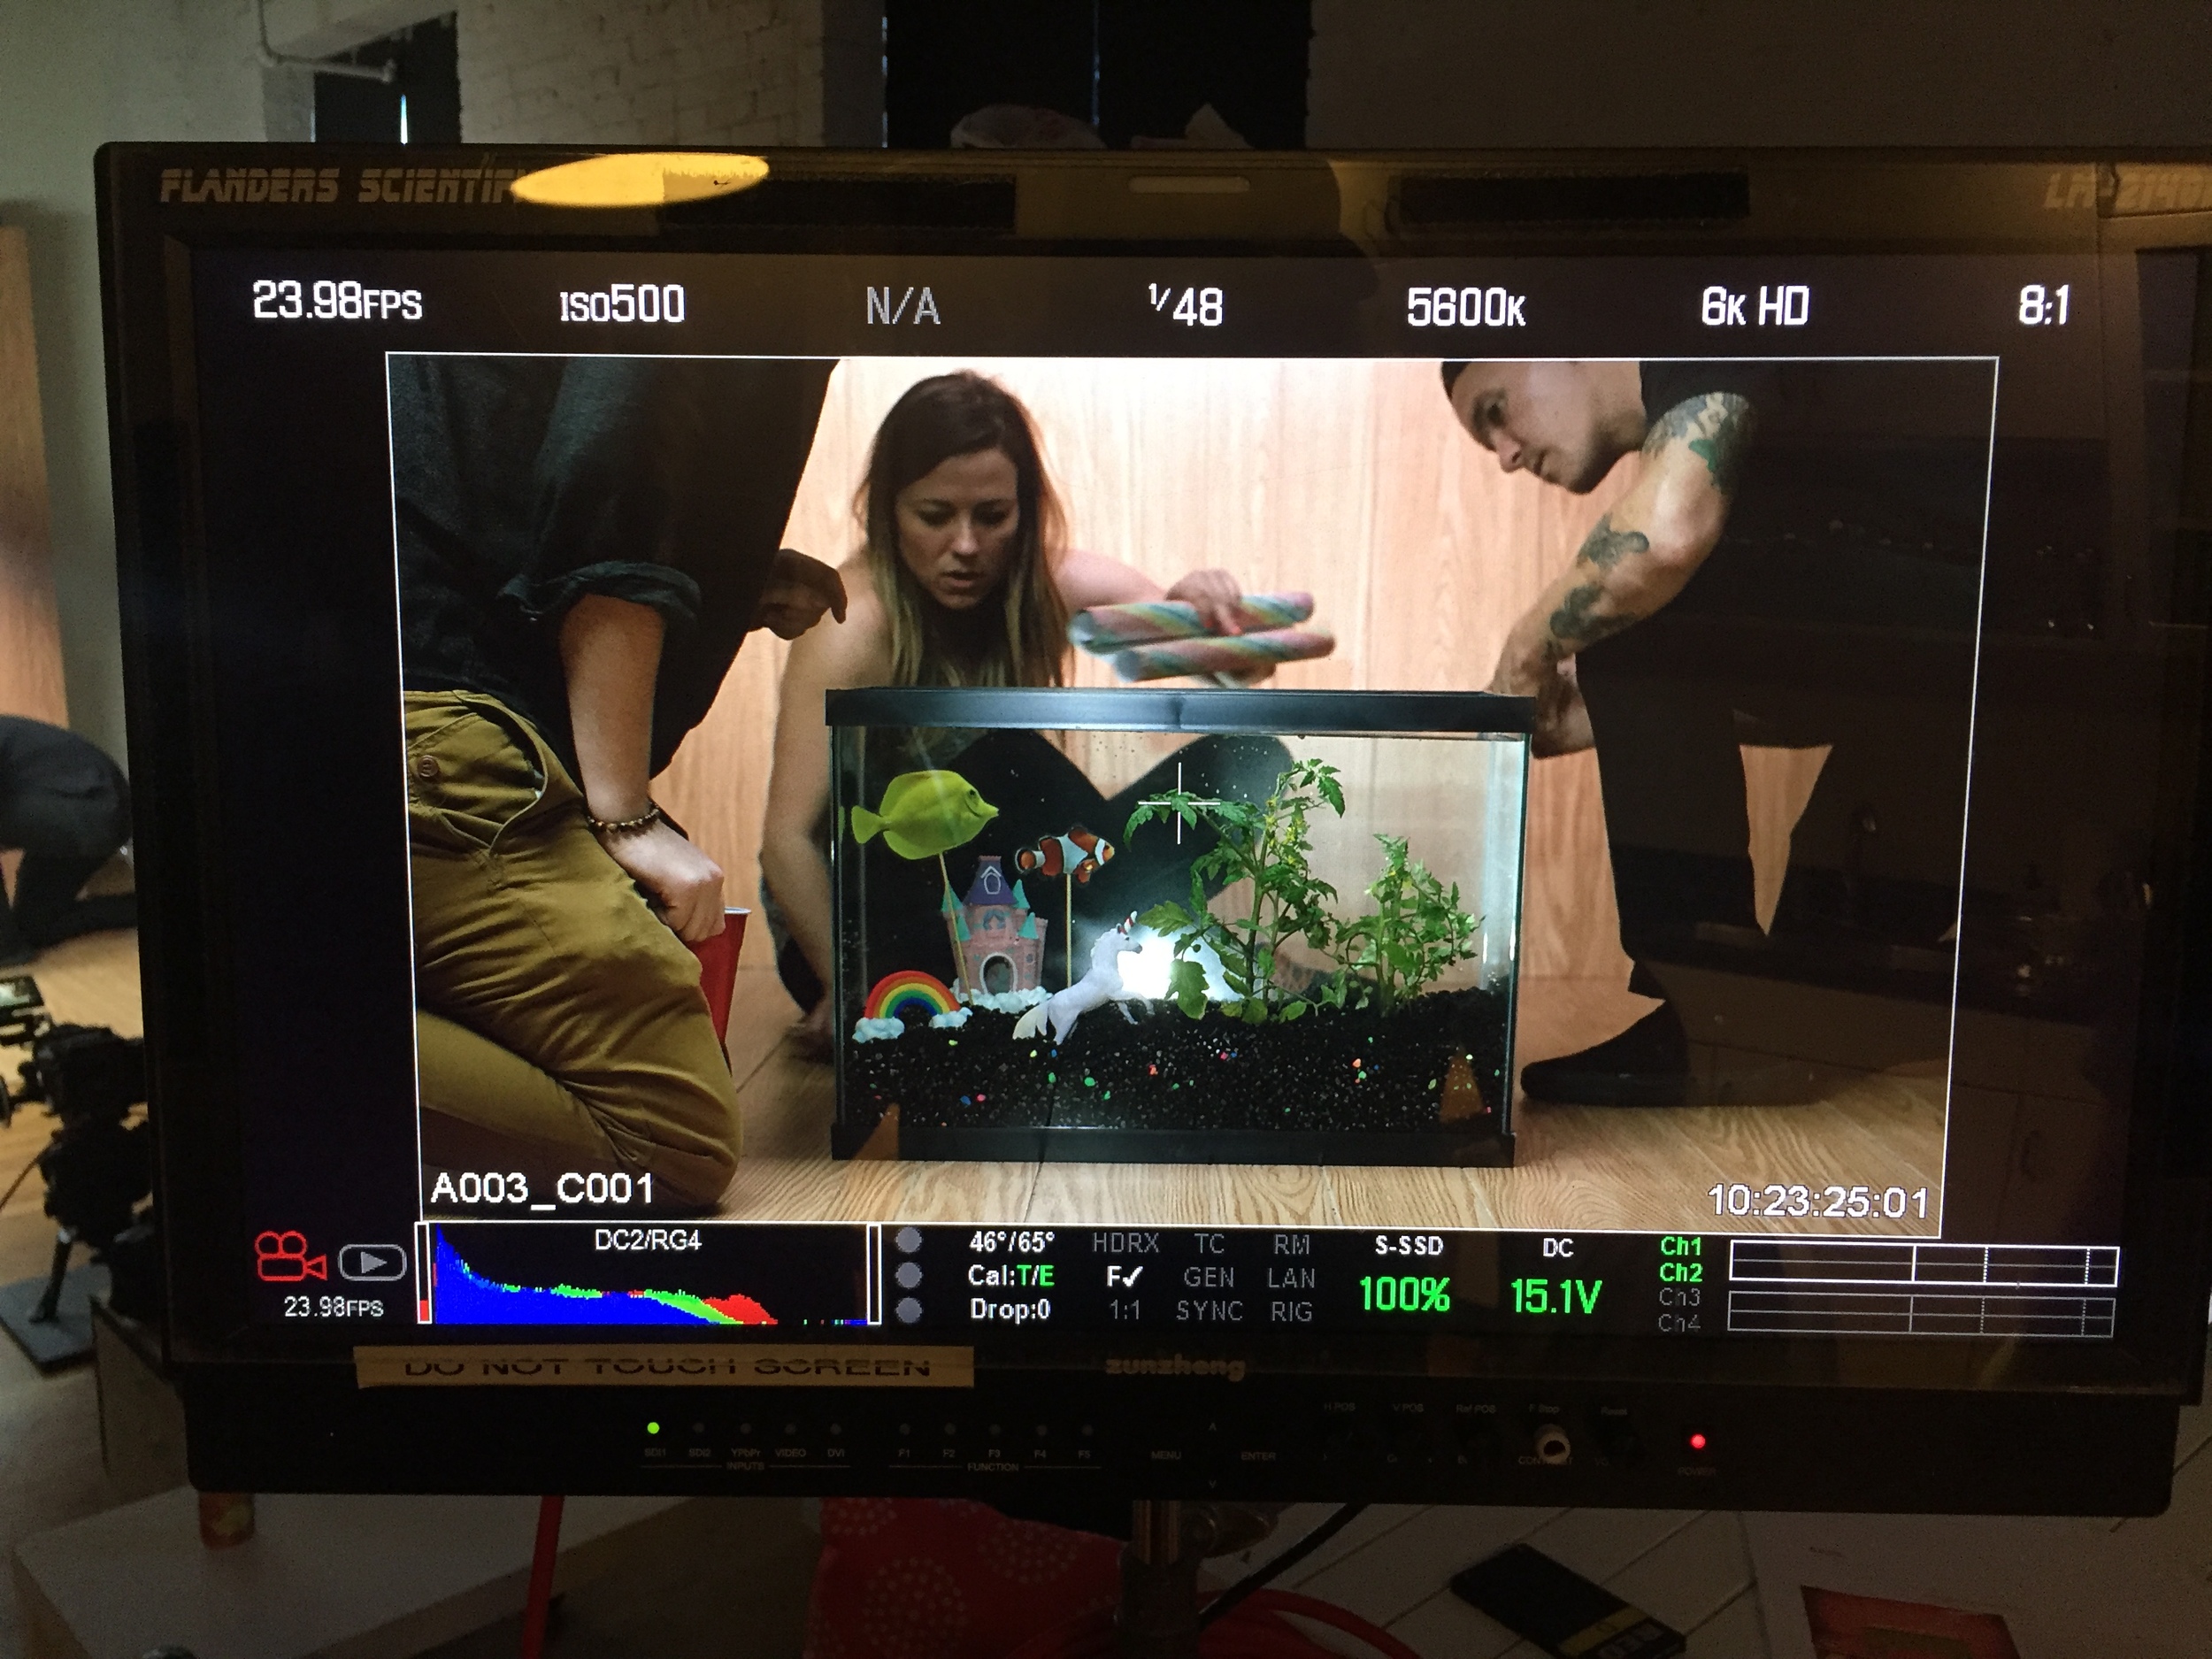
its not everyday you see 3 guys on set huddled around an aquarium with tomato plants and a unicorn inside. this napoleon dynamite-esque vibe was just another day at work with a super funnnn crew resulting in a few laughs.
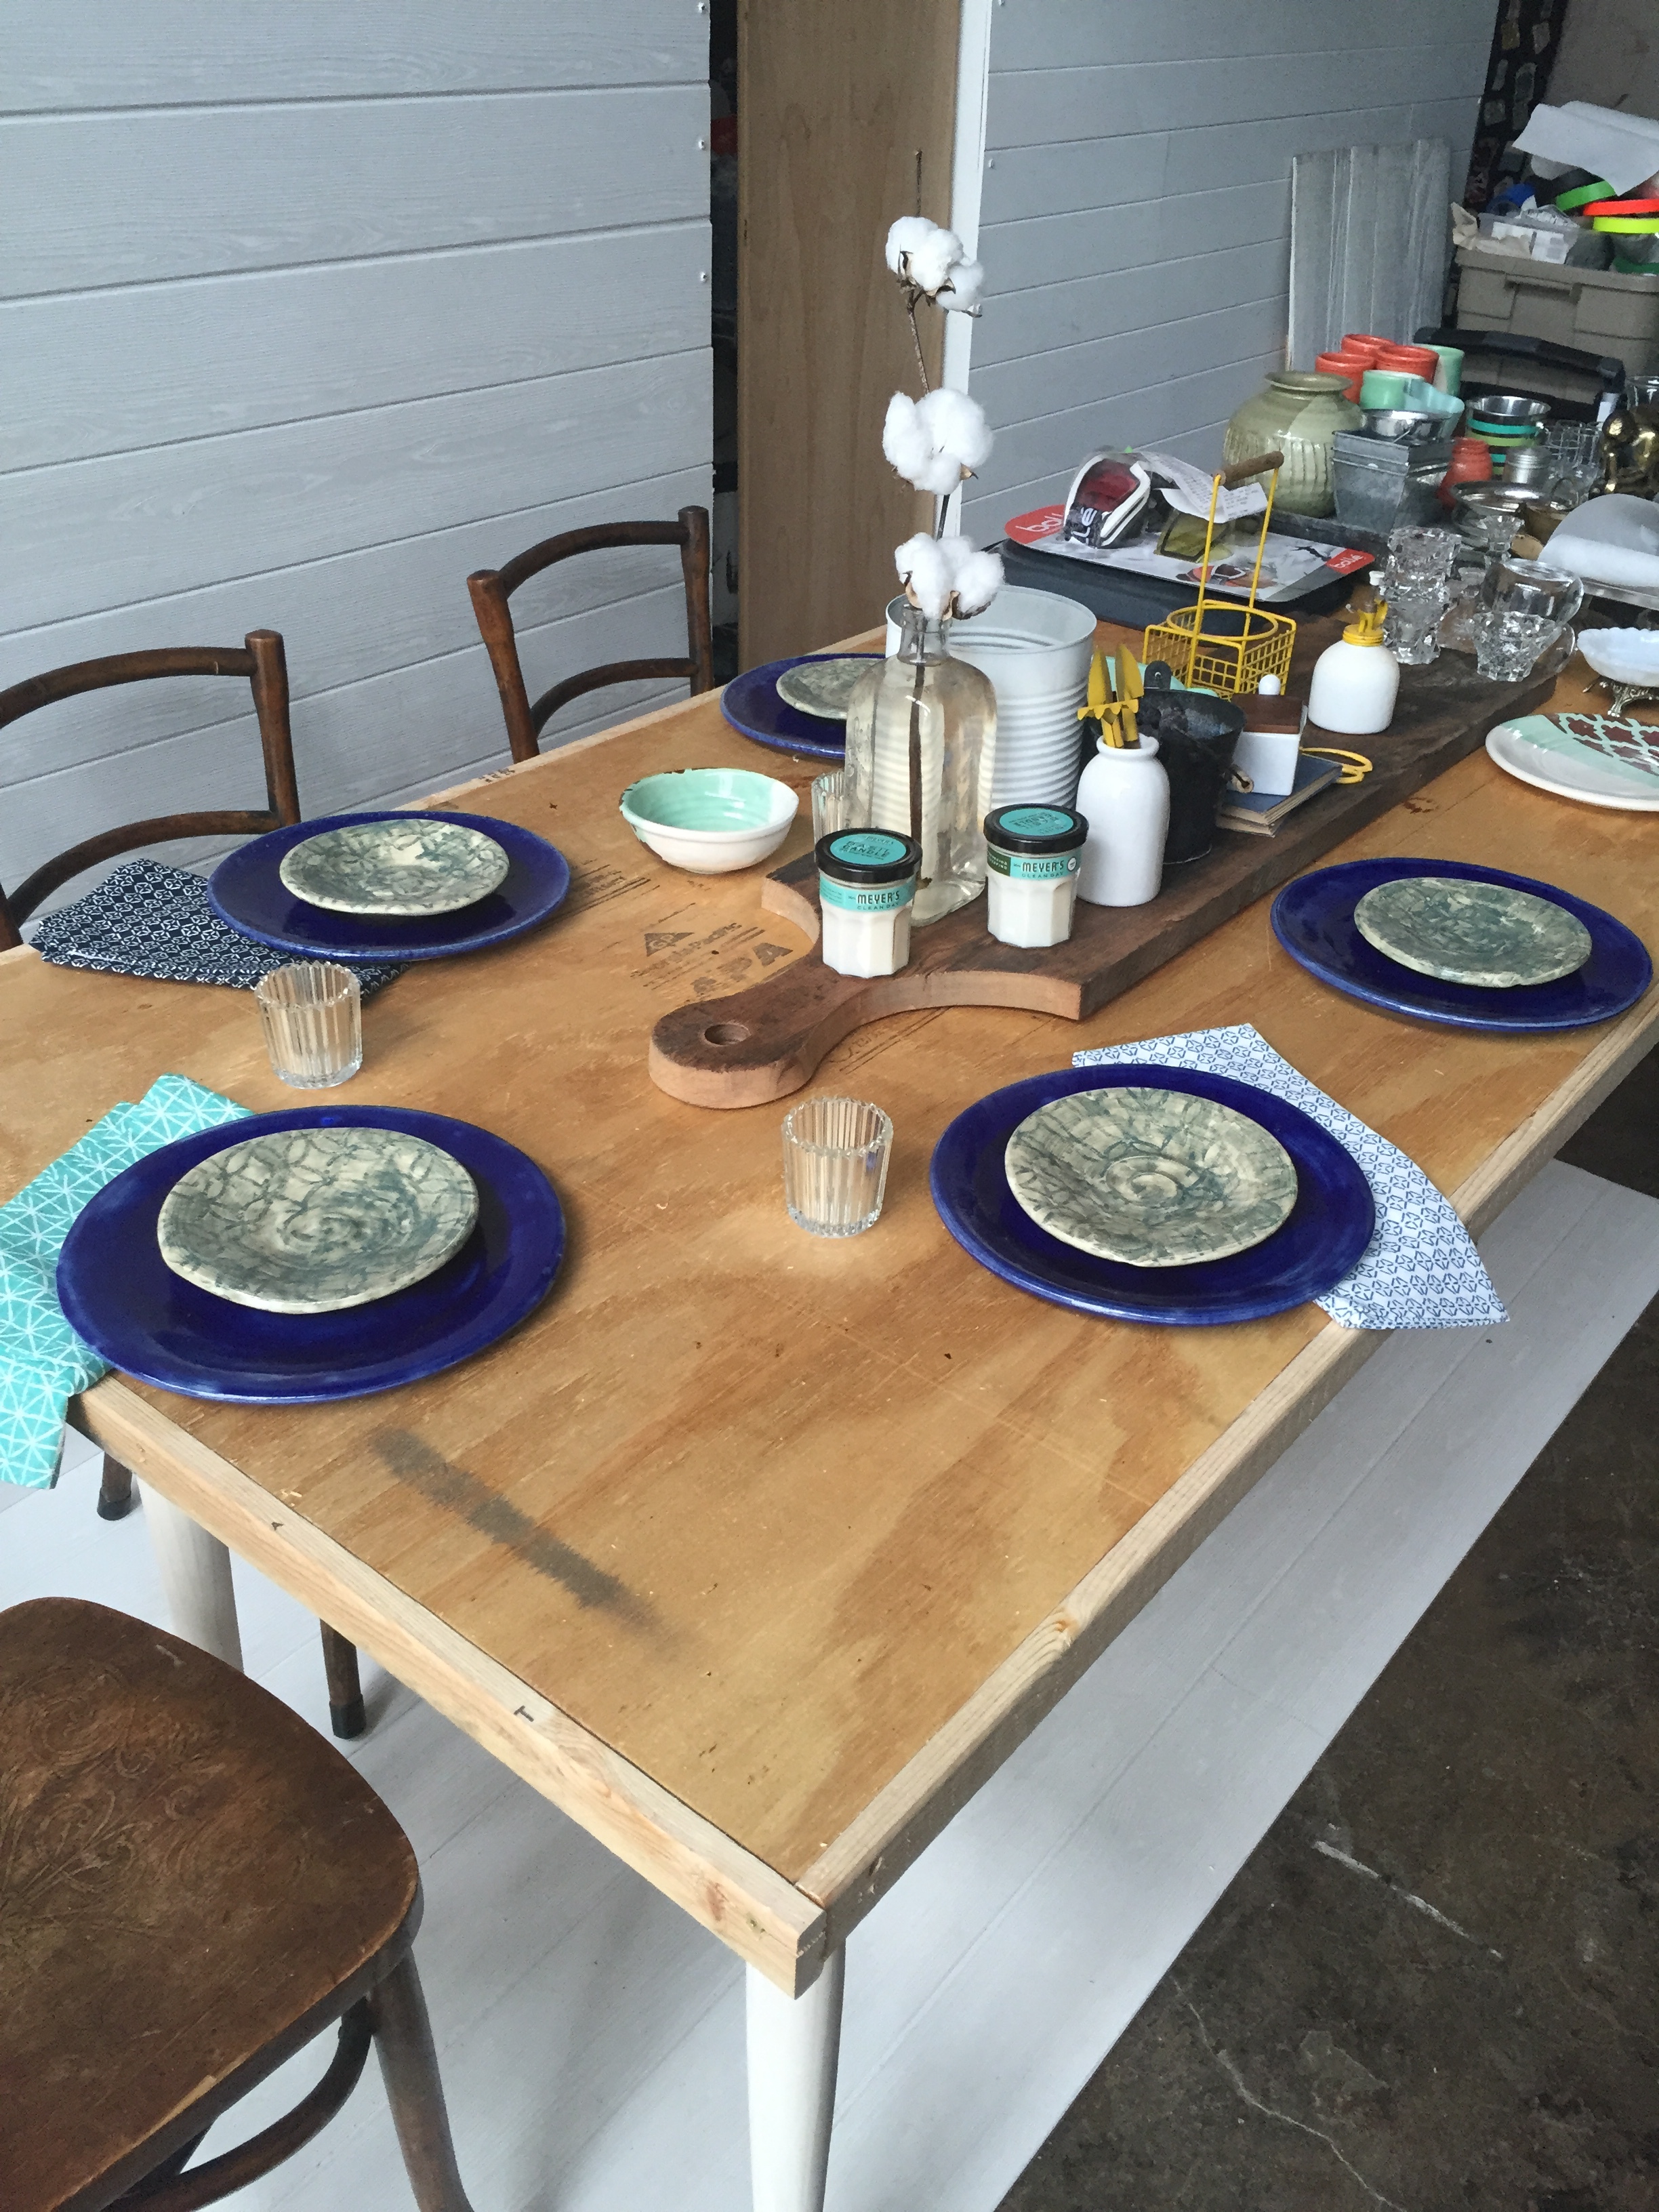
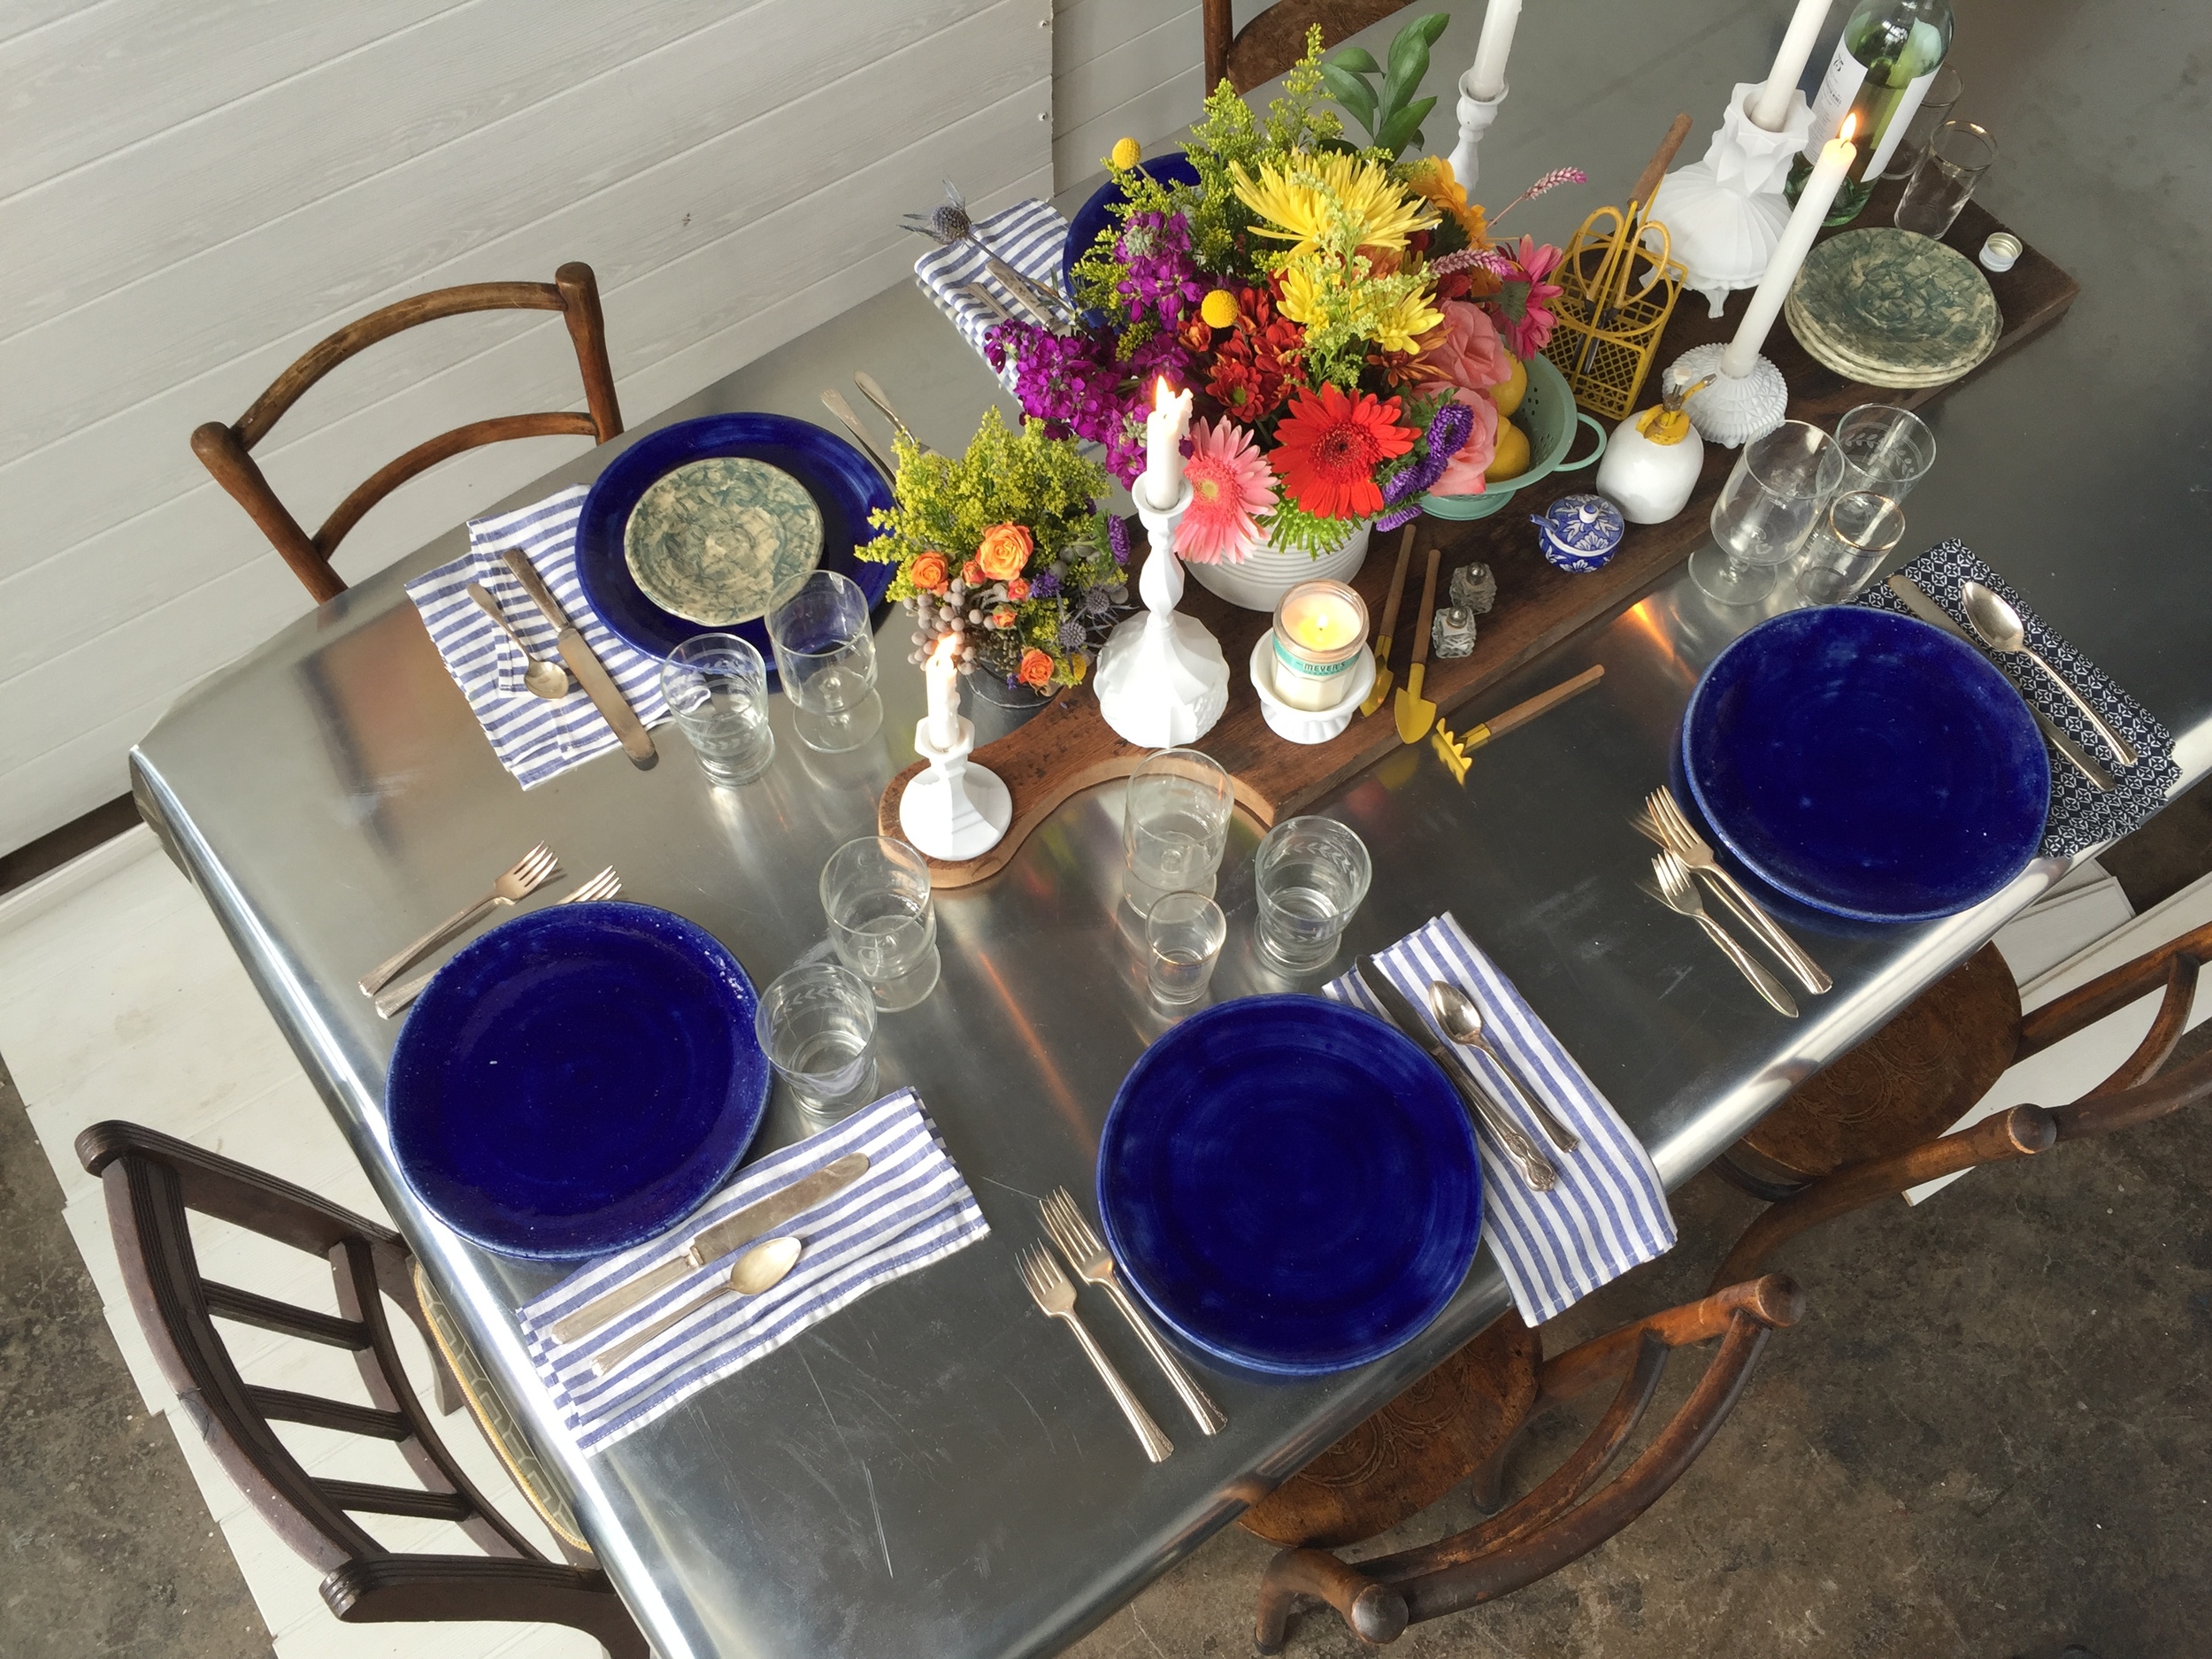
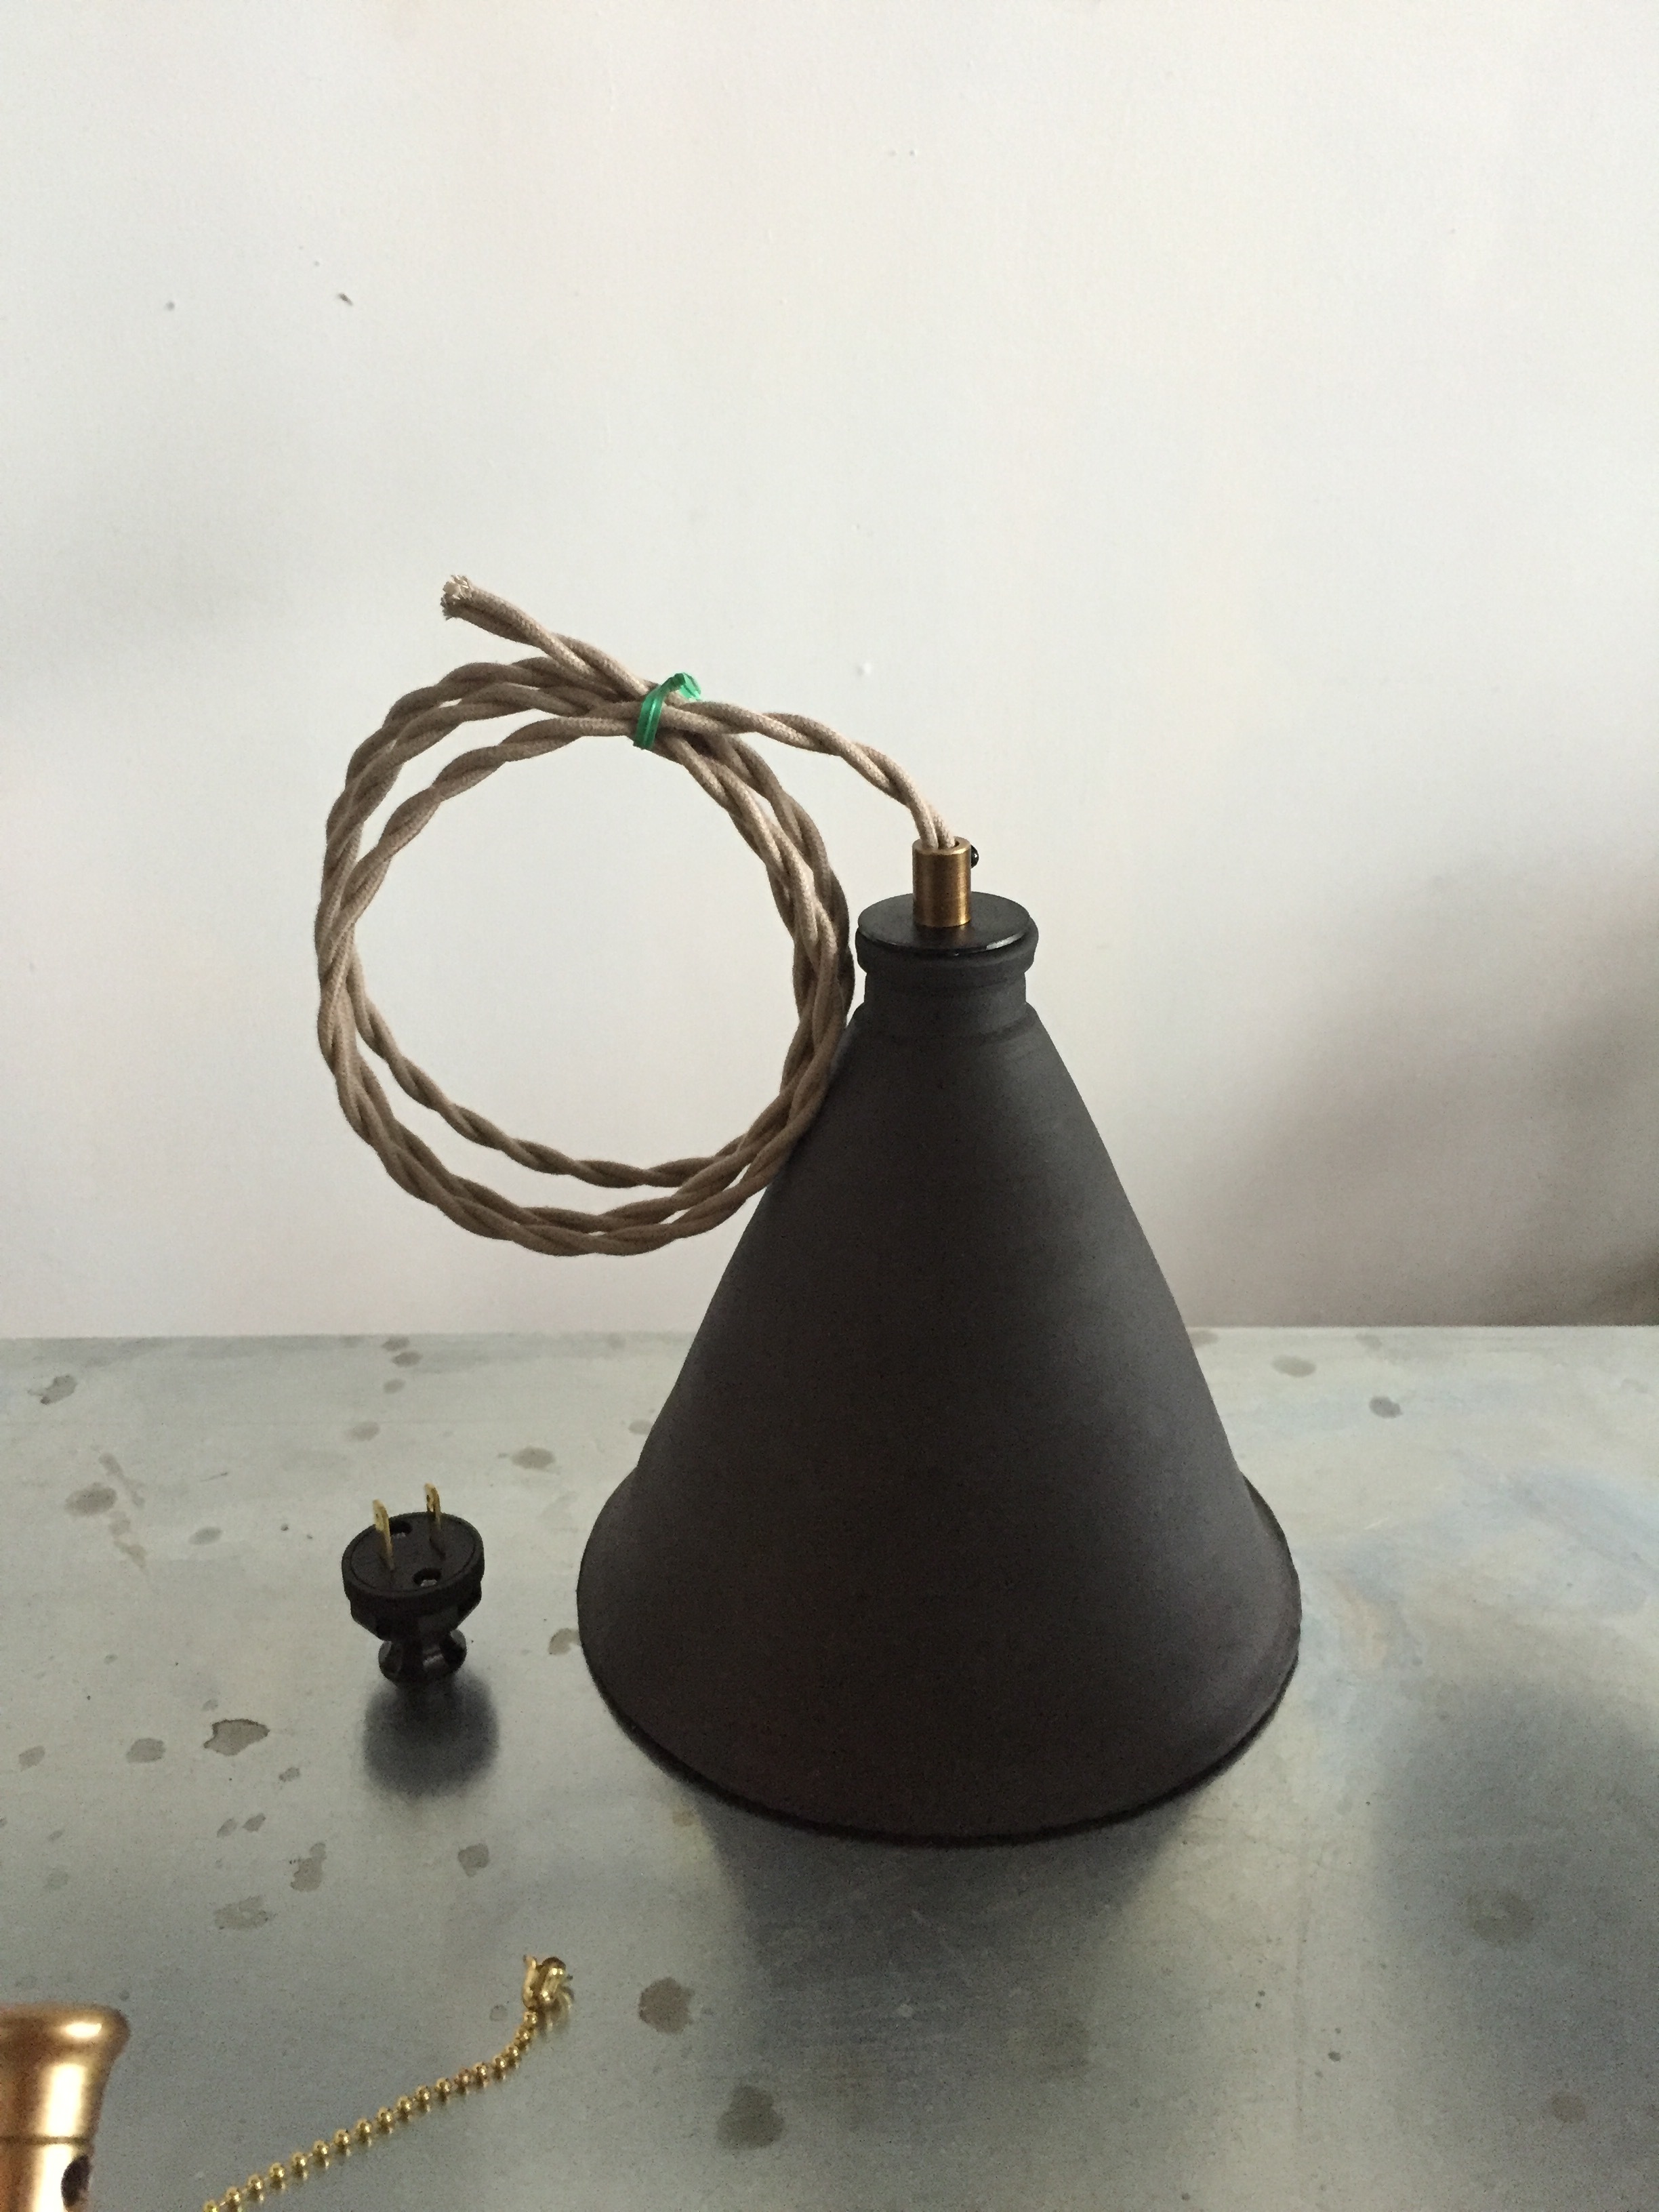
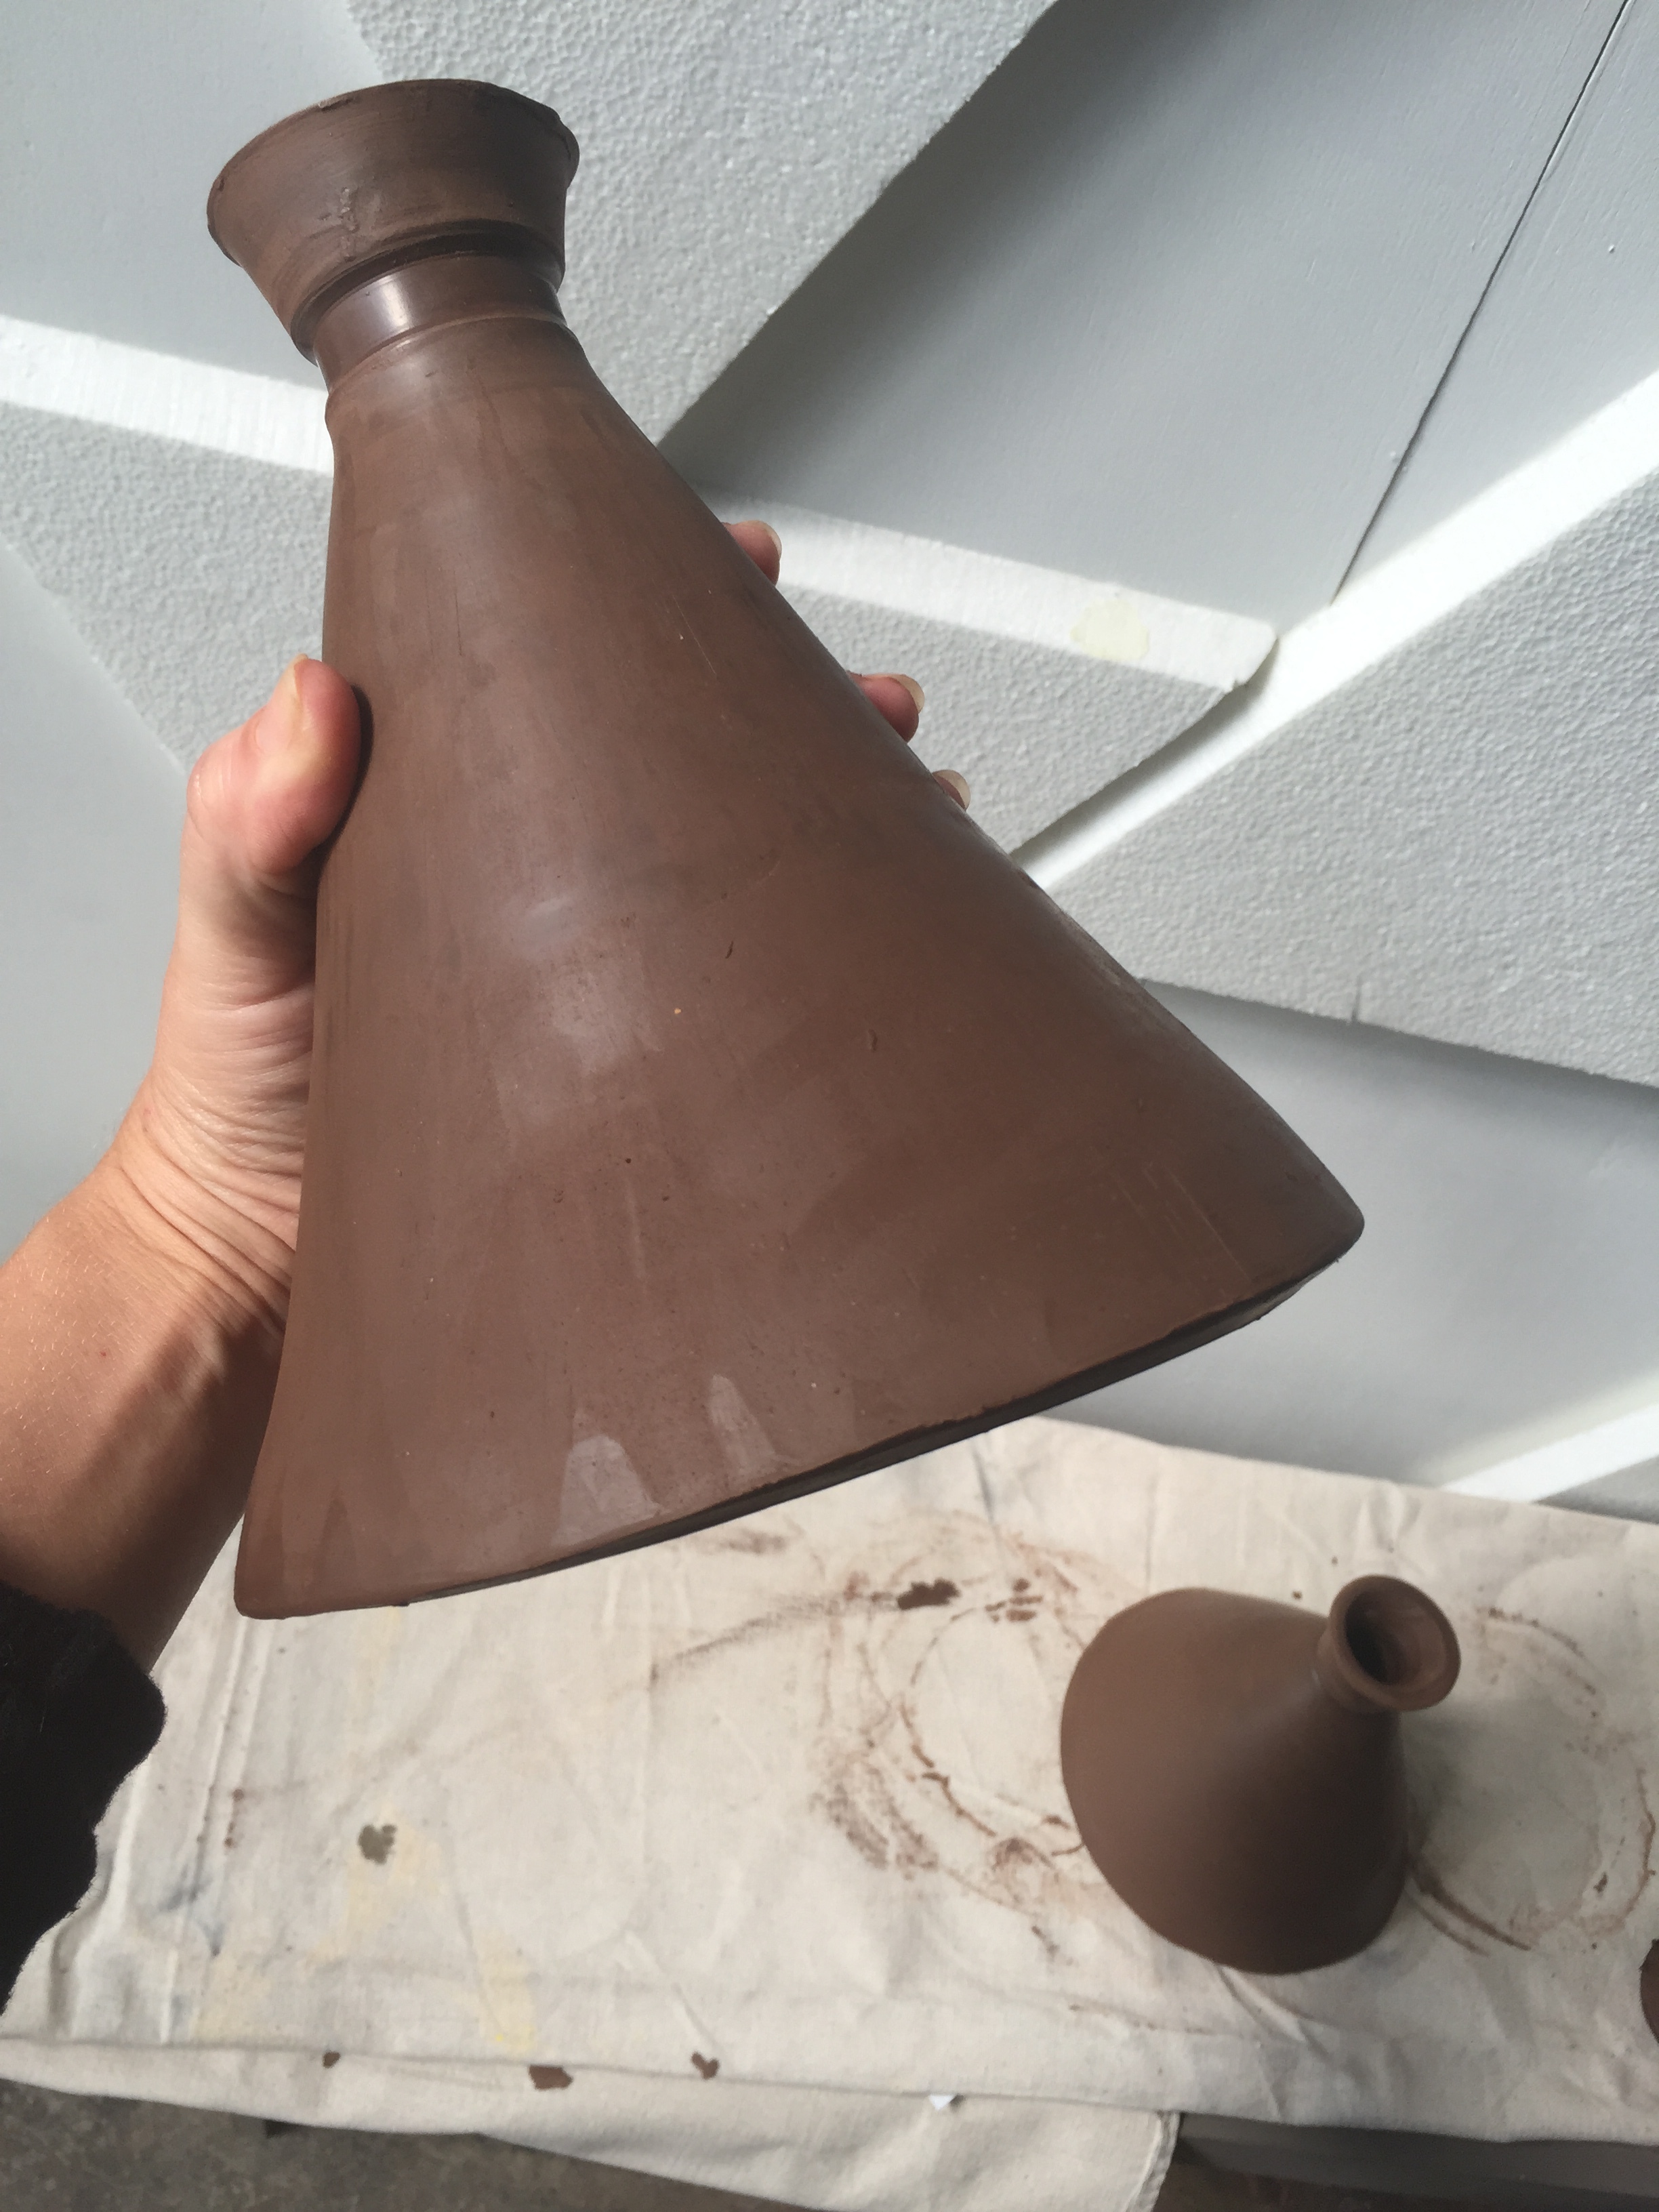
DIY pendant lamp for under $25 bucks?! here's how...
Read Morei shopped for an 3 x 8ft-ish table for a few months, but due to over-priced finds and not exactly the dimensions i desired, i came up with a solution that fit in my budget and was a DIY opportunity.

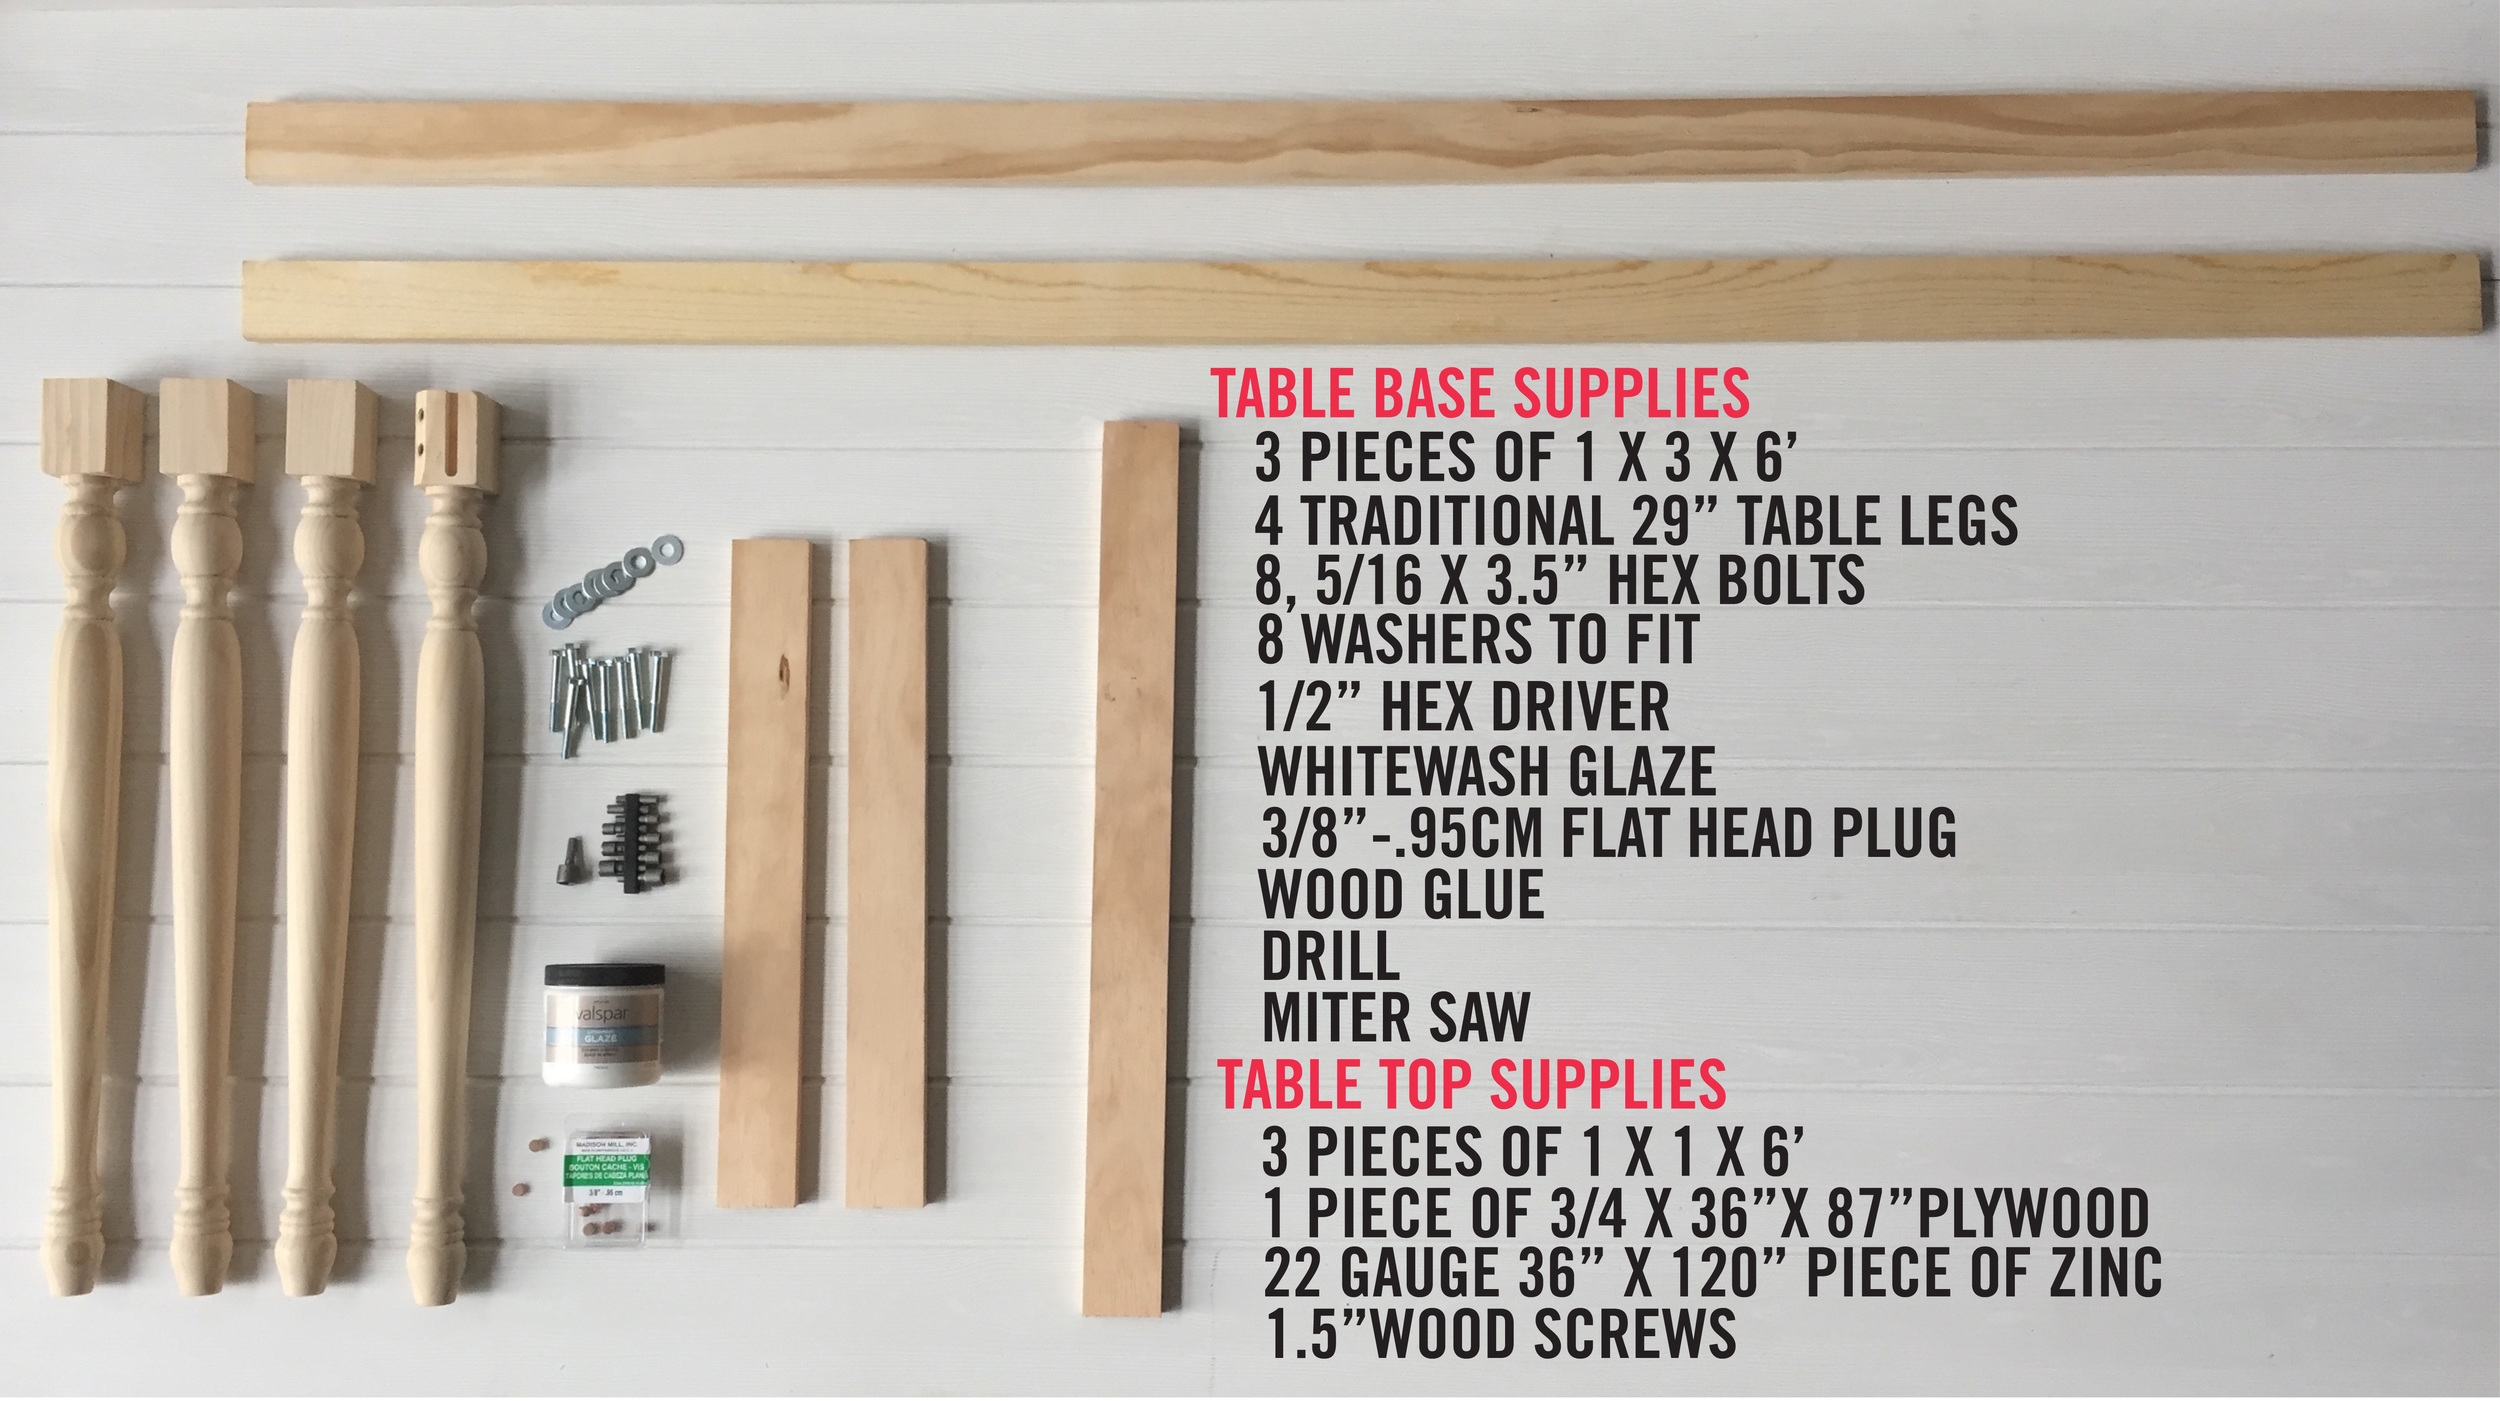
after making your purchases from the supplies// shop list pictured below, (i purchased everything at Lowe's with the exception of the zinc top, which i had shipped from Rotometals.com) you are ready to start making your cuts.
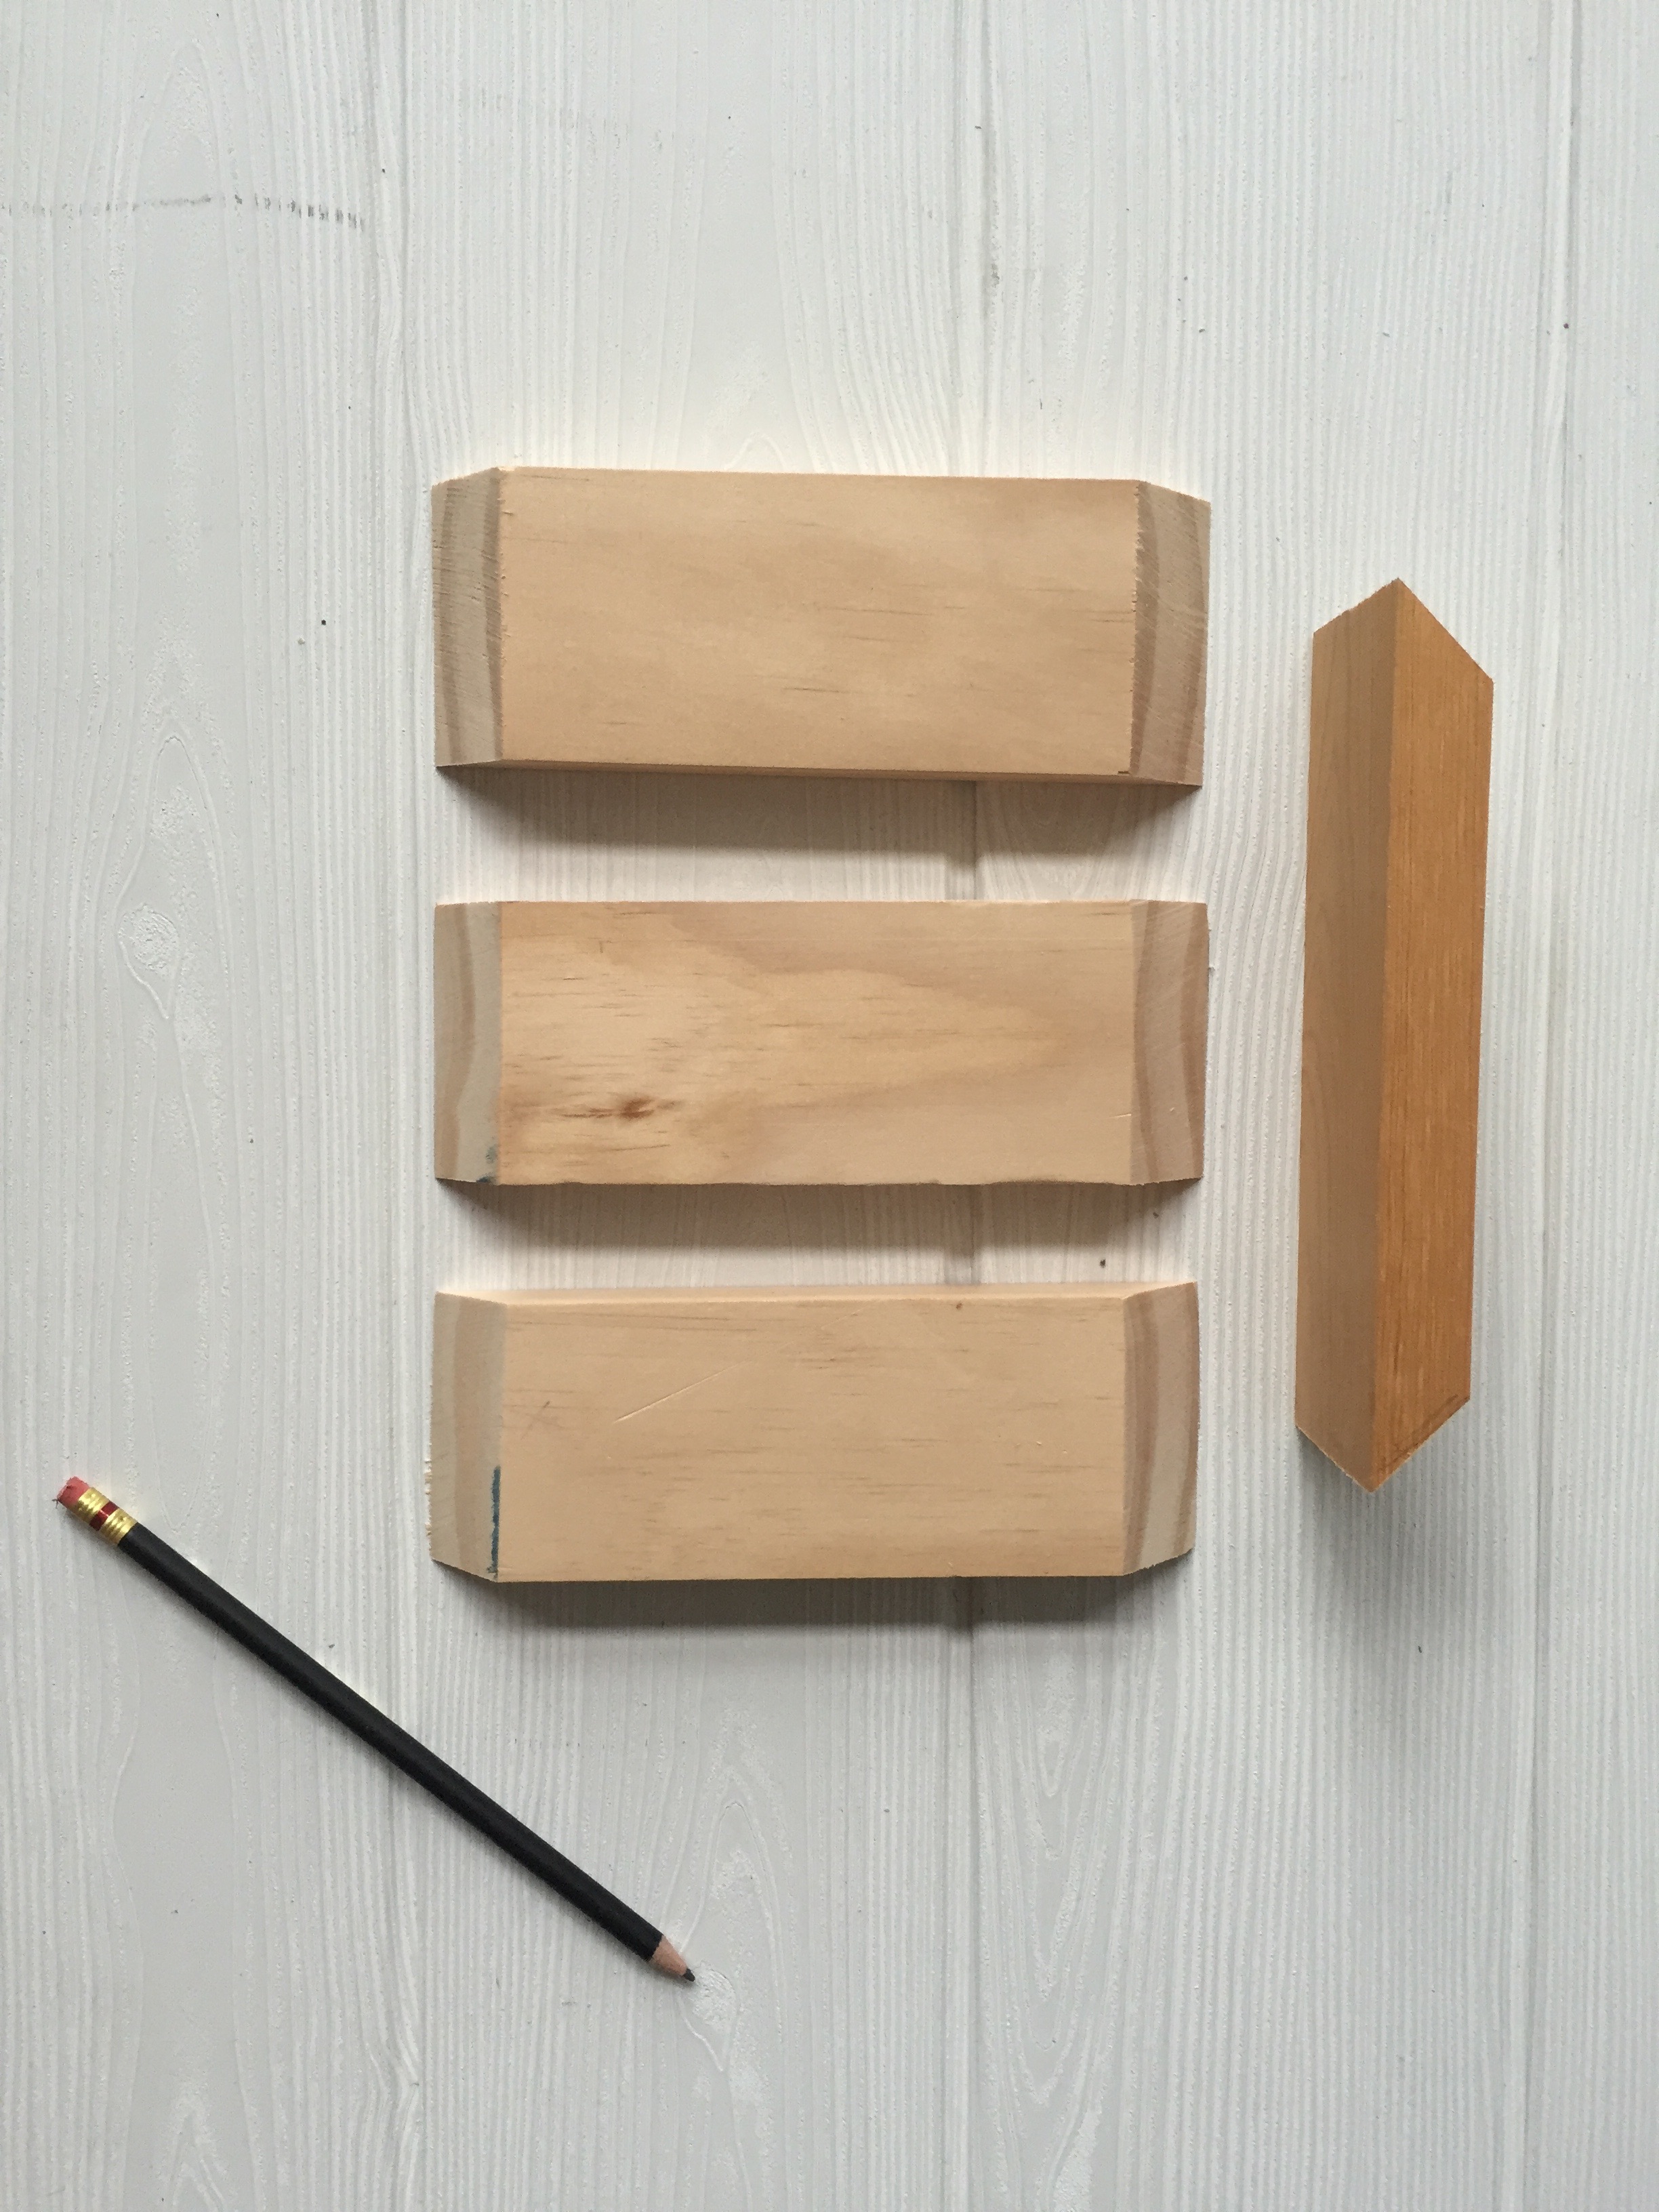
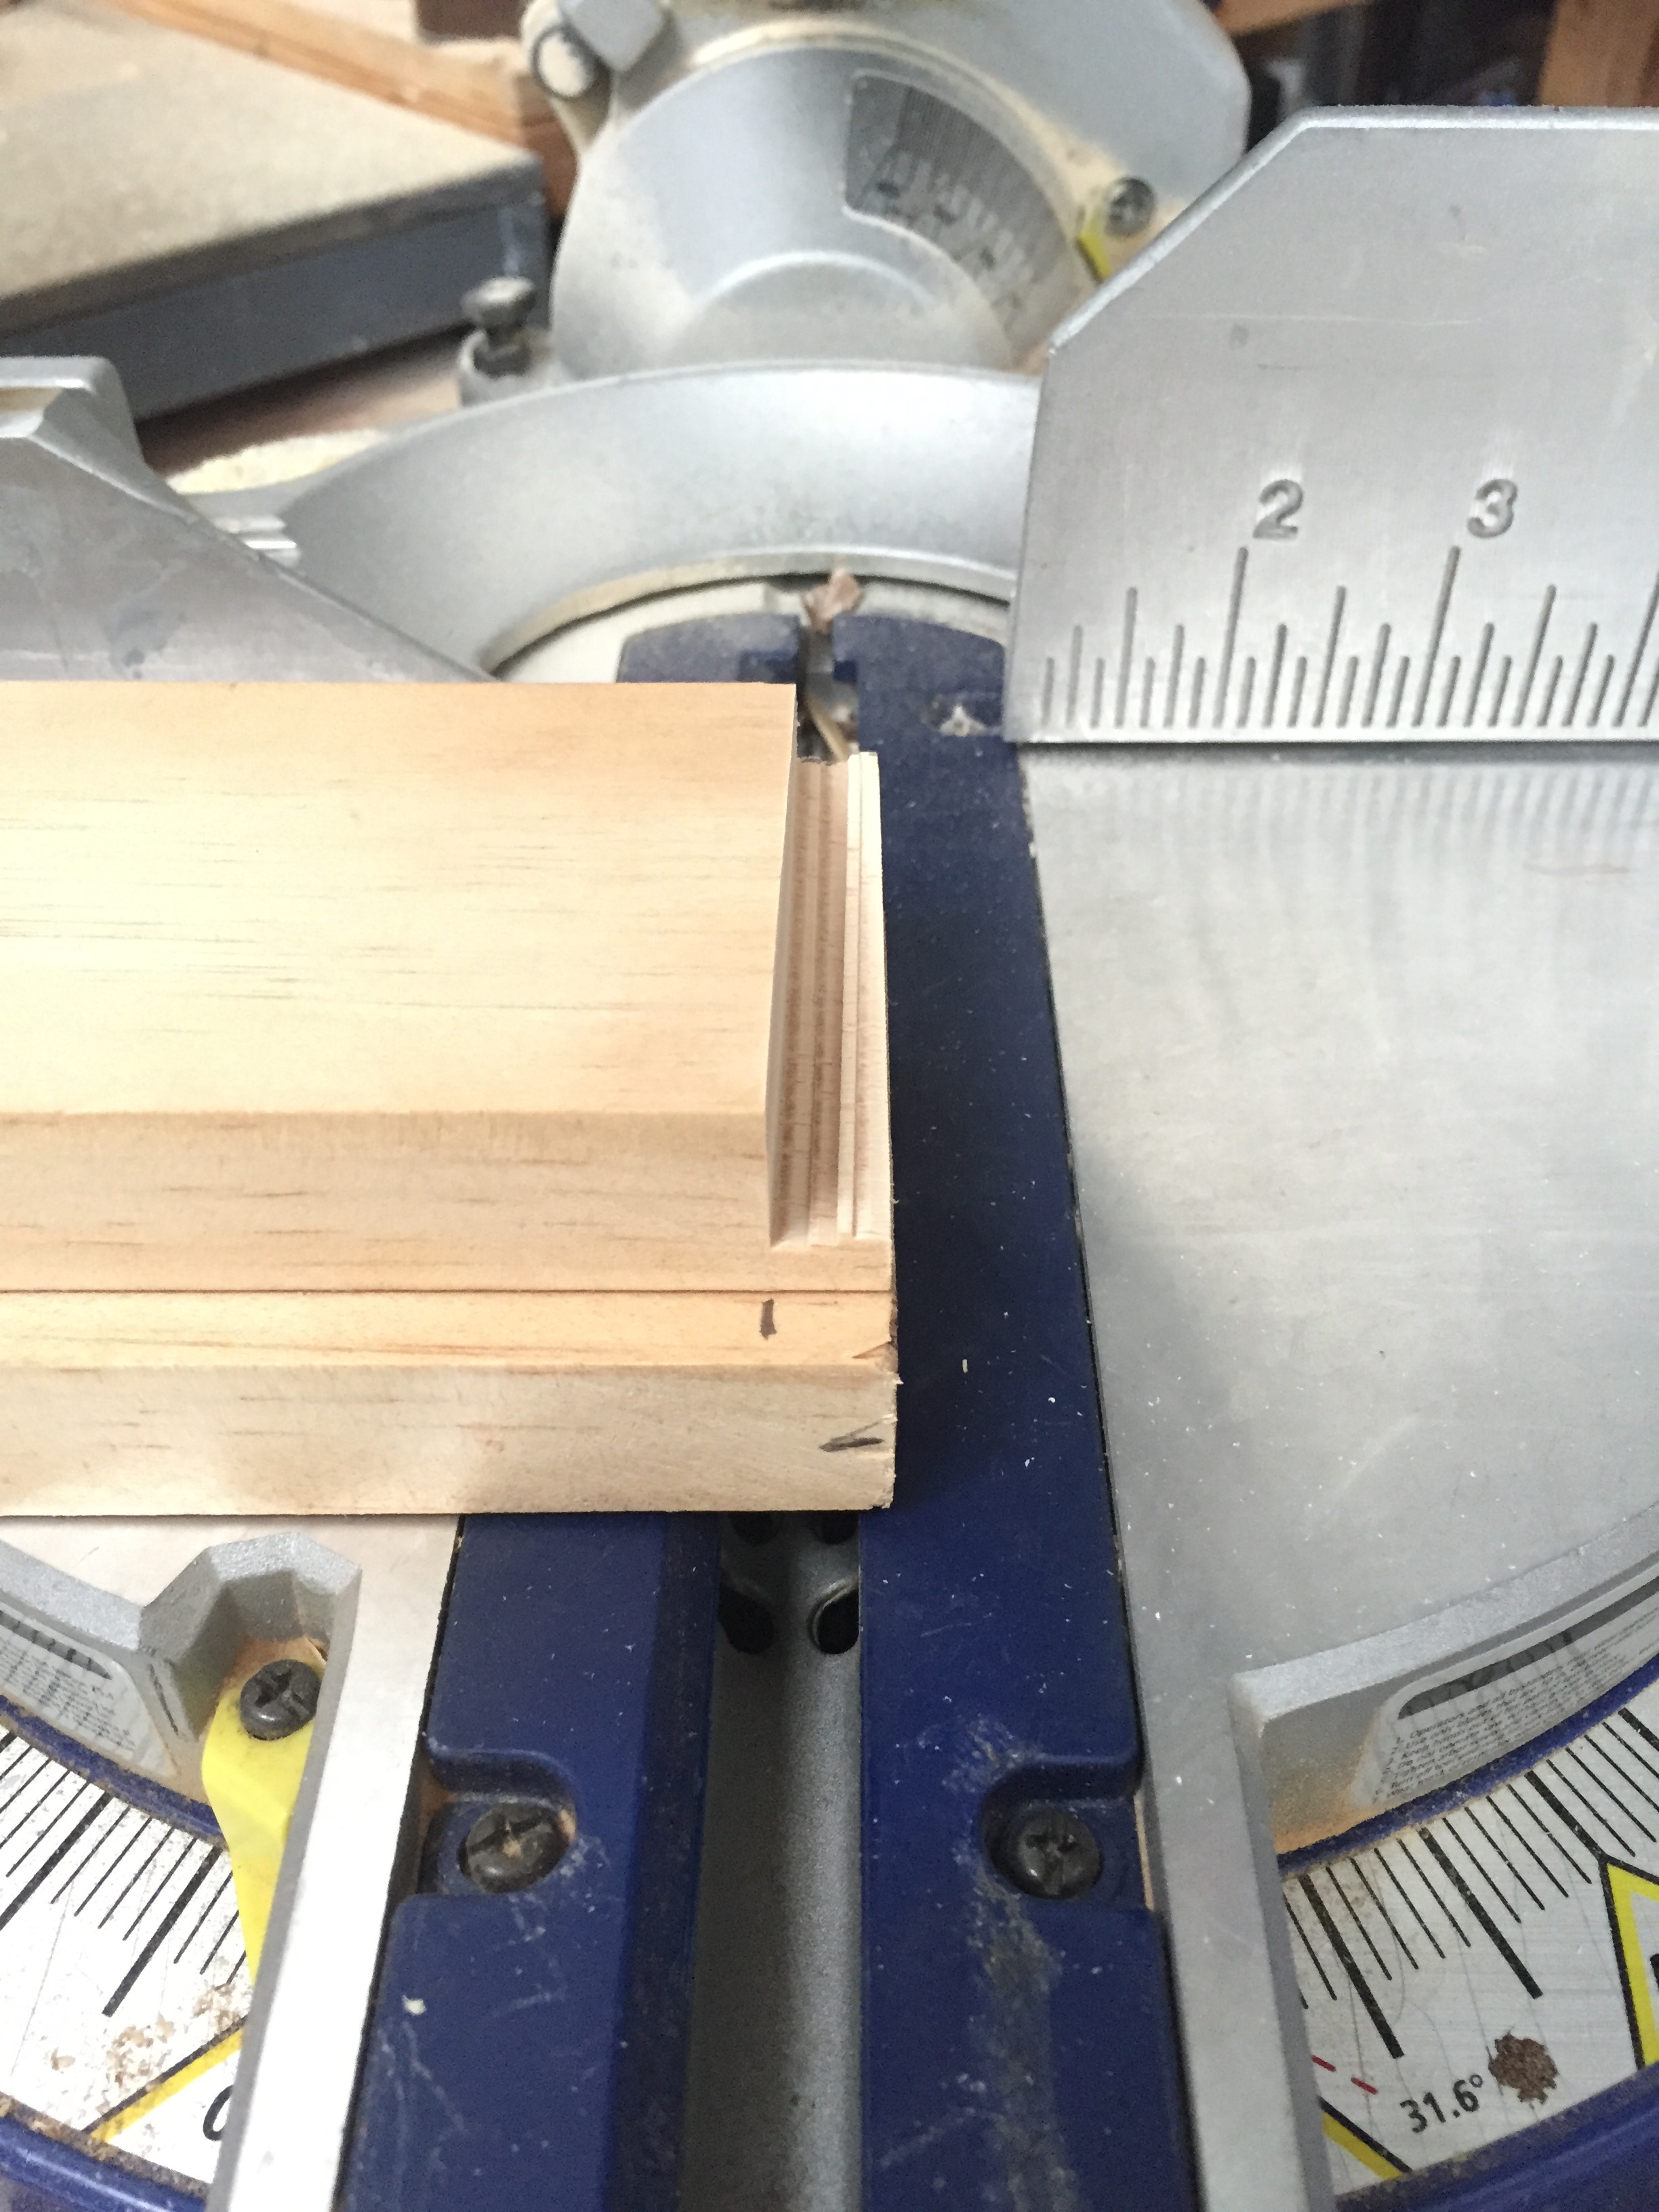
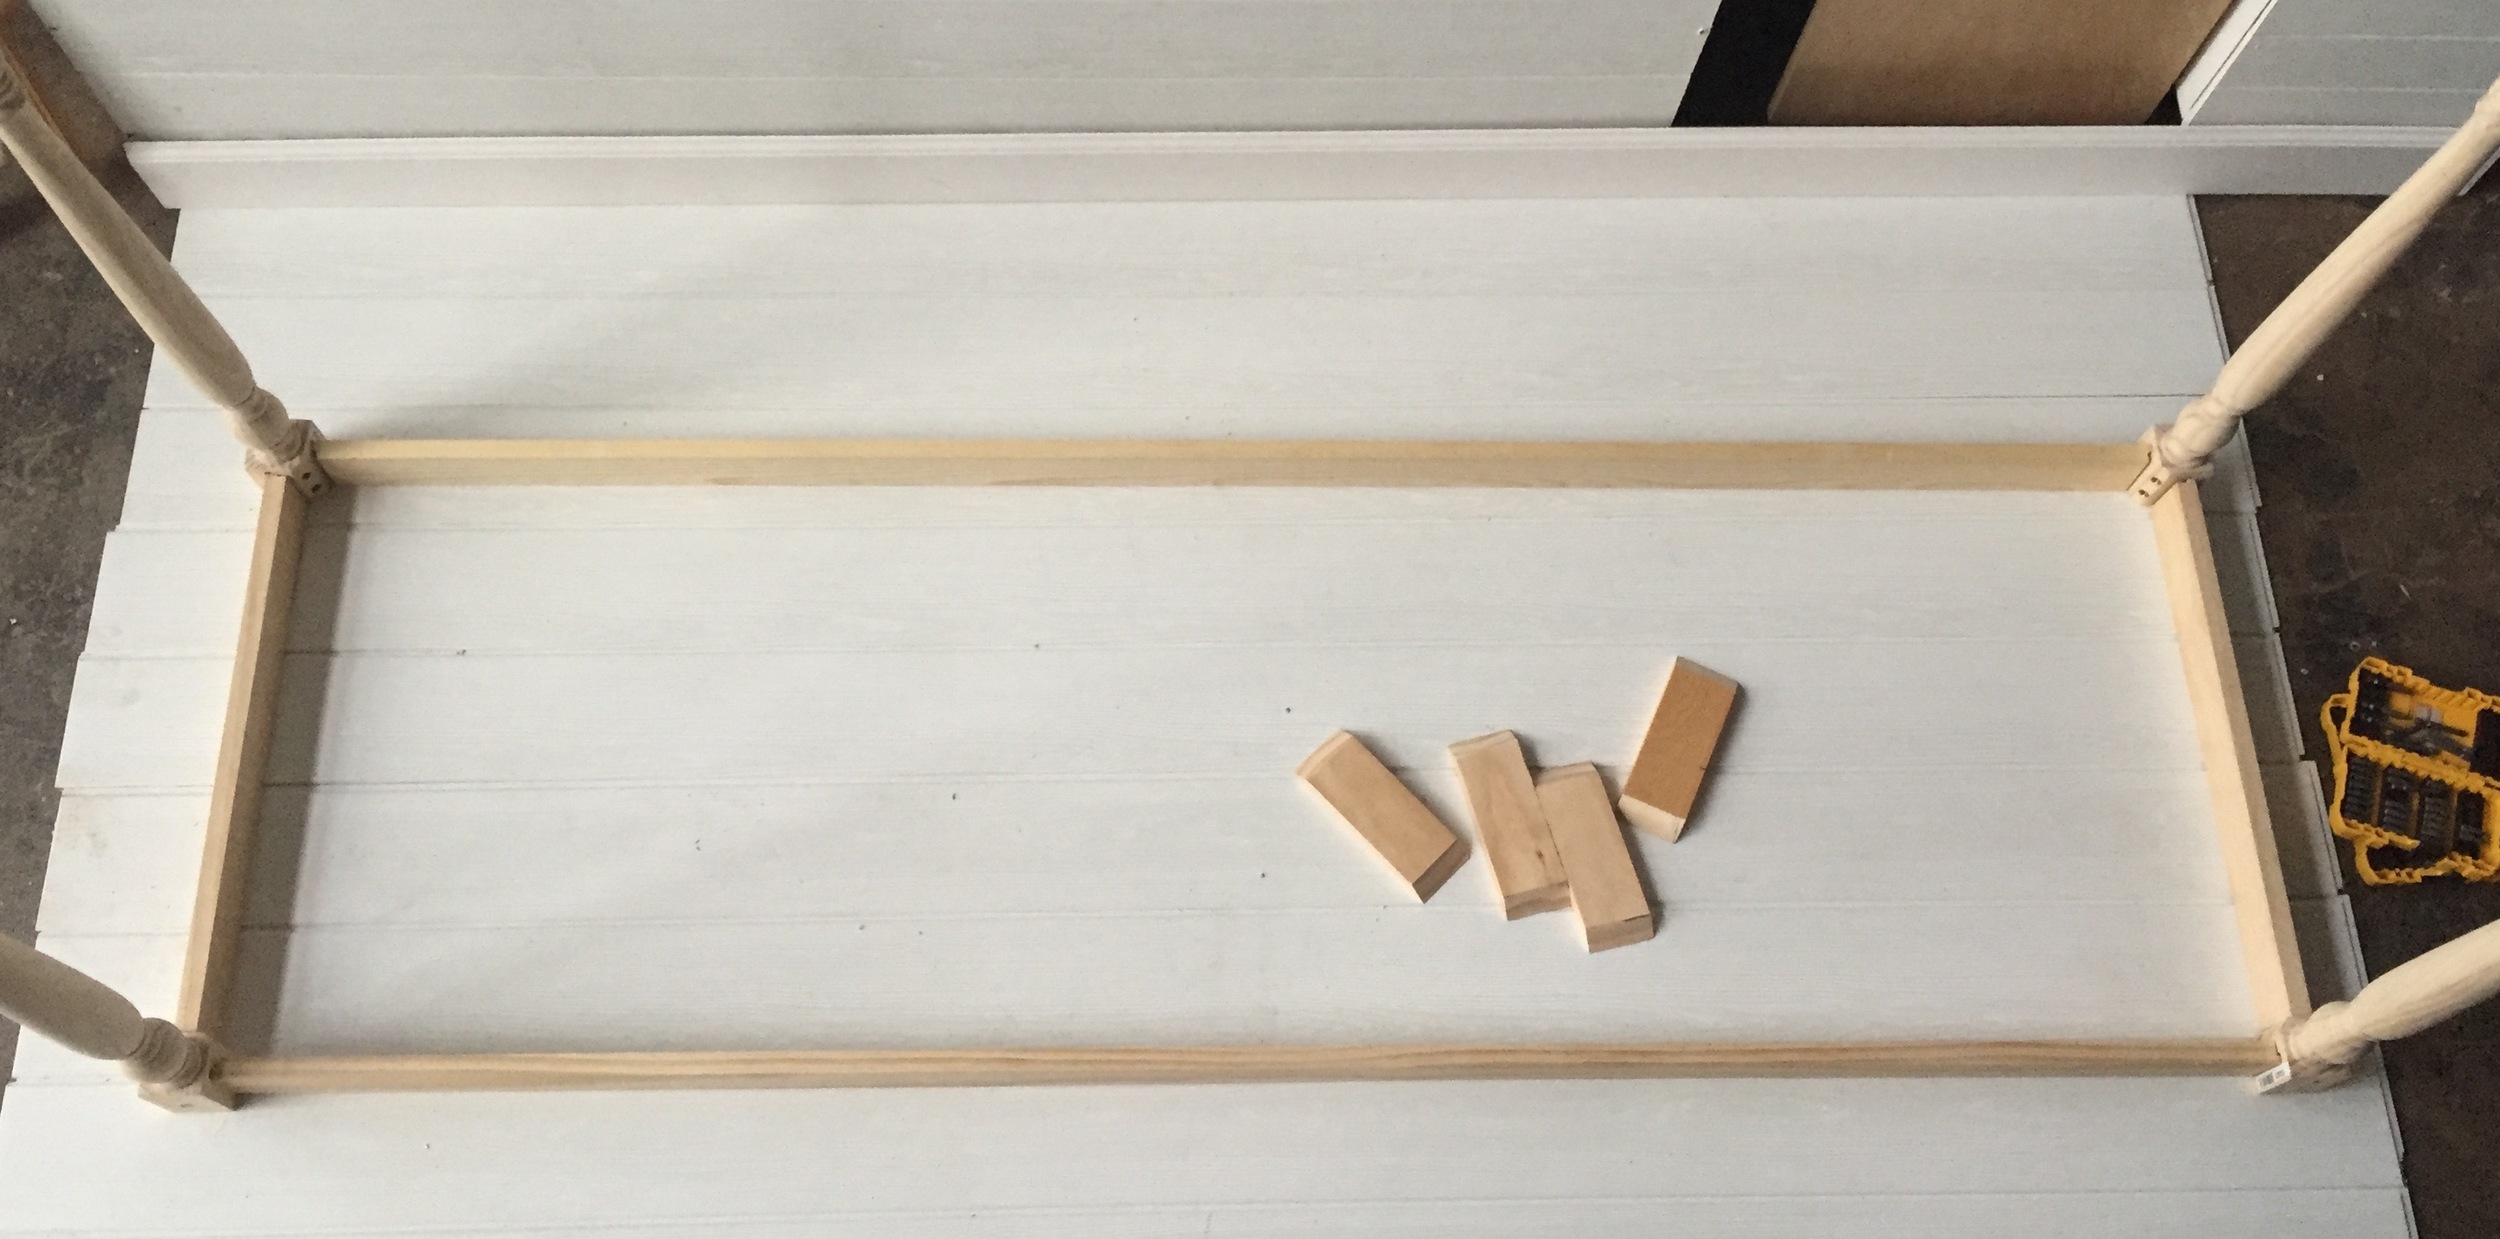
FIRST : measure and cut one of the pieces of 1 x 3 x 6' board into two 22" pieces and the remaining 28" of board, miter into 4 equally sized corner pieces. (approx 7" each)
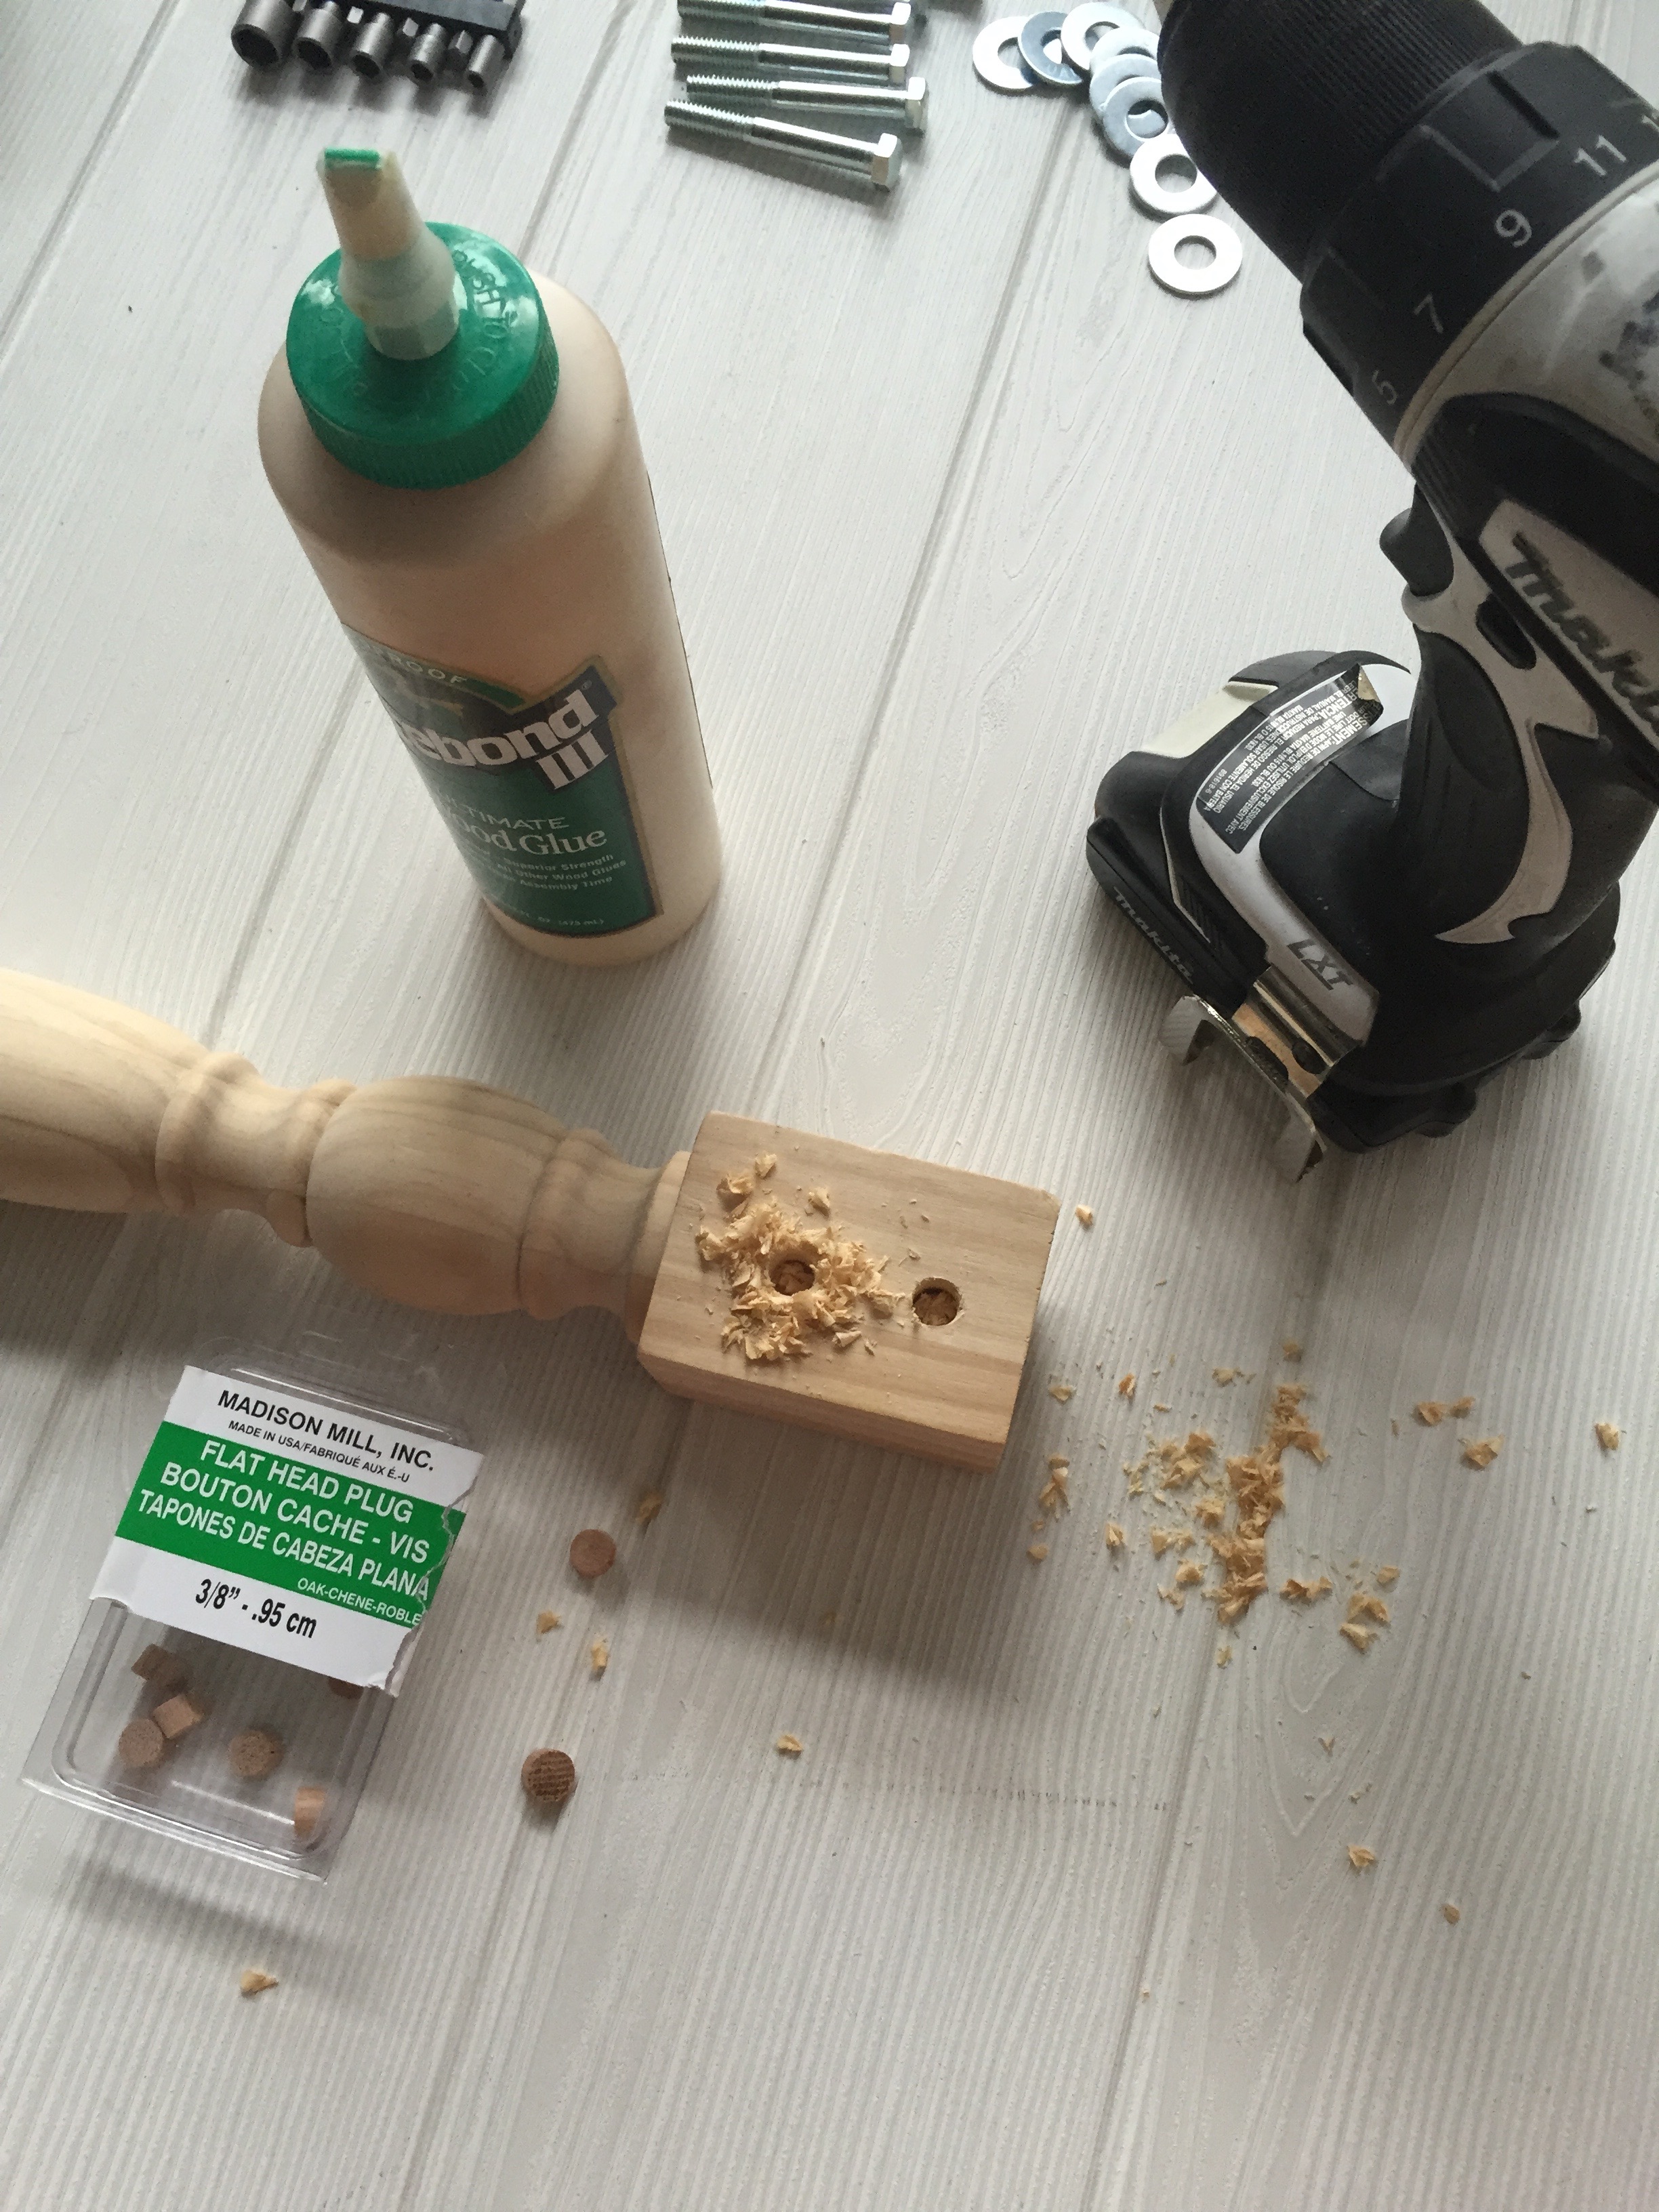
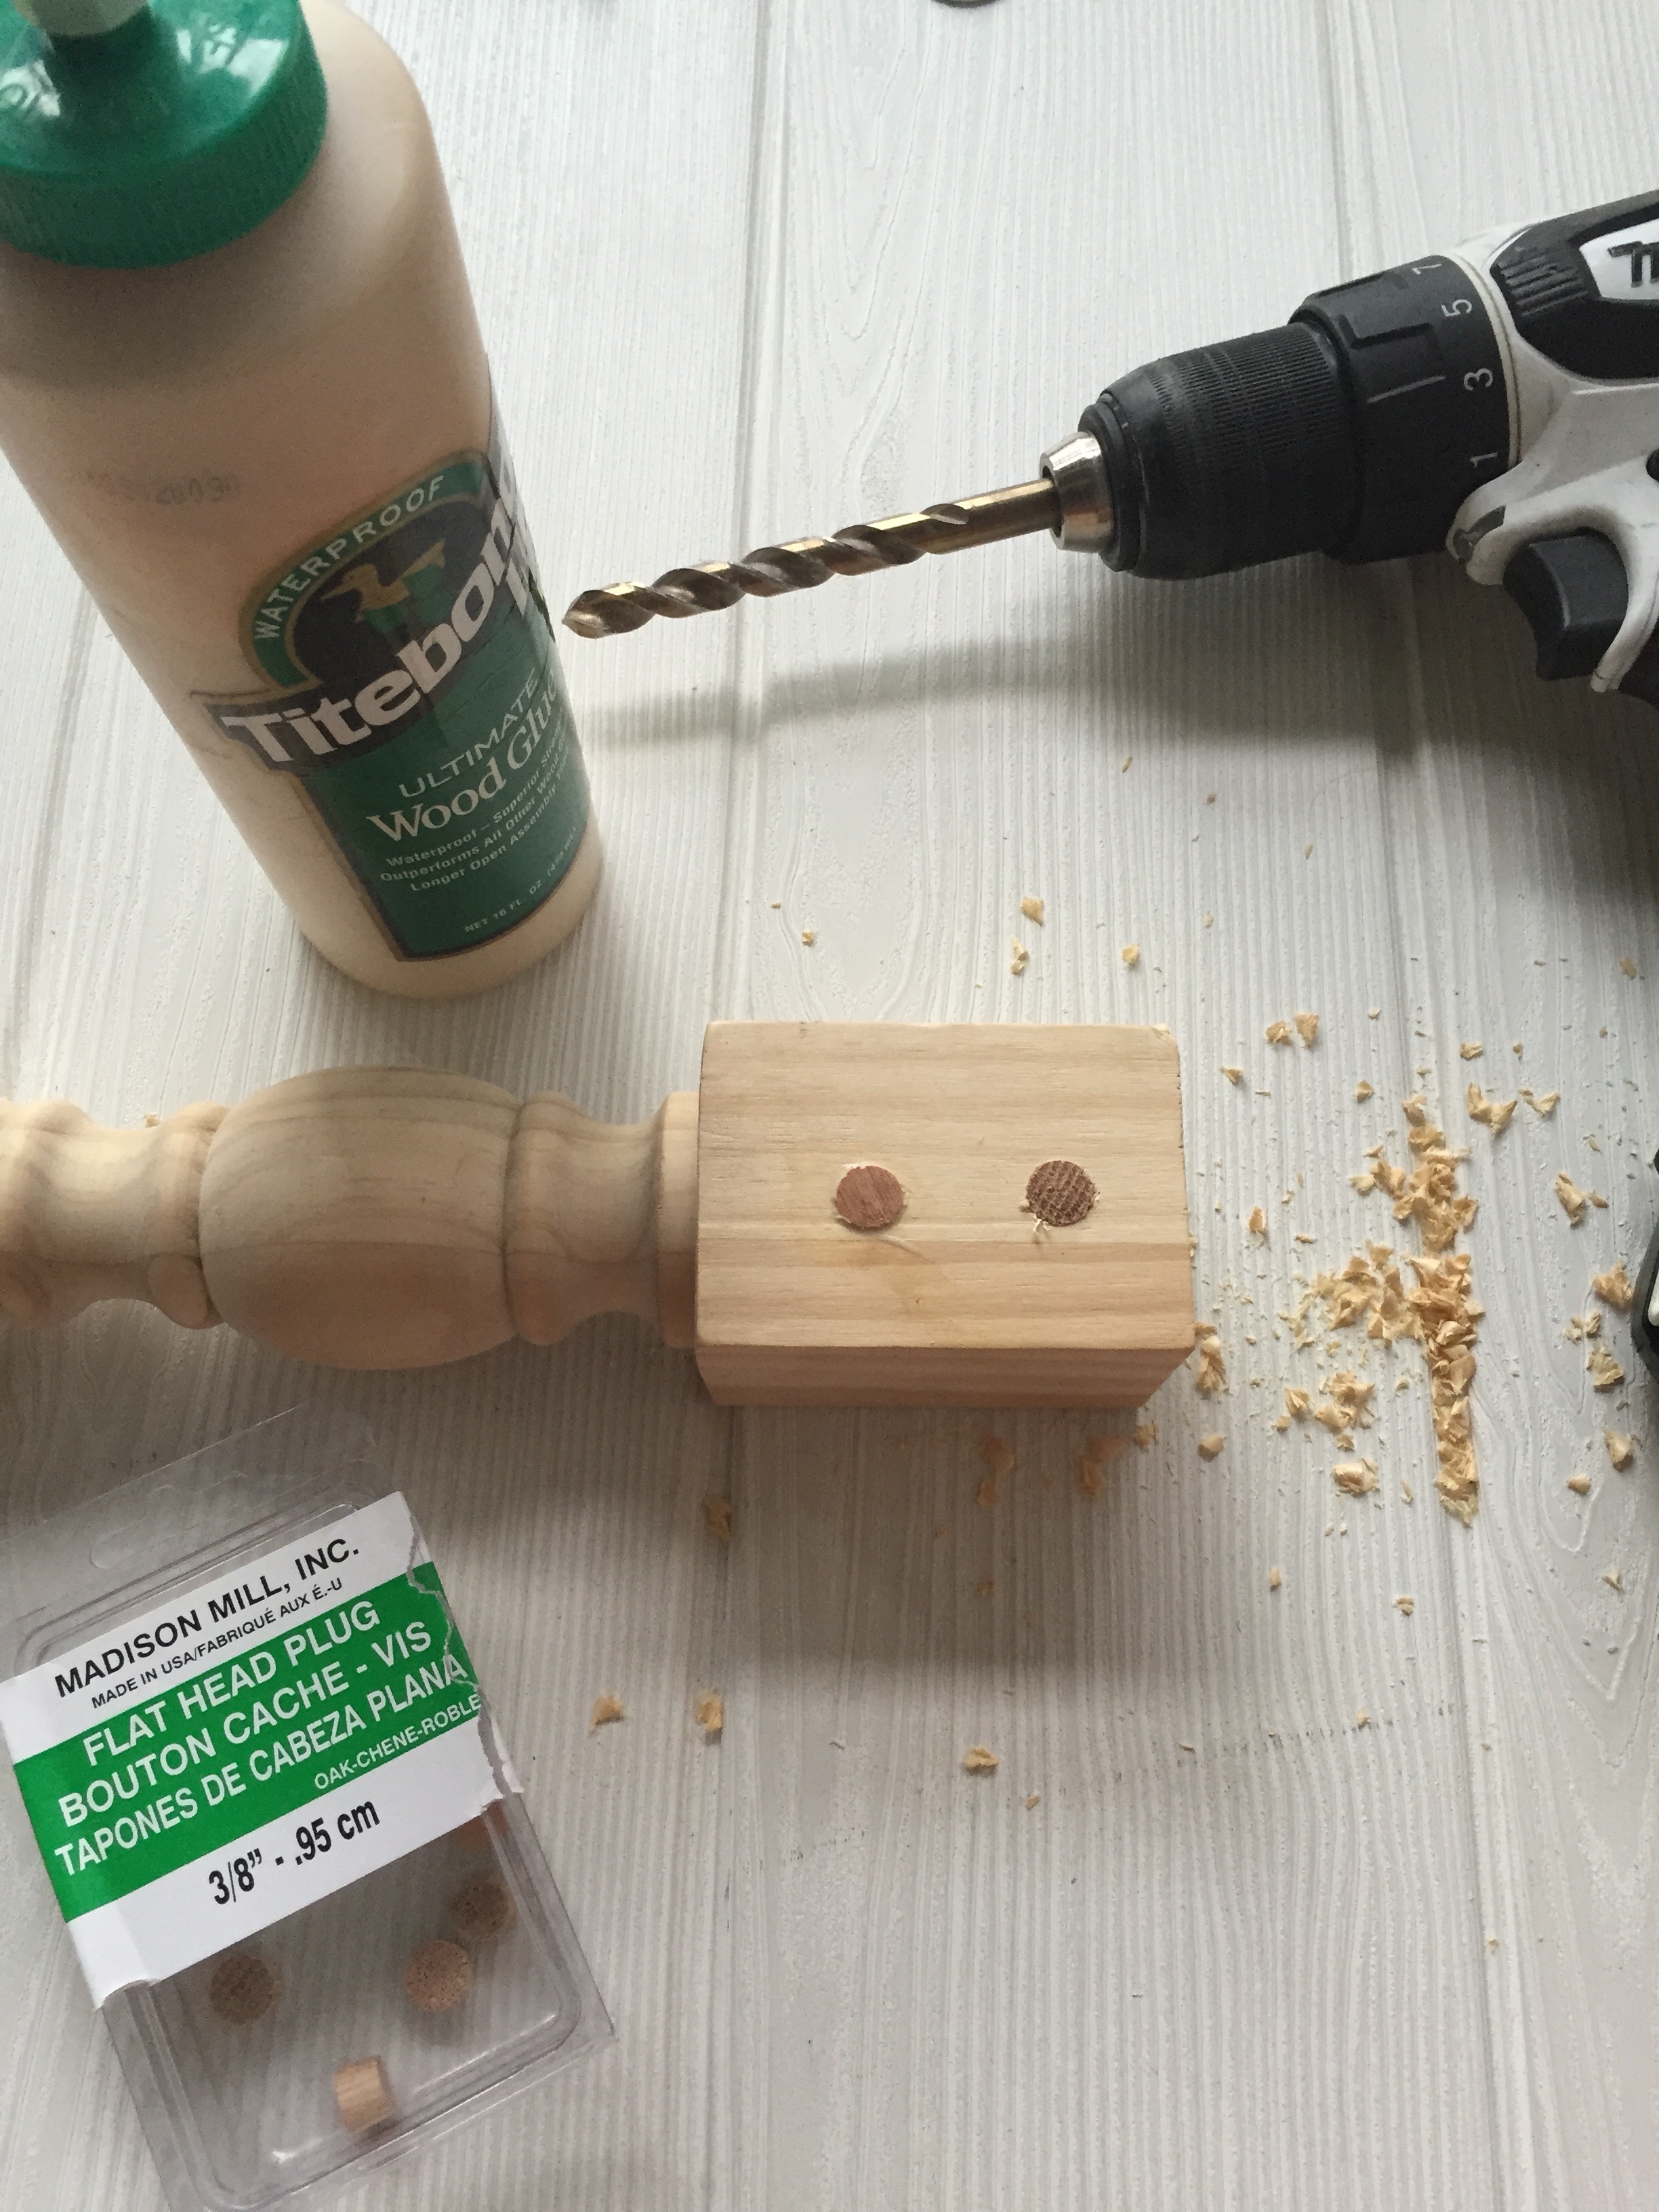
SECOND: notch out 3/8" inch on the ends of the two pieces of 1 x 3 x 6' and the two 22" pieces. this is what will slide into the grove on the tops of the table legs. add a handmade element to the tops of the table legs, by drilling a couple of holes and filling it with wood glue and the flat head plugs.
THIRD: now you are ready to dry fit your table base together, and once you are happy with it, apply the wood glue to the groves and let dry. (don't forget to place something beneath the joint in case the wood glue runs)
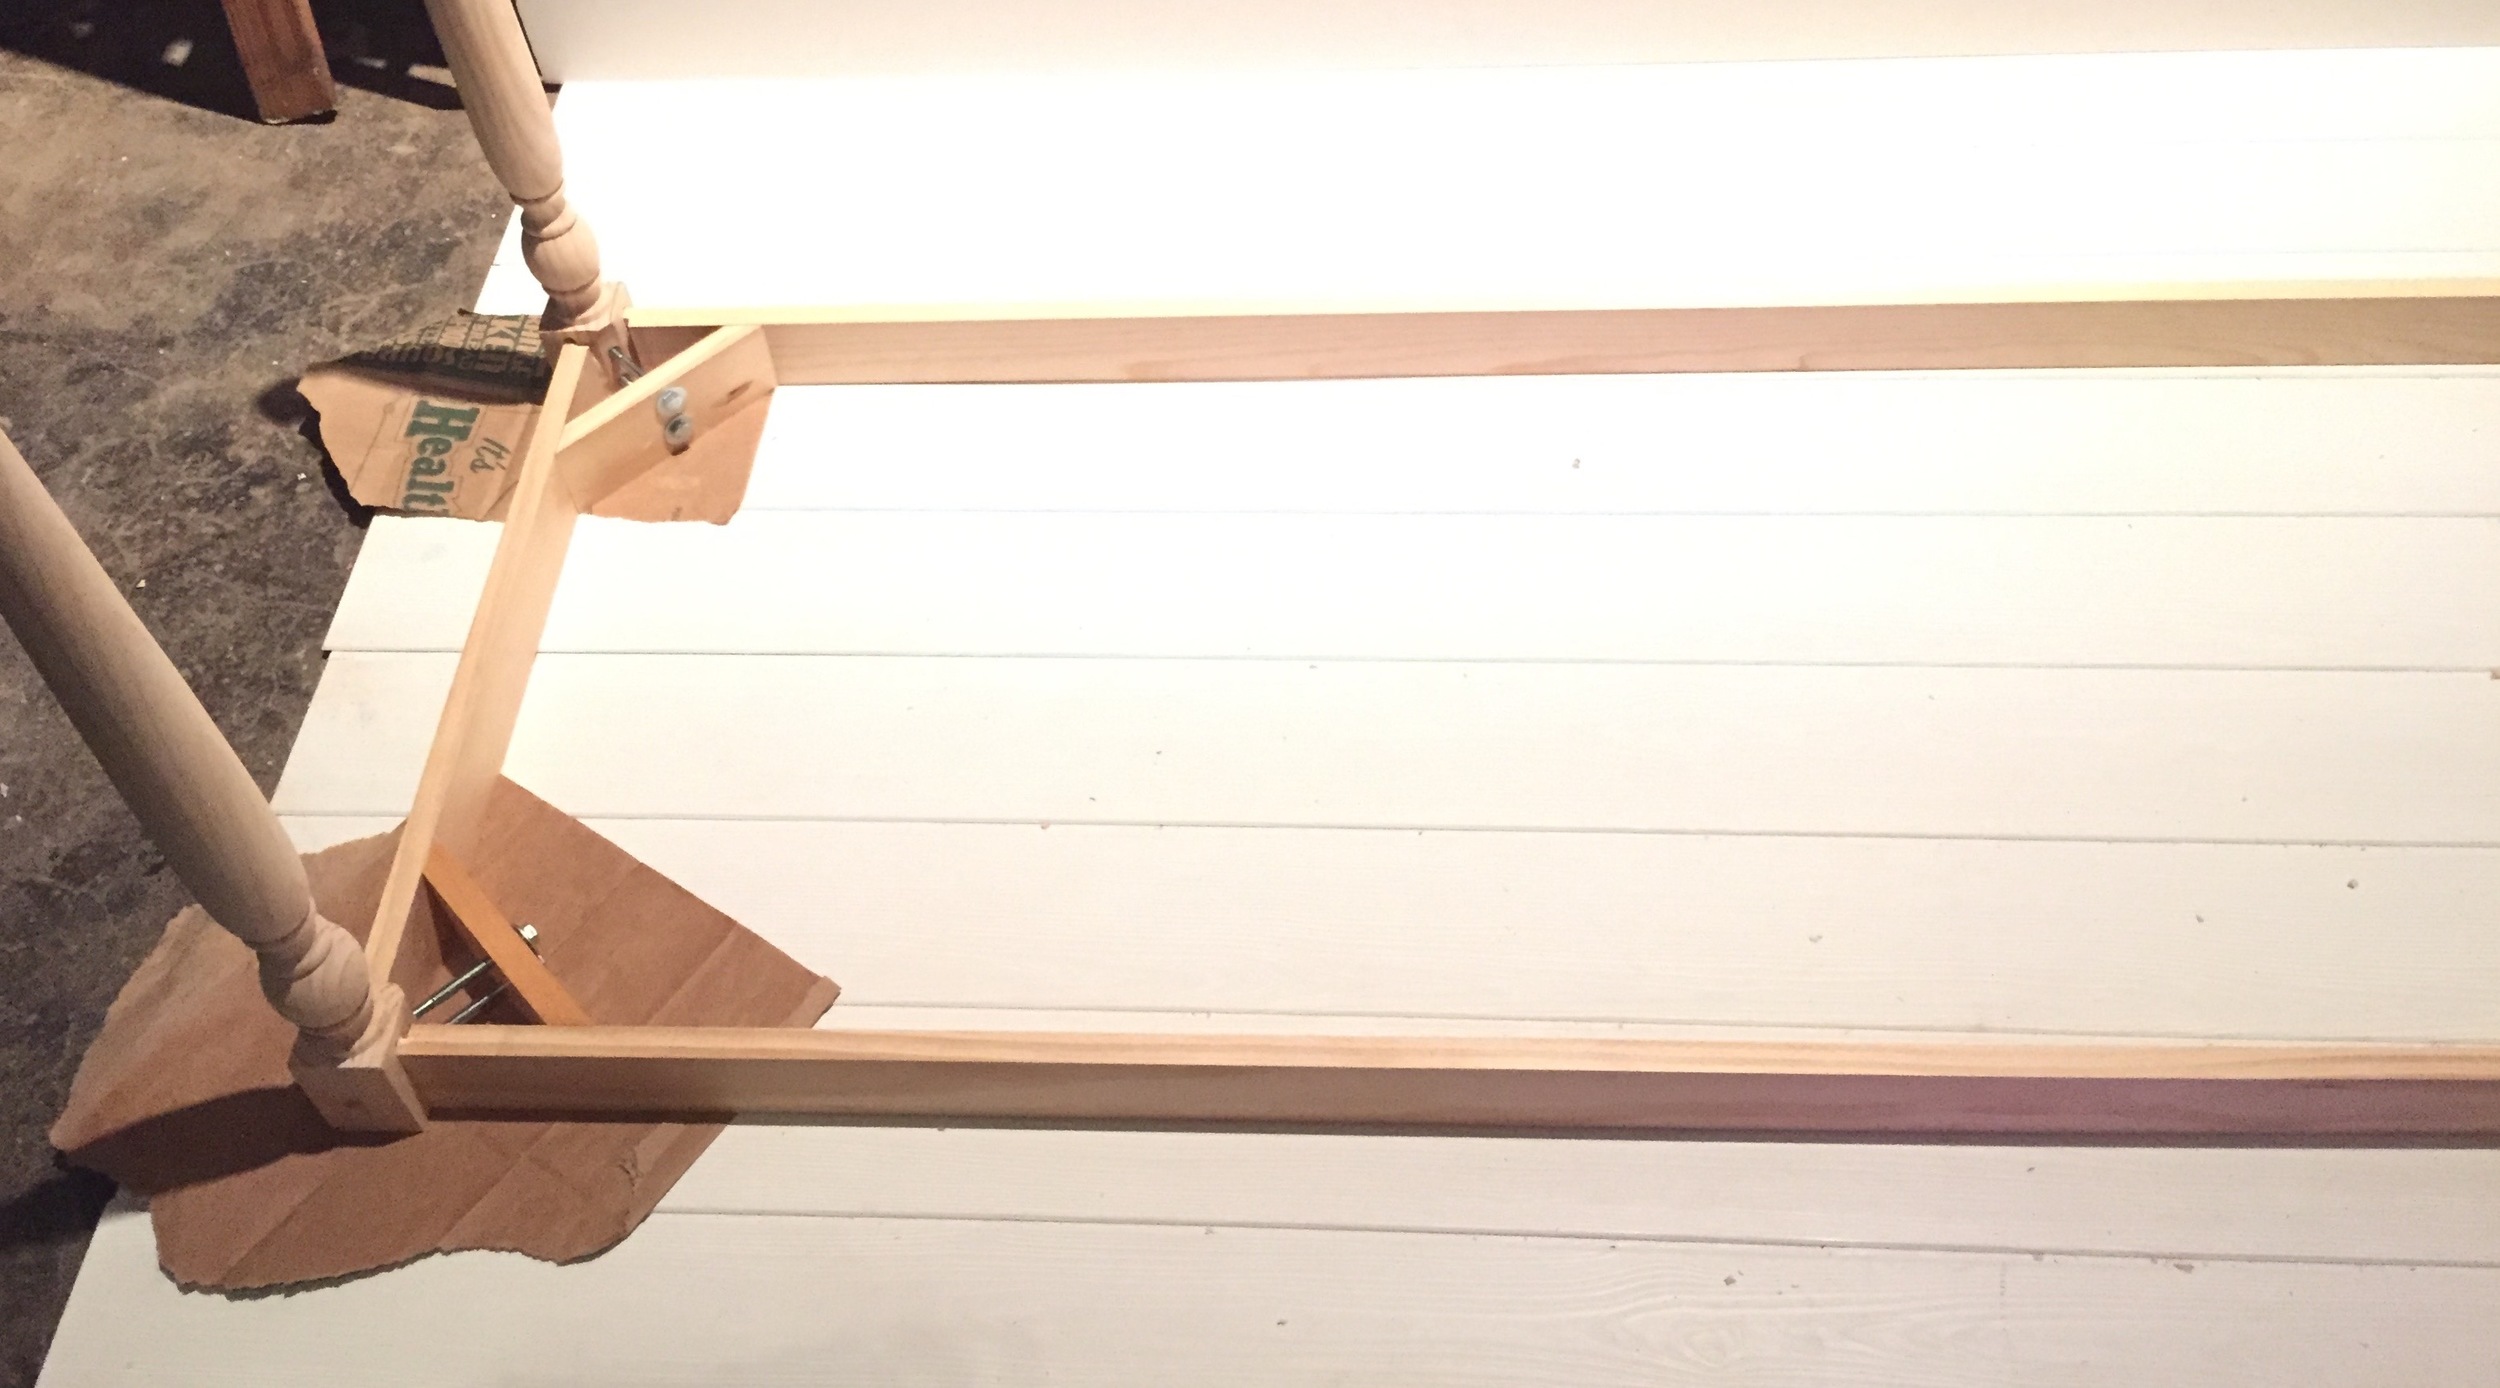
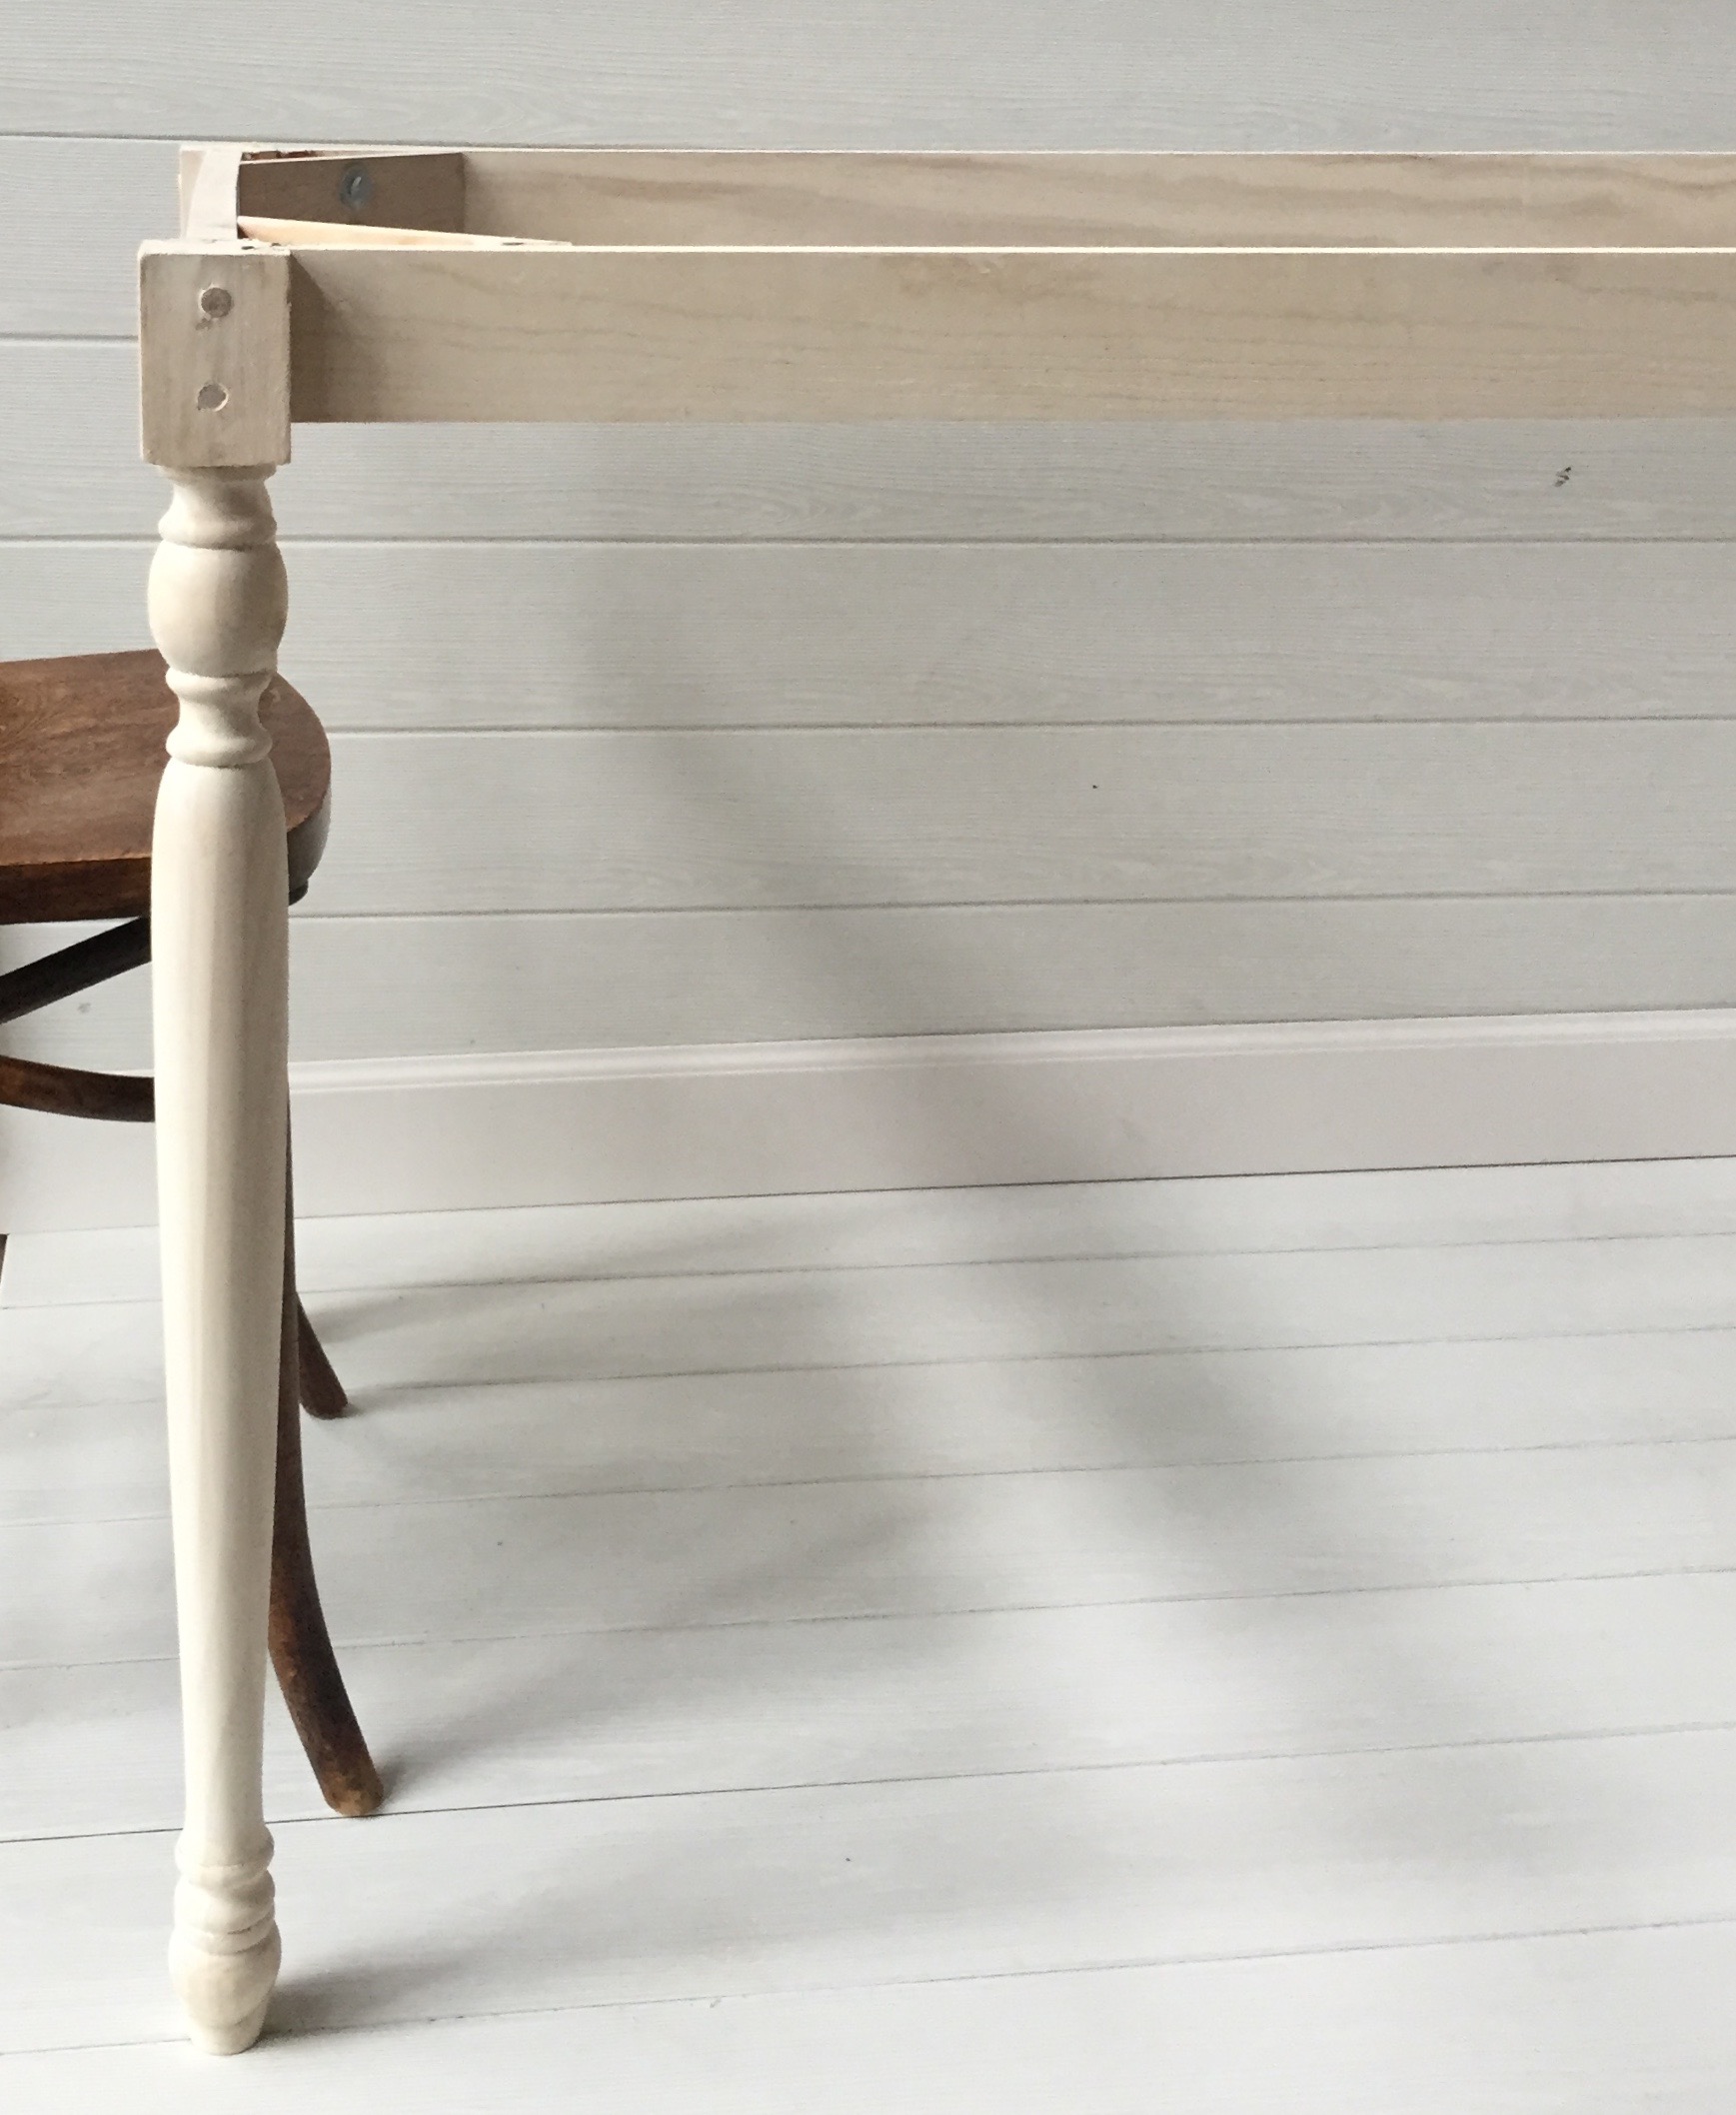
FOURTH: attach the 7" mitered corner braces to each corner with the 3.5" hex bolt and washer. there are threaded female ends already in the legs, so make sure you line up your bolt before drilling the hole in the corner brace. tighten the bolts. (feel free to white wash with the limewash or leave your pine unfinished)
FIFTH: the table top is made of 3/4" plywood, that i had the guys in lumber cut down for me in the store. mine is approx 36" x 87", and then i framed out the edges of the plywood with 1-by's that i attached with the wood screws. Rotometals.com delivered a sheet of zinc and i took it to my local tin shop where they broke the edges of the table to wrap around the plywood base. (i like to have the option of switching out surfaces on my table, so i let it rest on top & its weighty enough to where it works)
for now, i'm letting time naturally age the surface, but you can visit rotometals.com for a list of finishing effects that will work well with your space.
in the studio today, shooting some content inspired by Mrs Meyer's Geranium dish soap. no gloves needed here, in fact, my hands were baby soft after soaking in the wash basin.
only 10 days left to vote in the Hunt for Mrs Meyers Maker. cast your vote here!
#mrsmeyersinspires
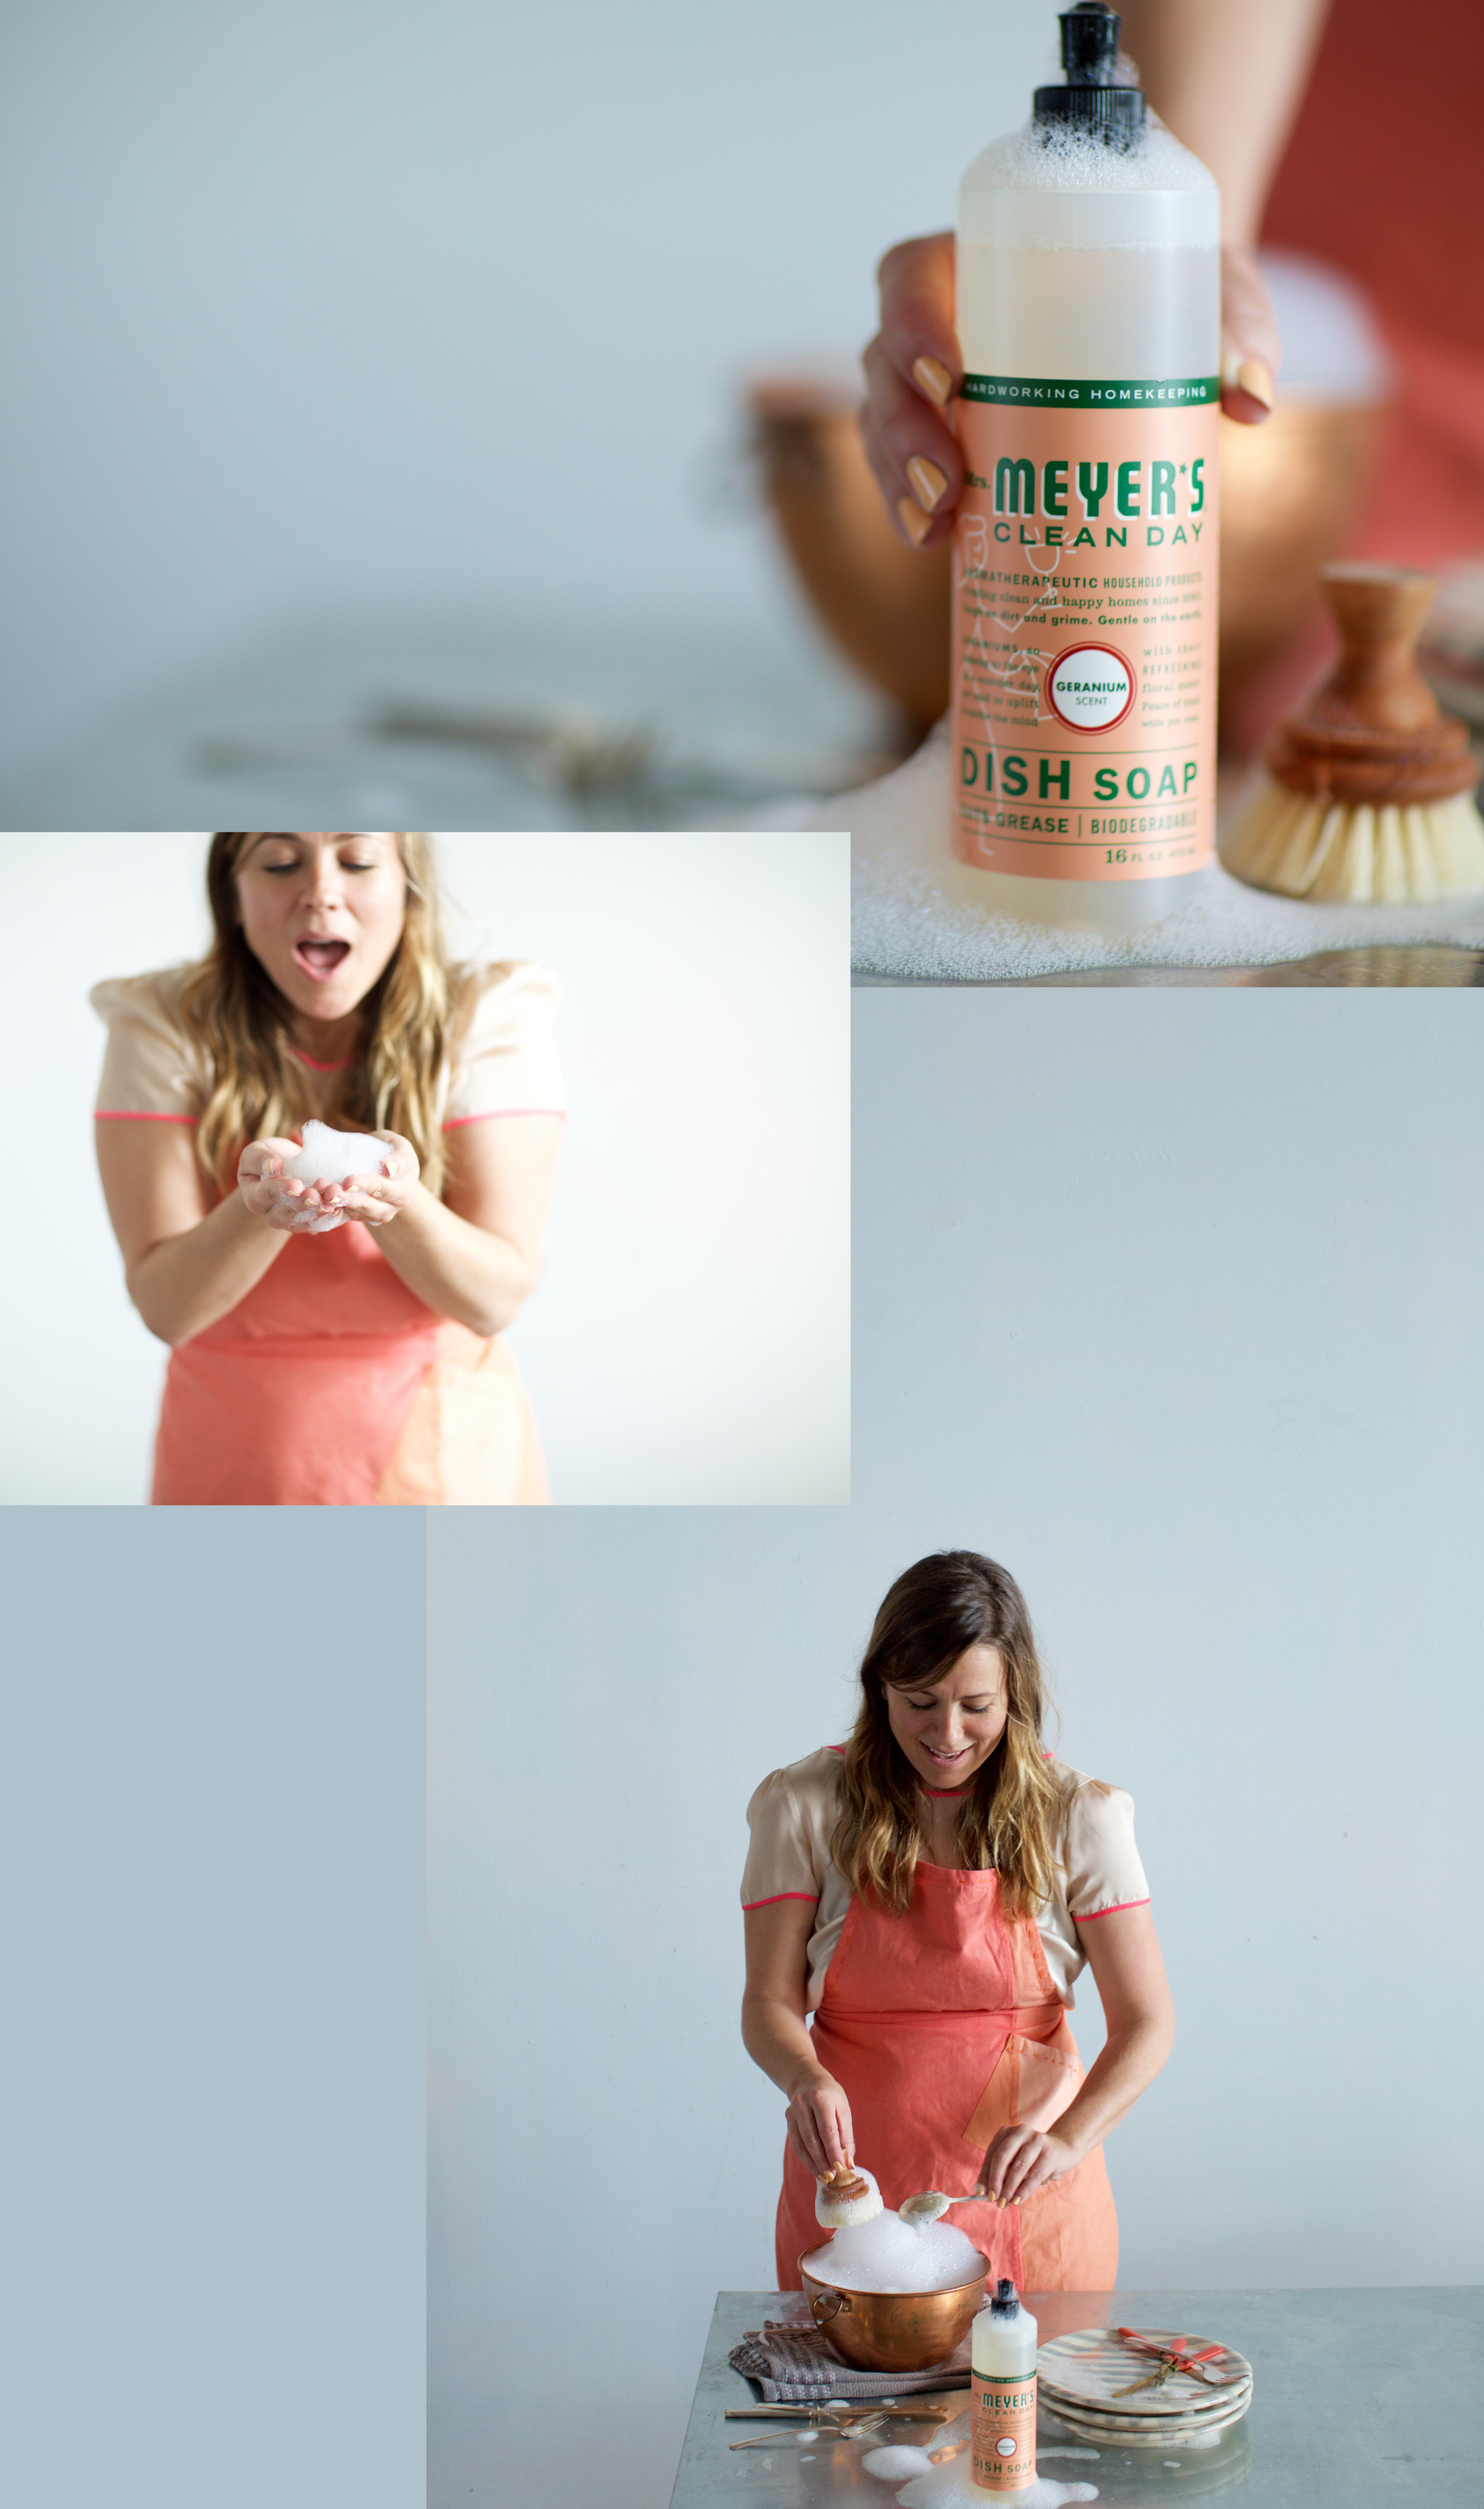
photos by Seth Newell
last february i had the opportunity to prop style this adorable how-to for Southern Living at the Time Inc Digital studios. the talented Brad Thomason shot and edited this piece with a witty nod to the one and only mr. wes anderson <3
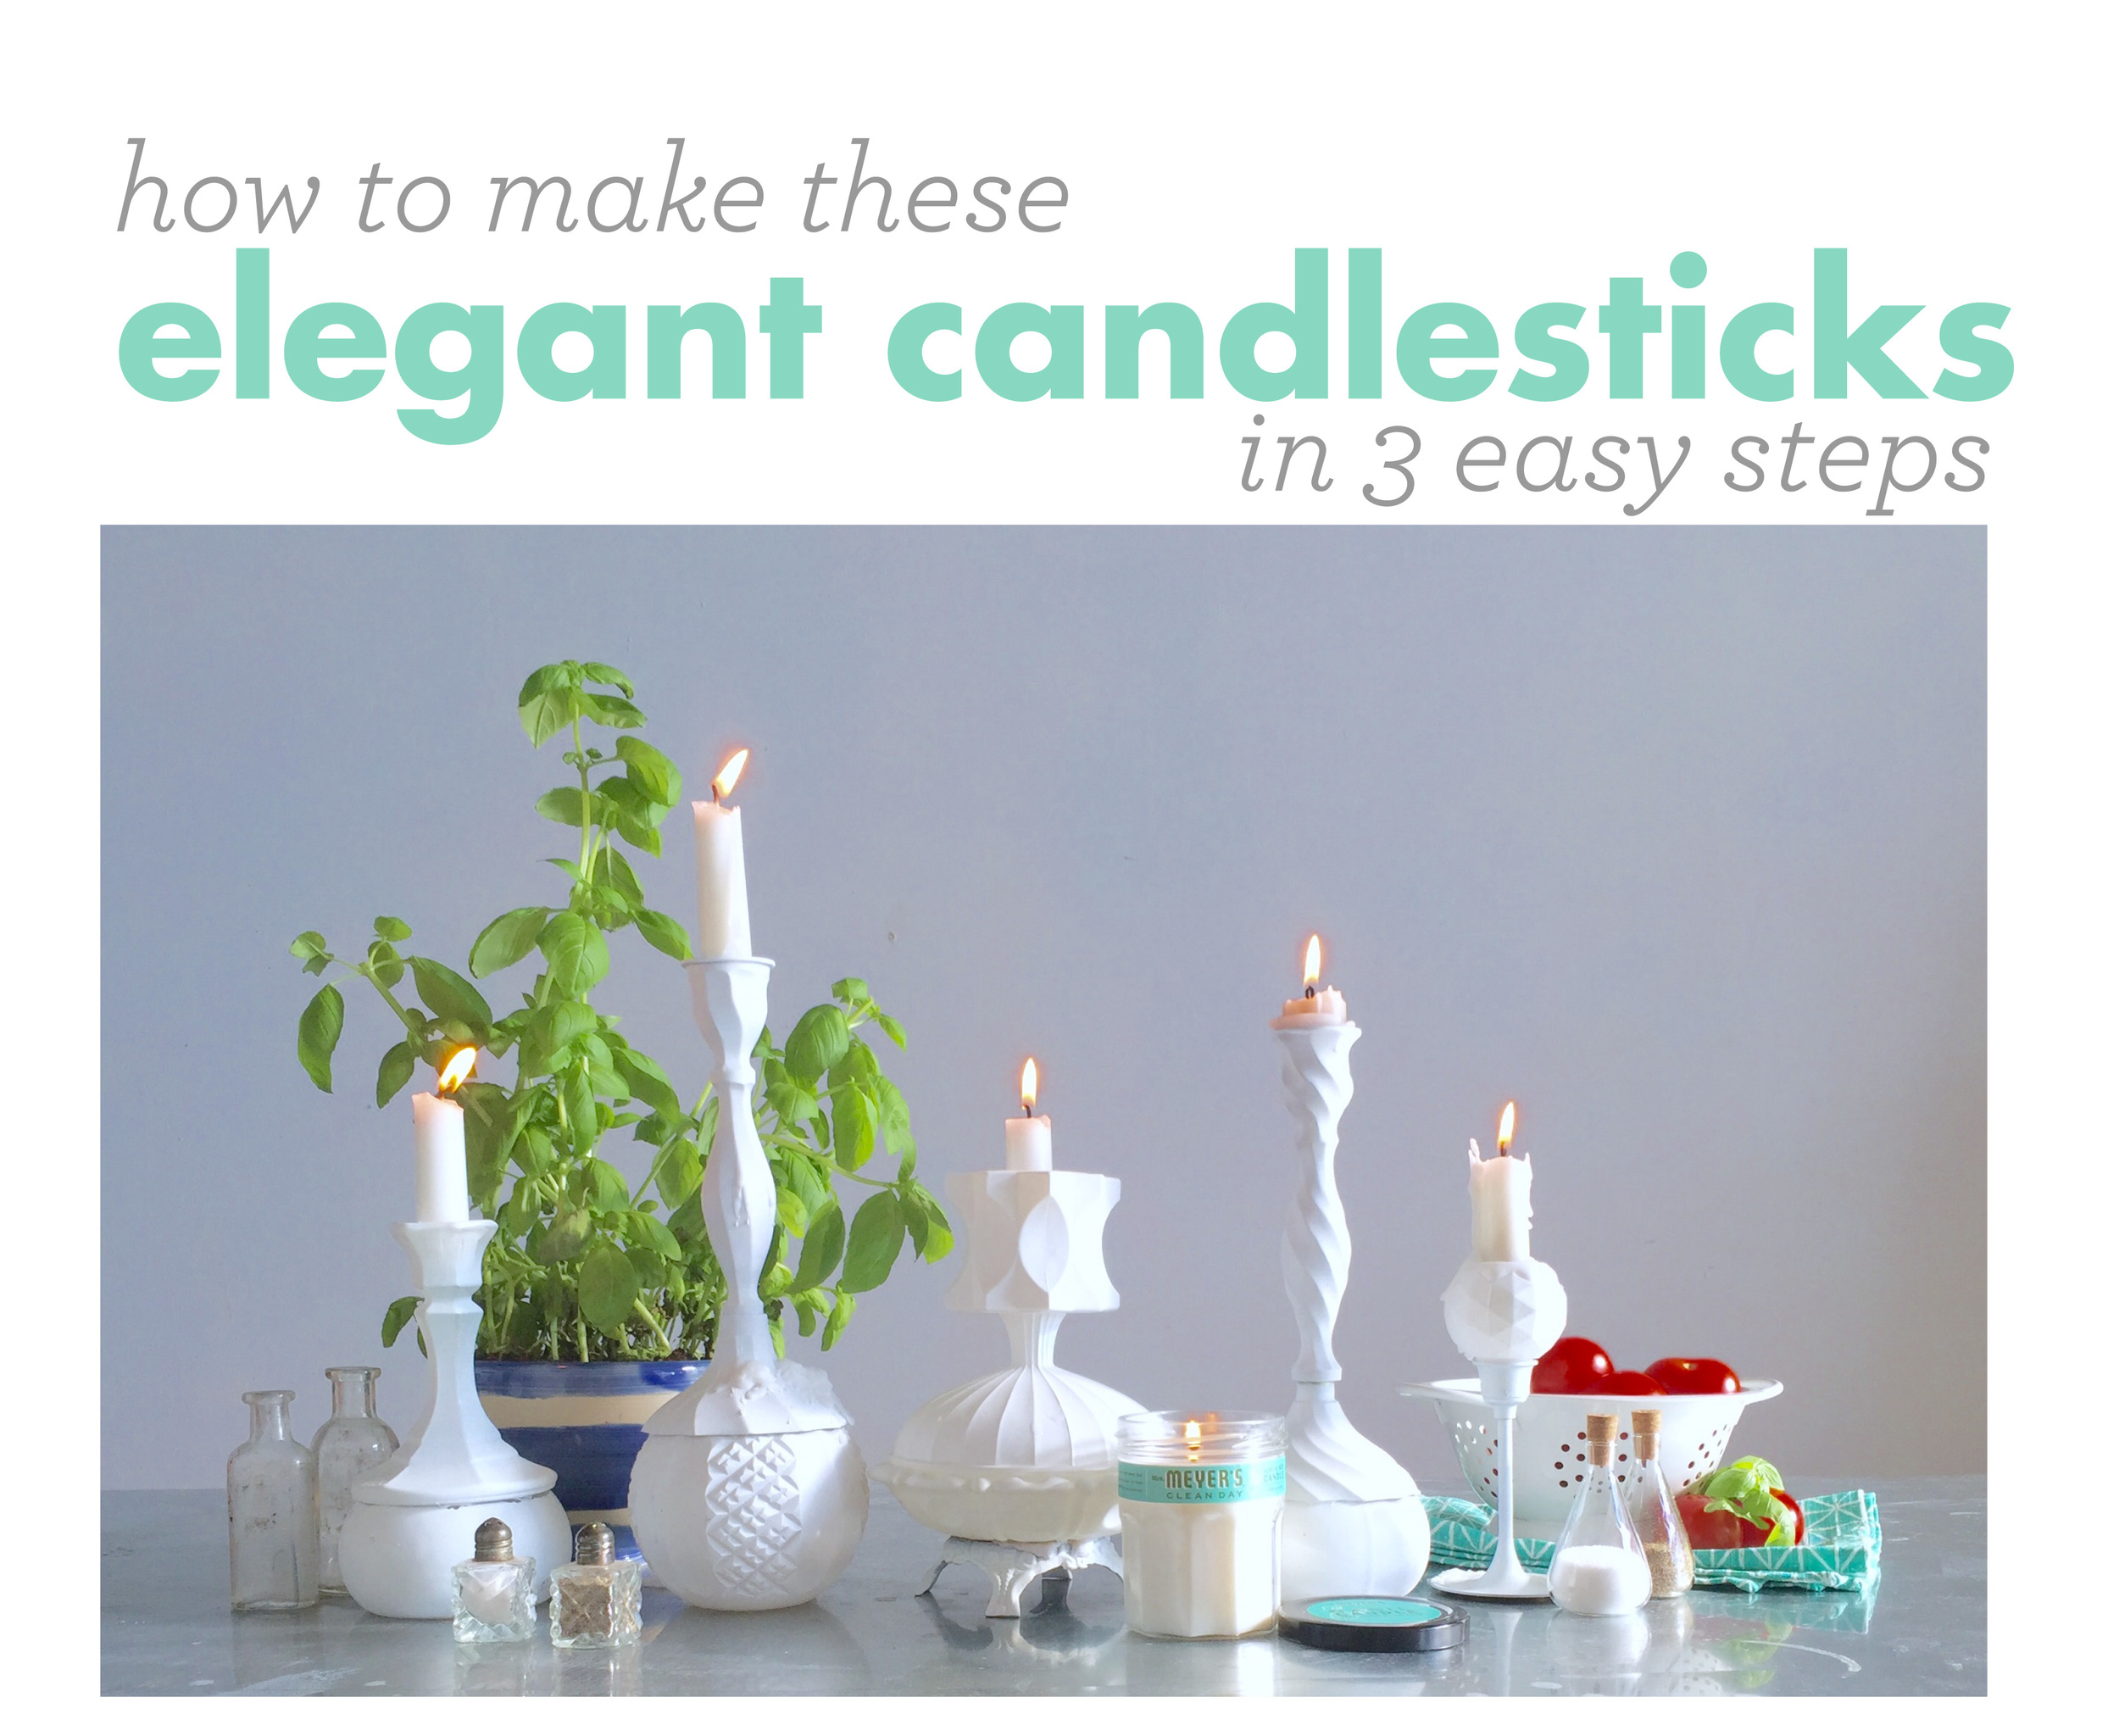
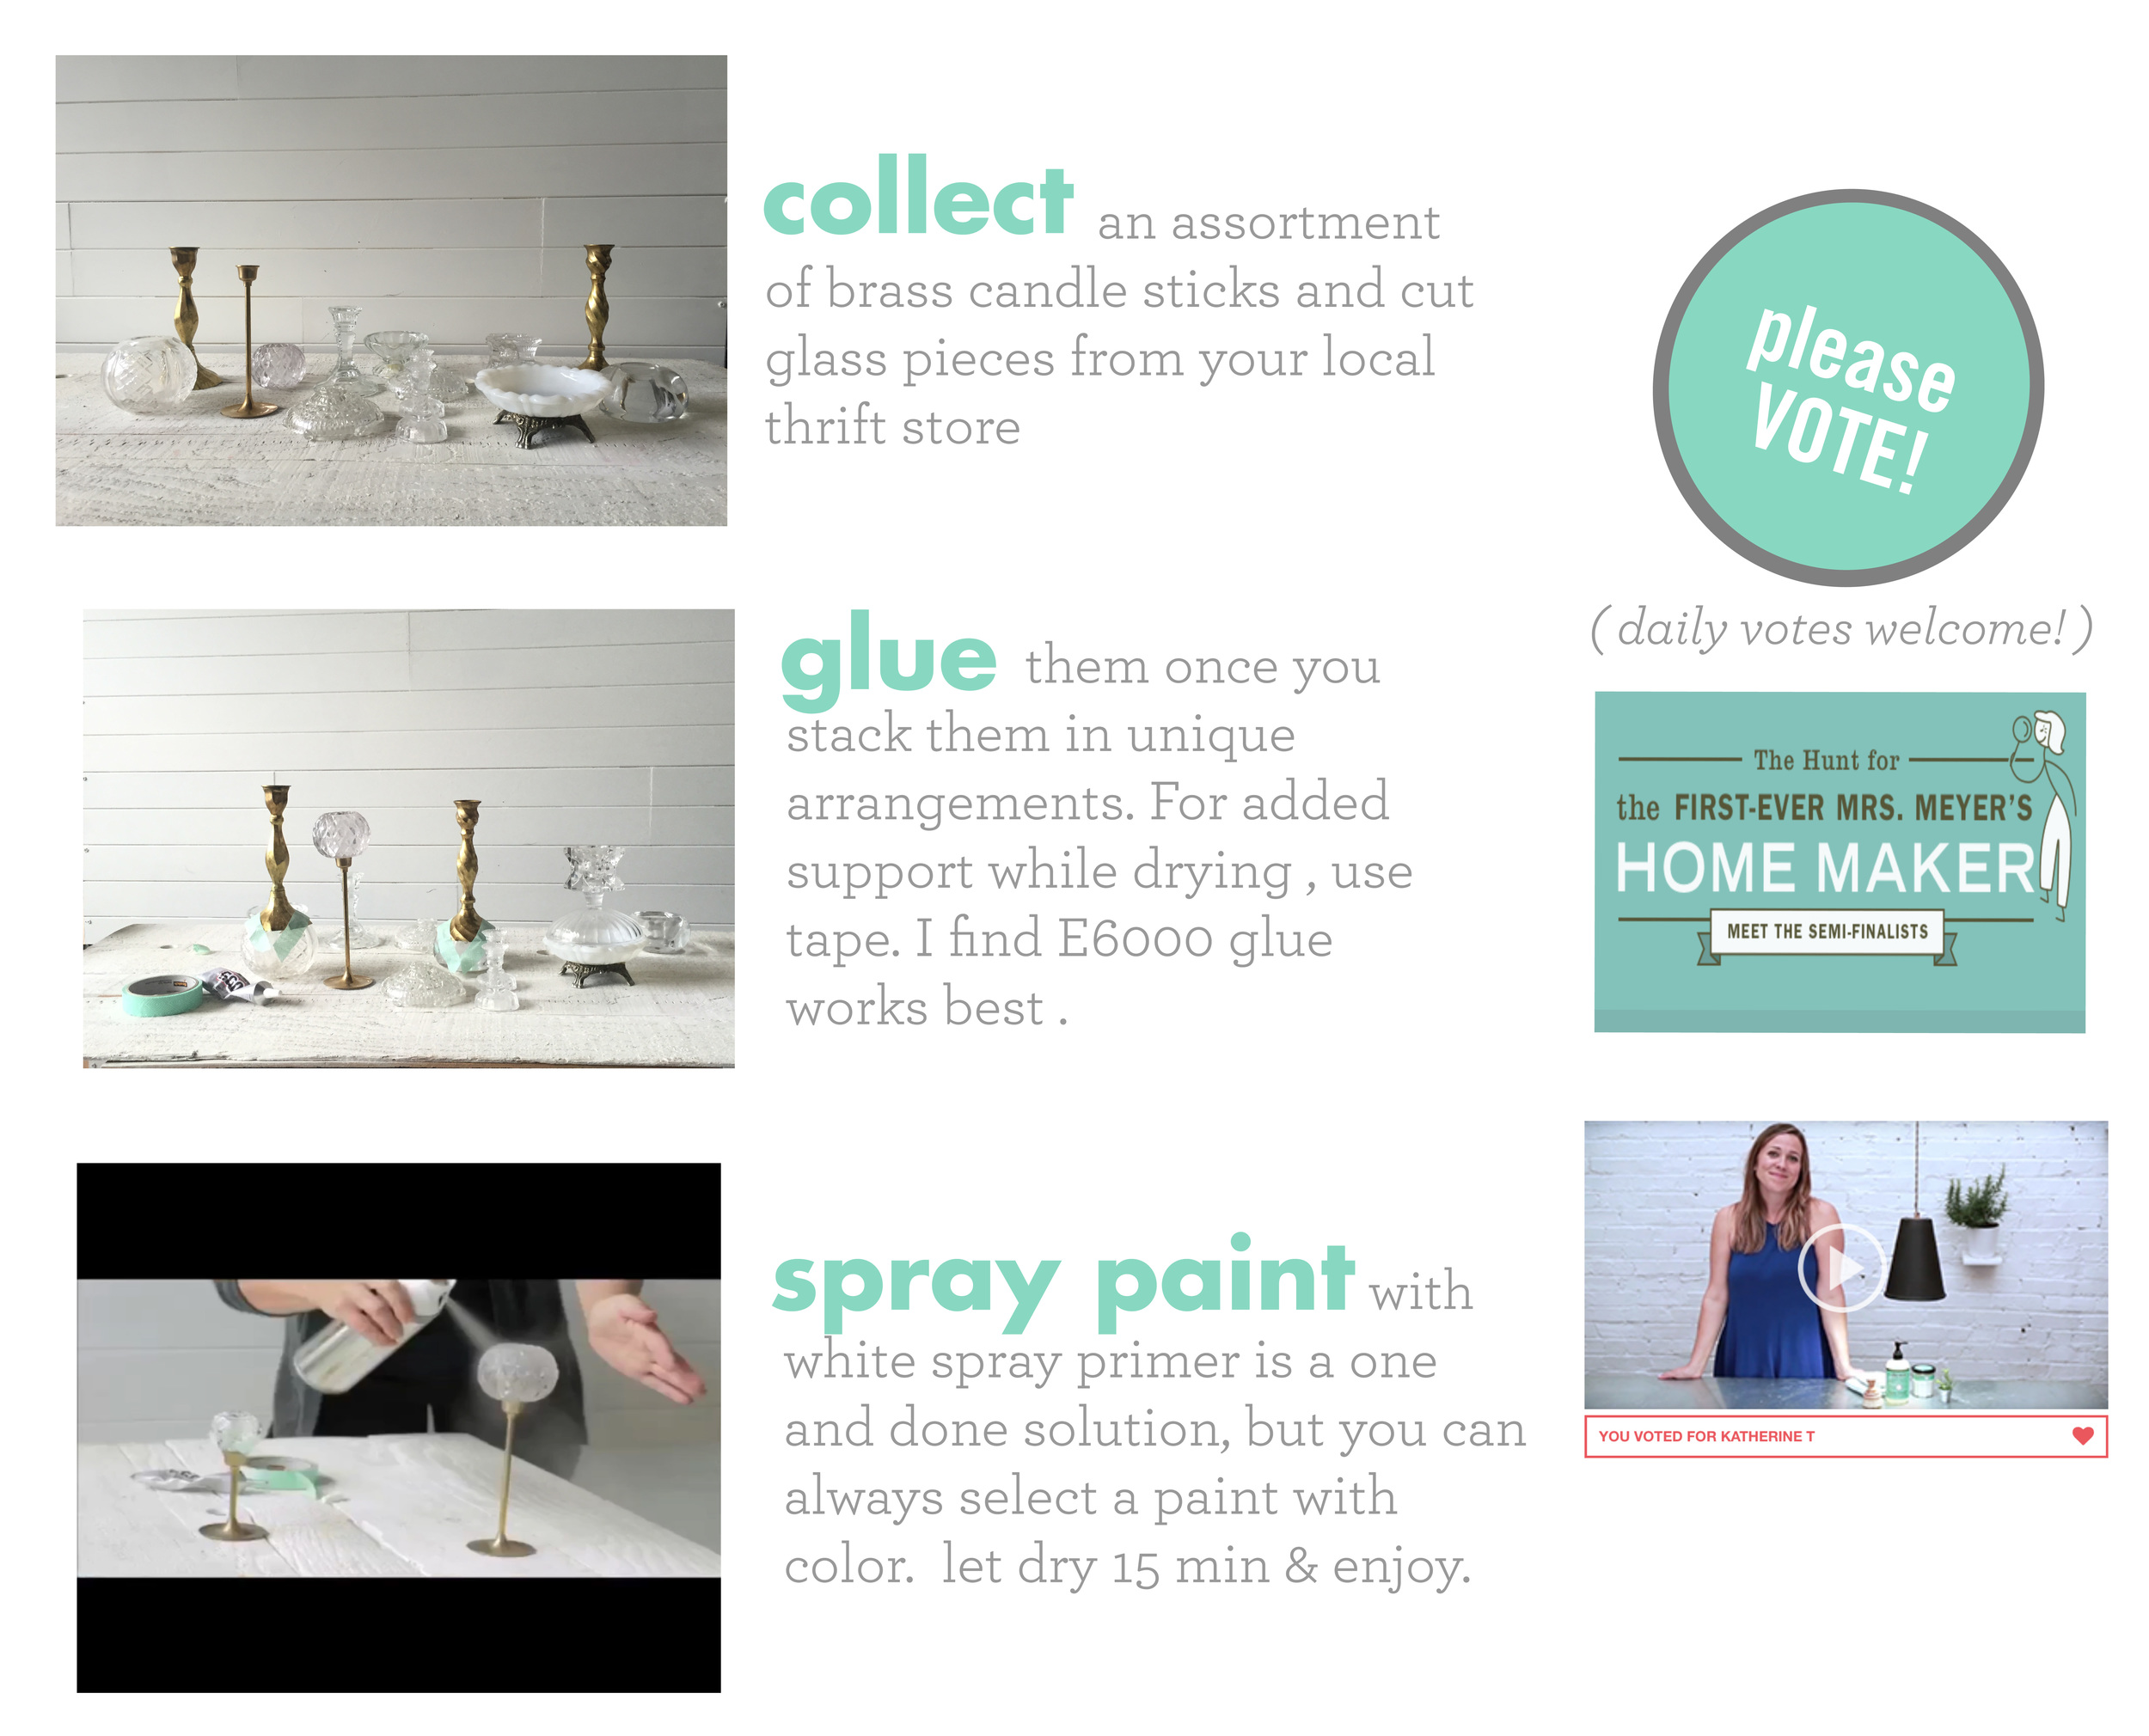
friends, i am so excited!
a few months ago, i entered a contest... the Hunt for Mrs. Meyer's Home Maker and was selected as a semi-finalist among 14 other super talented creatives. if i win, i get the opportunity to collaborate with the folks at Mrs. Meyers Clean Day, a brand i love to use at home and when i'm on shoots. their natural fresh scents are a welcomed calming agent on the sometimes hectic sets & their products are sweet on the eyes so i drop them in the background of a lot of my sets for a lil pop of color. As a winner, I'd also have the opportunity to work with other well-known DIY// crafter// bloggers that i've looked up to for years. (Grace Bonney of Design Sponge, Paul Lowe of Sweet Paul Magazine , & Maxwell Ryan of Apartment Therapy who frequent guest- post on their instagram) wish me luck guys and feel free to vote for me their website! < daily votes welcome! >
in the meantime, i wanted to share with you all a project i featured on the first submission a bit more in depth because the video was super condensed. i love a simple DIY and this one is just that.
Styled this spot for Columbus Regional Health. (Directed by: Jason Wallis)
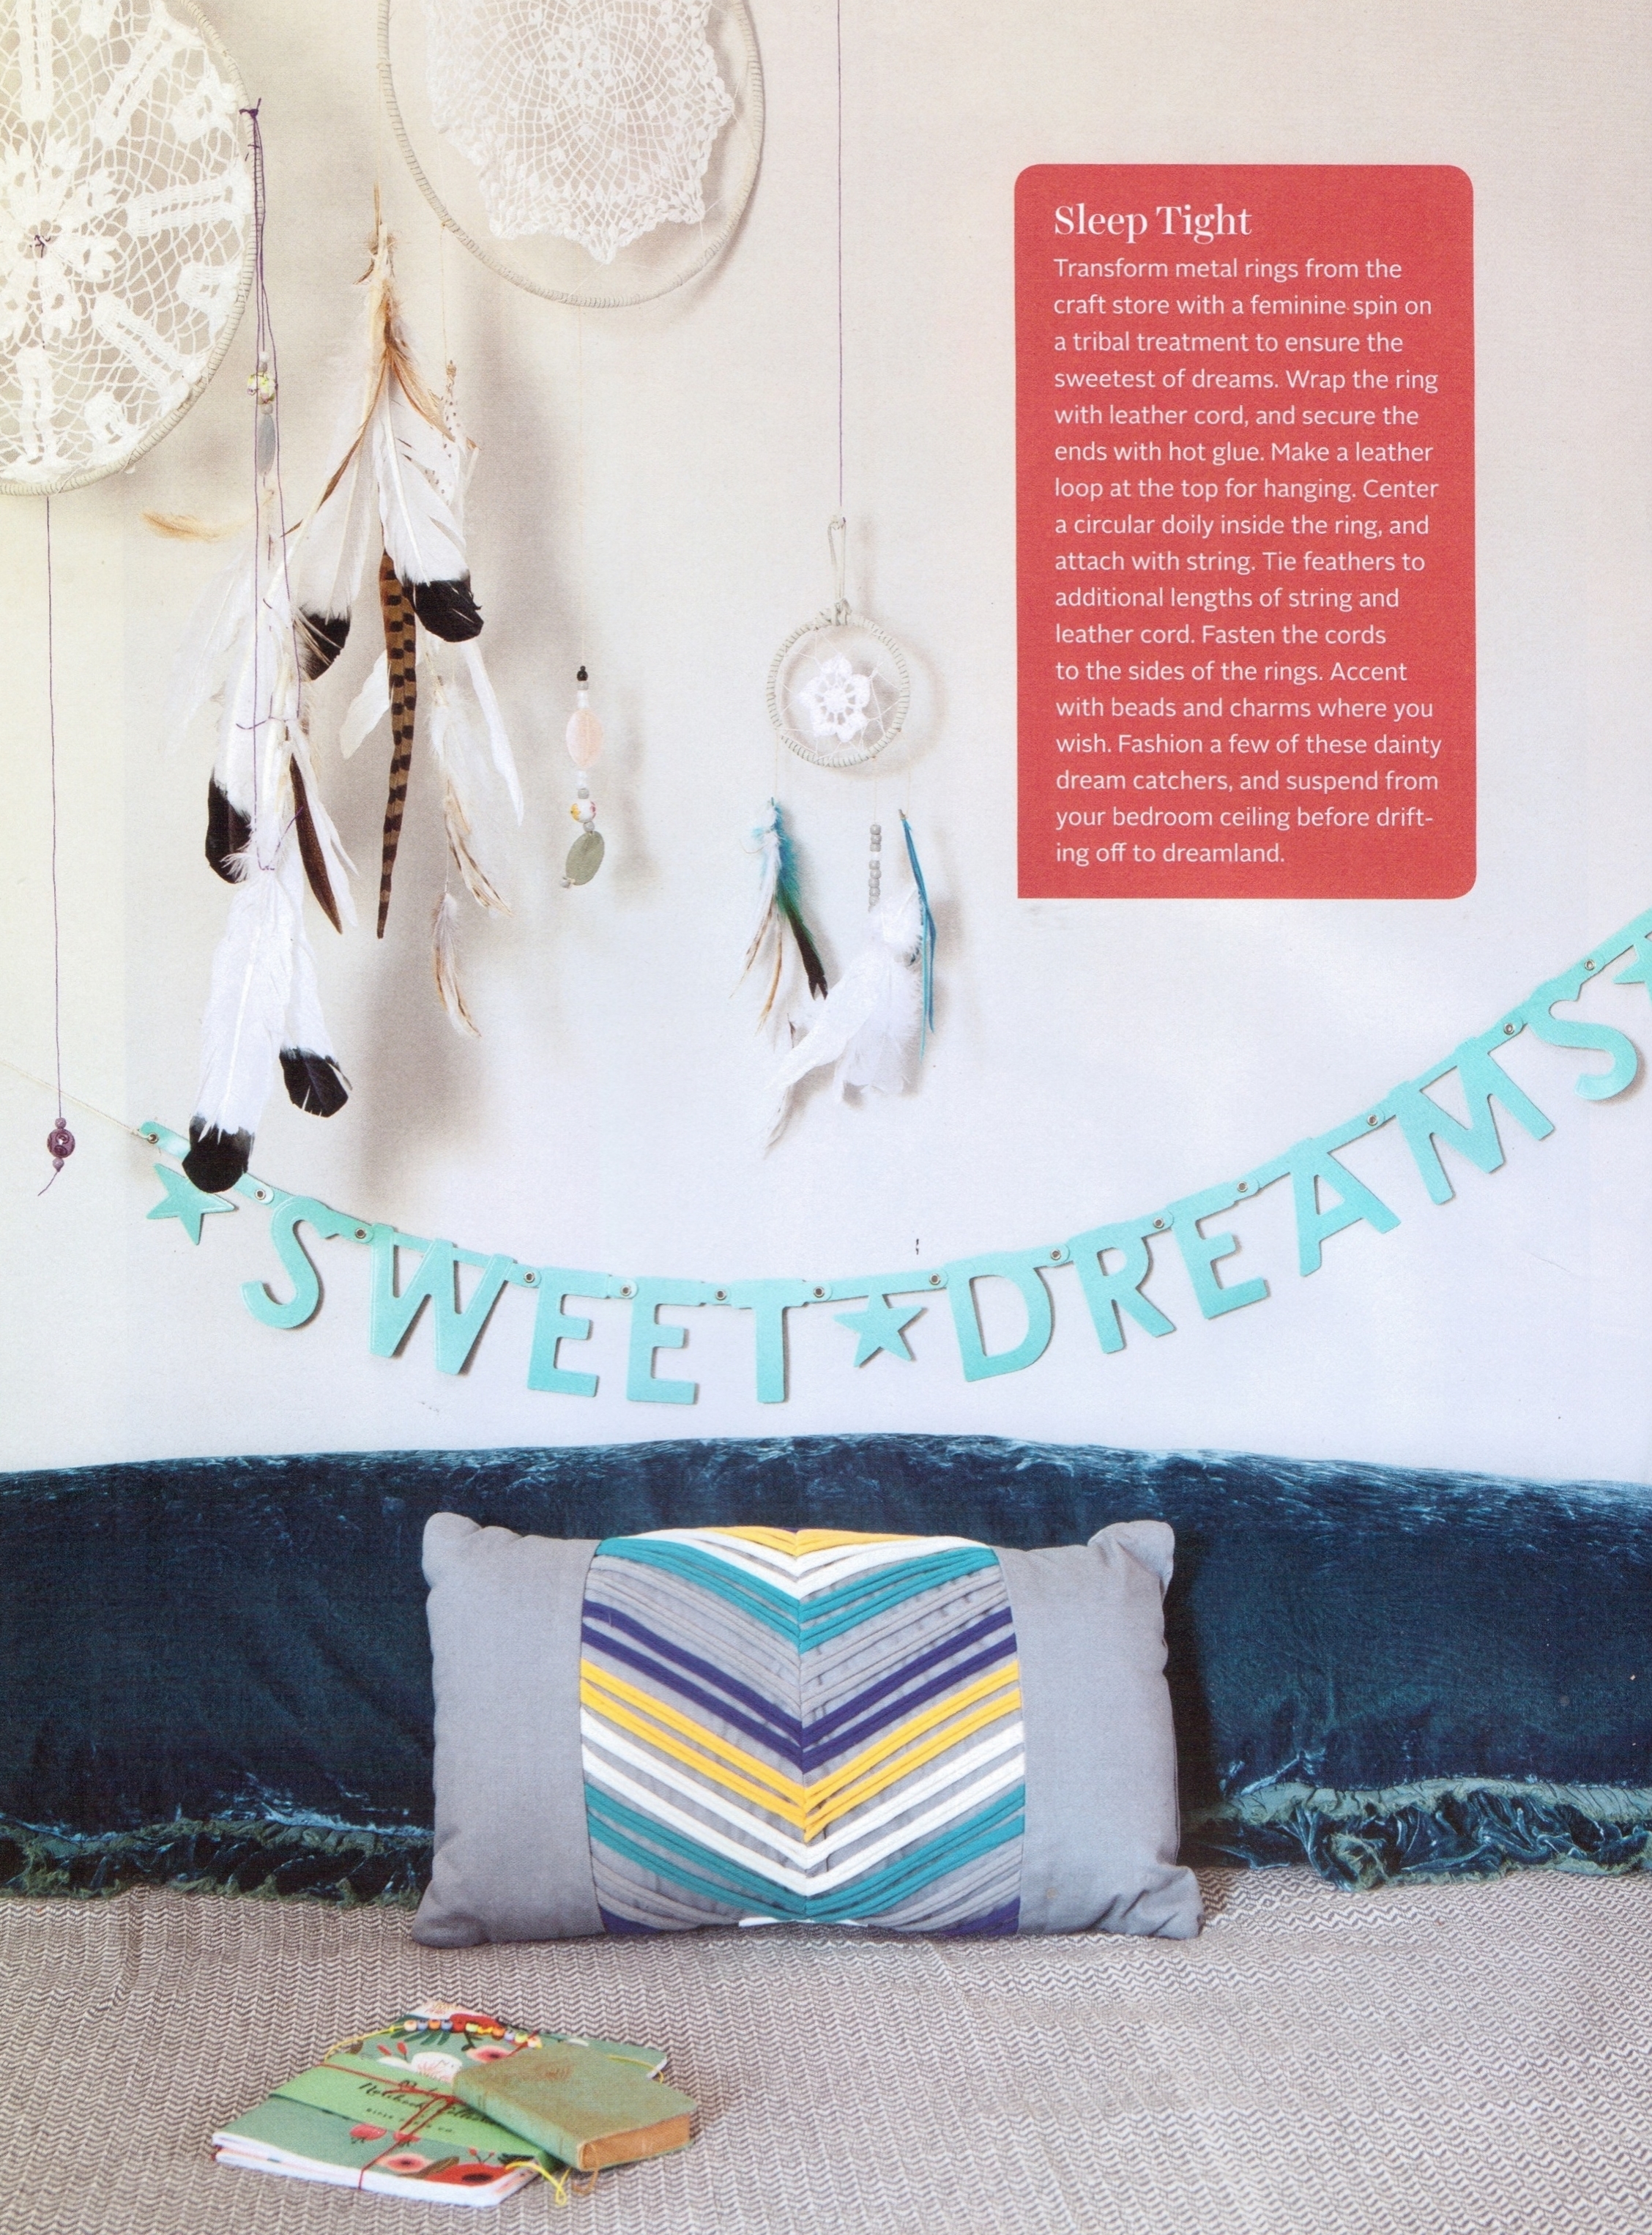
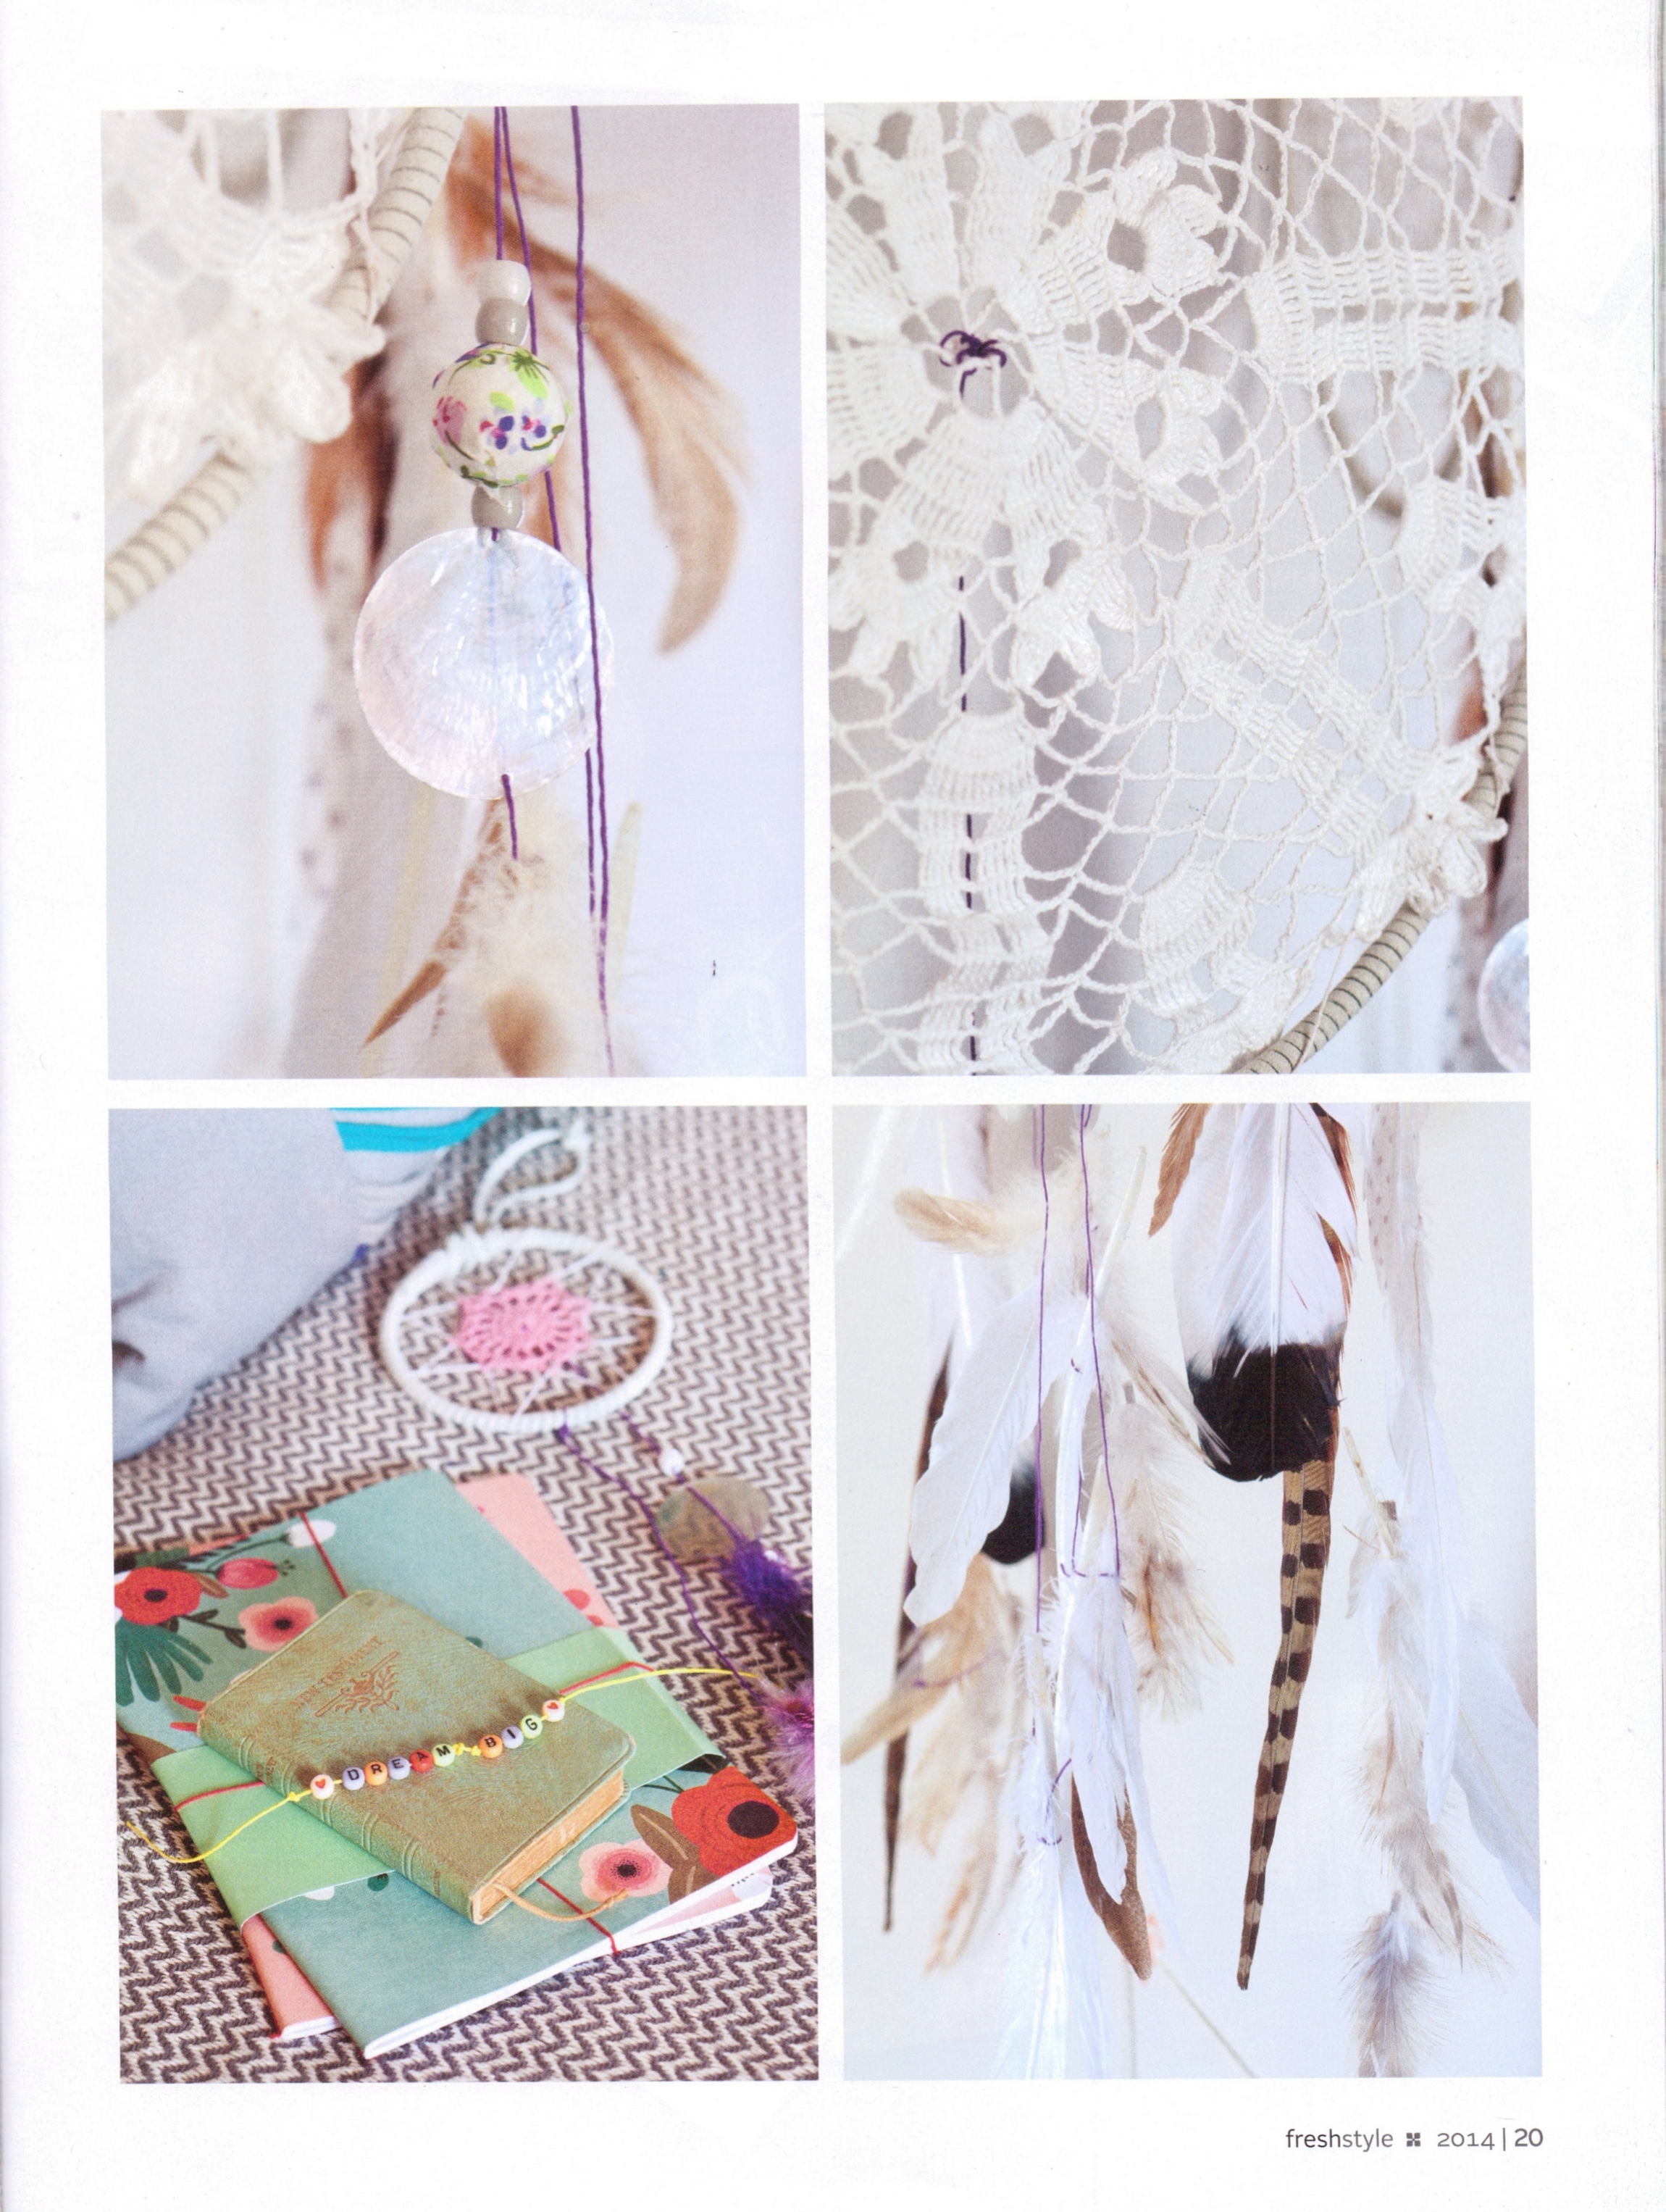
produced this pretty little spread inspired by dreams, feathers, & wishful thinking. the enlarged dream catchers are quite easy to make, simply wrap metal rings (from hobby lobby) in leather cord and string a doily in the center. tie feathers from the bottom and dream awayyy.

i was honored to style this shoot for Purelle, which was beautifully shot by Jason Wallis + you might never know that this day was actually an overcast chilly winter one because it was excellently lit by ALA GRIP CO.
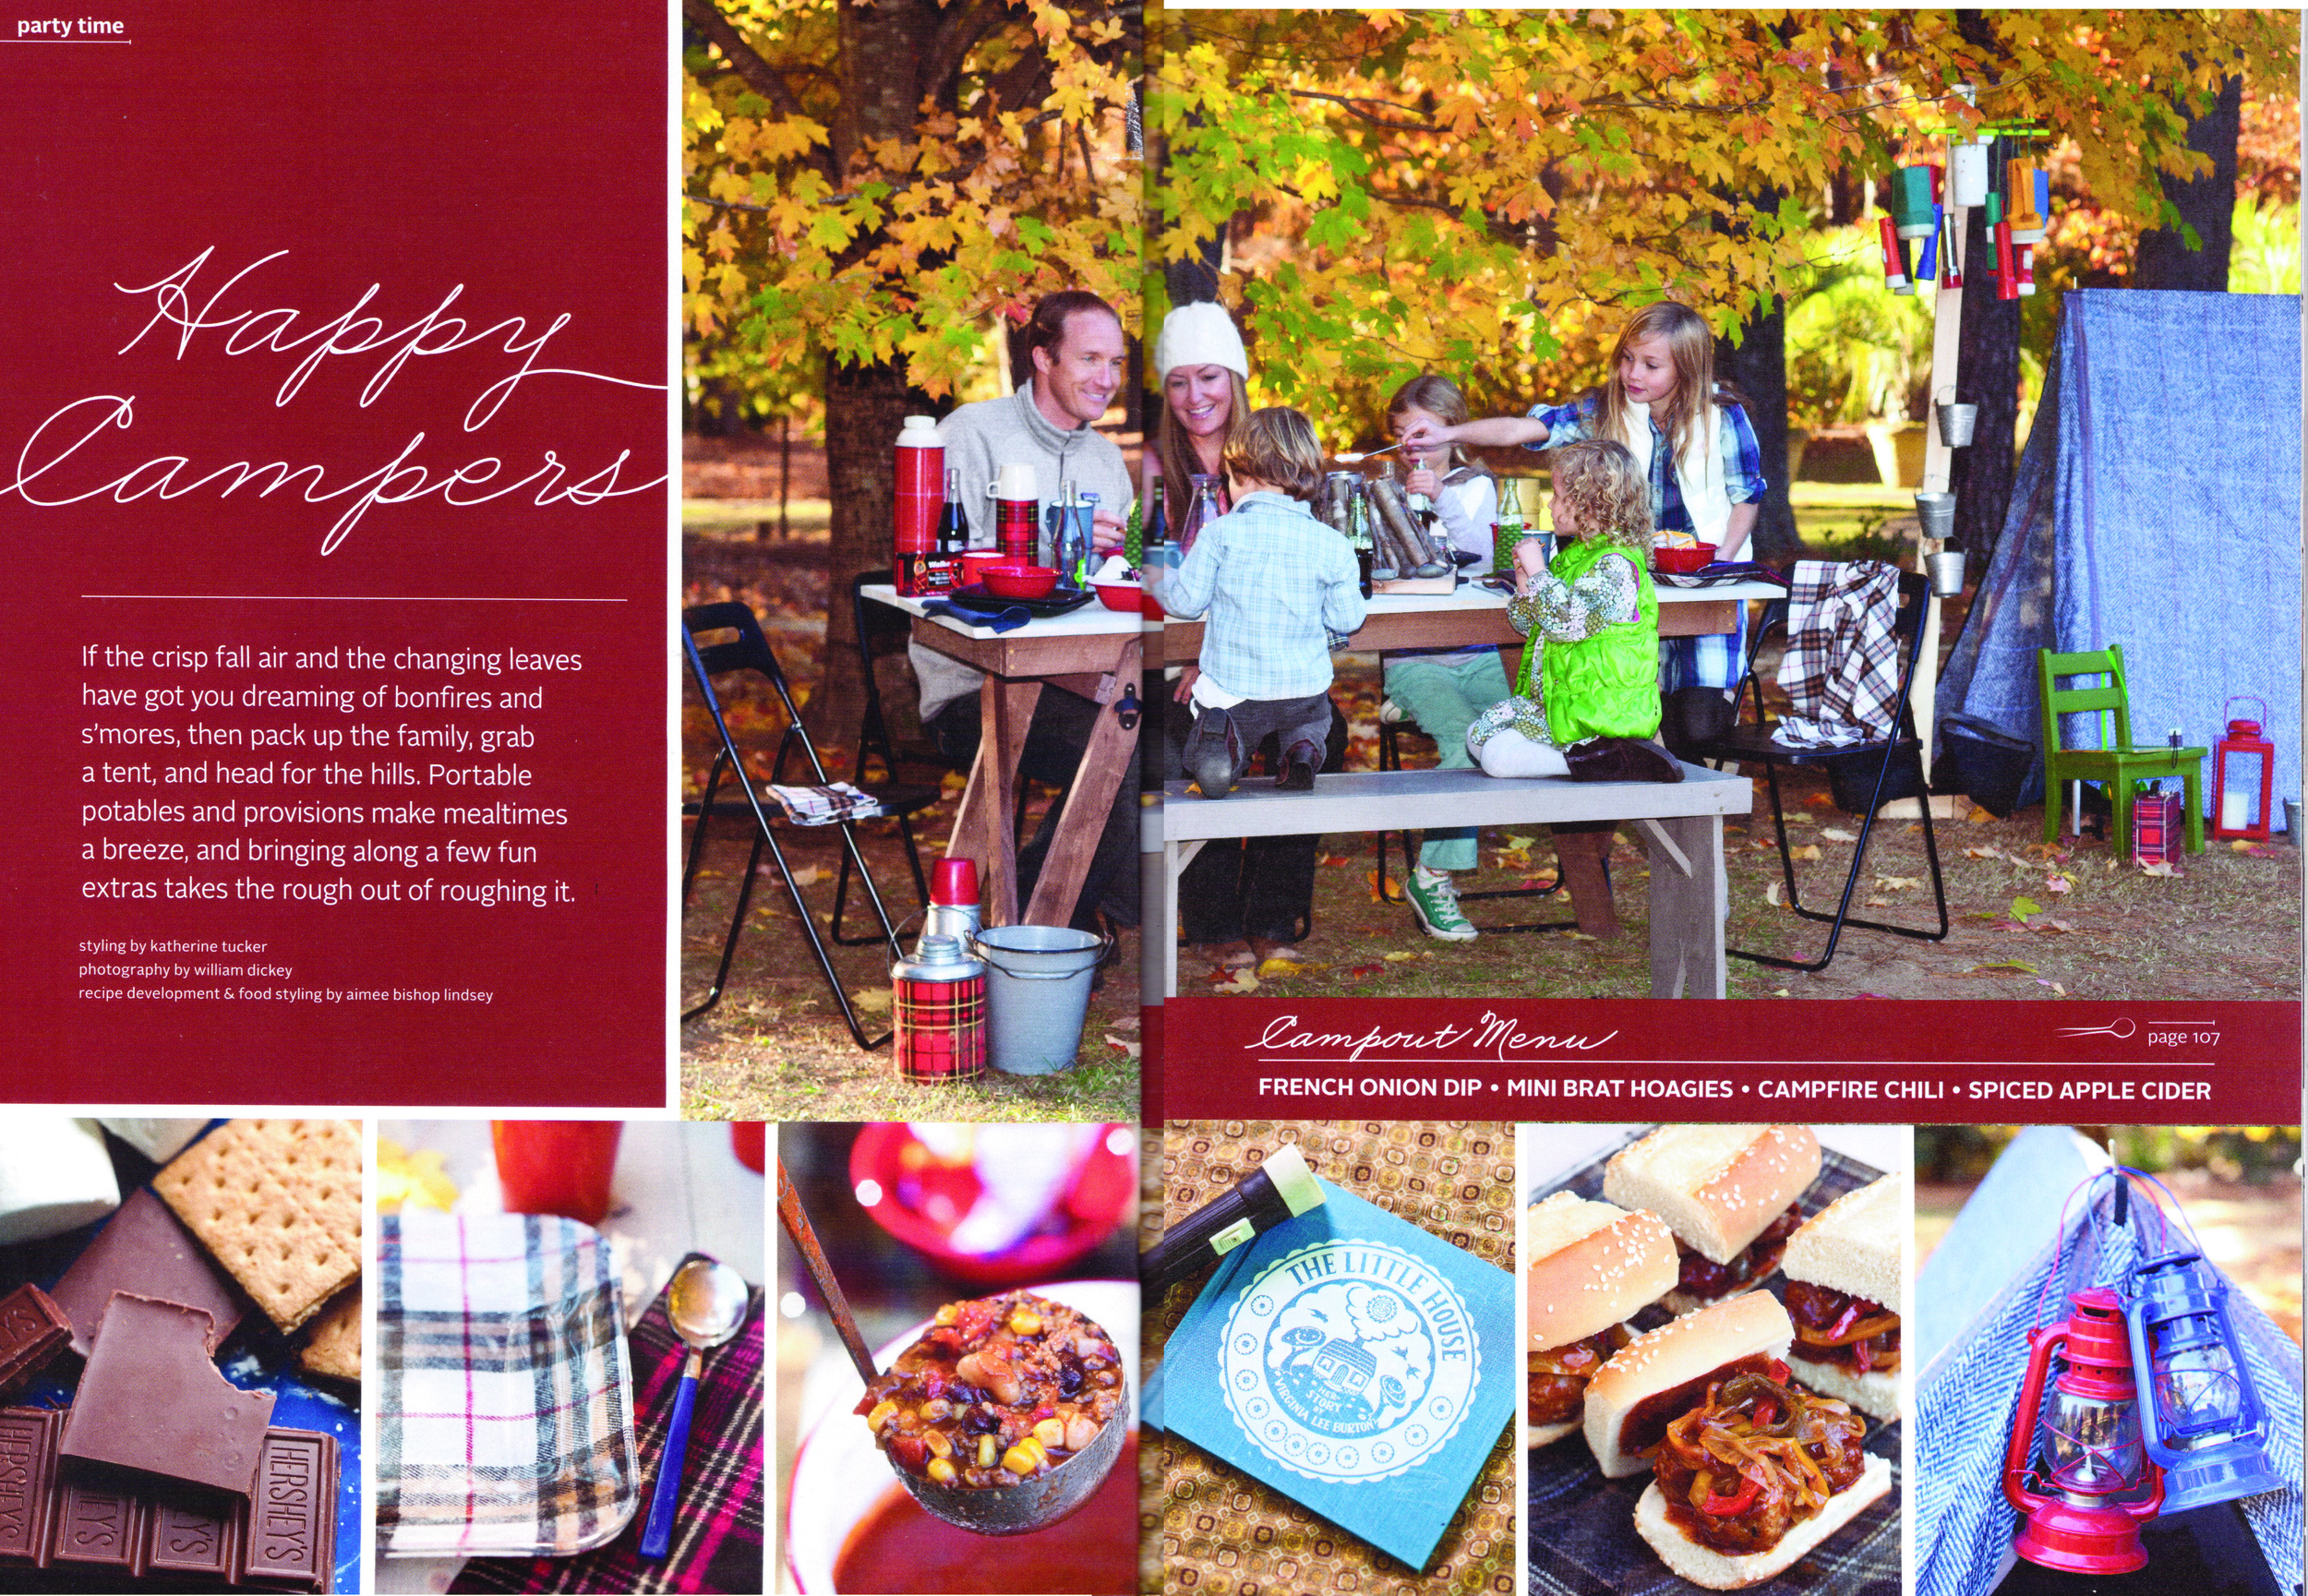
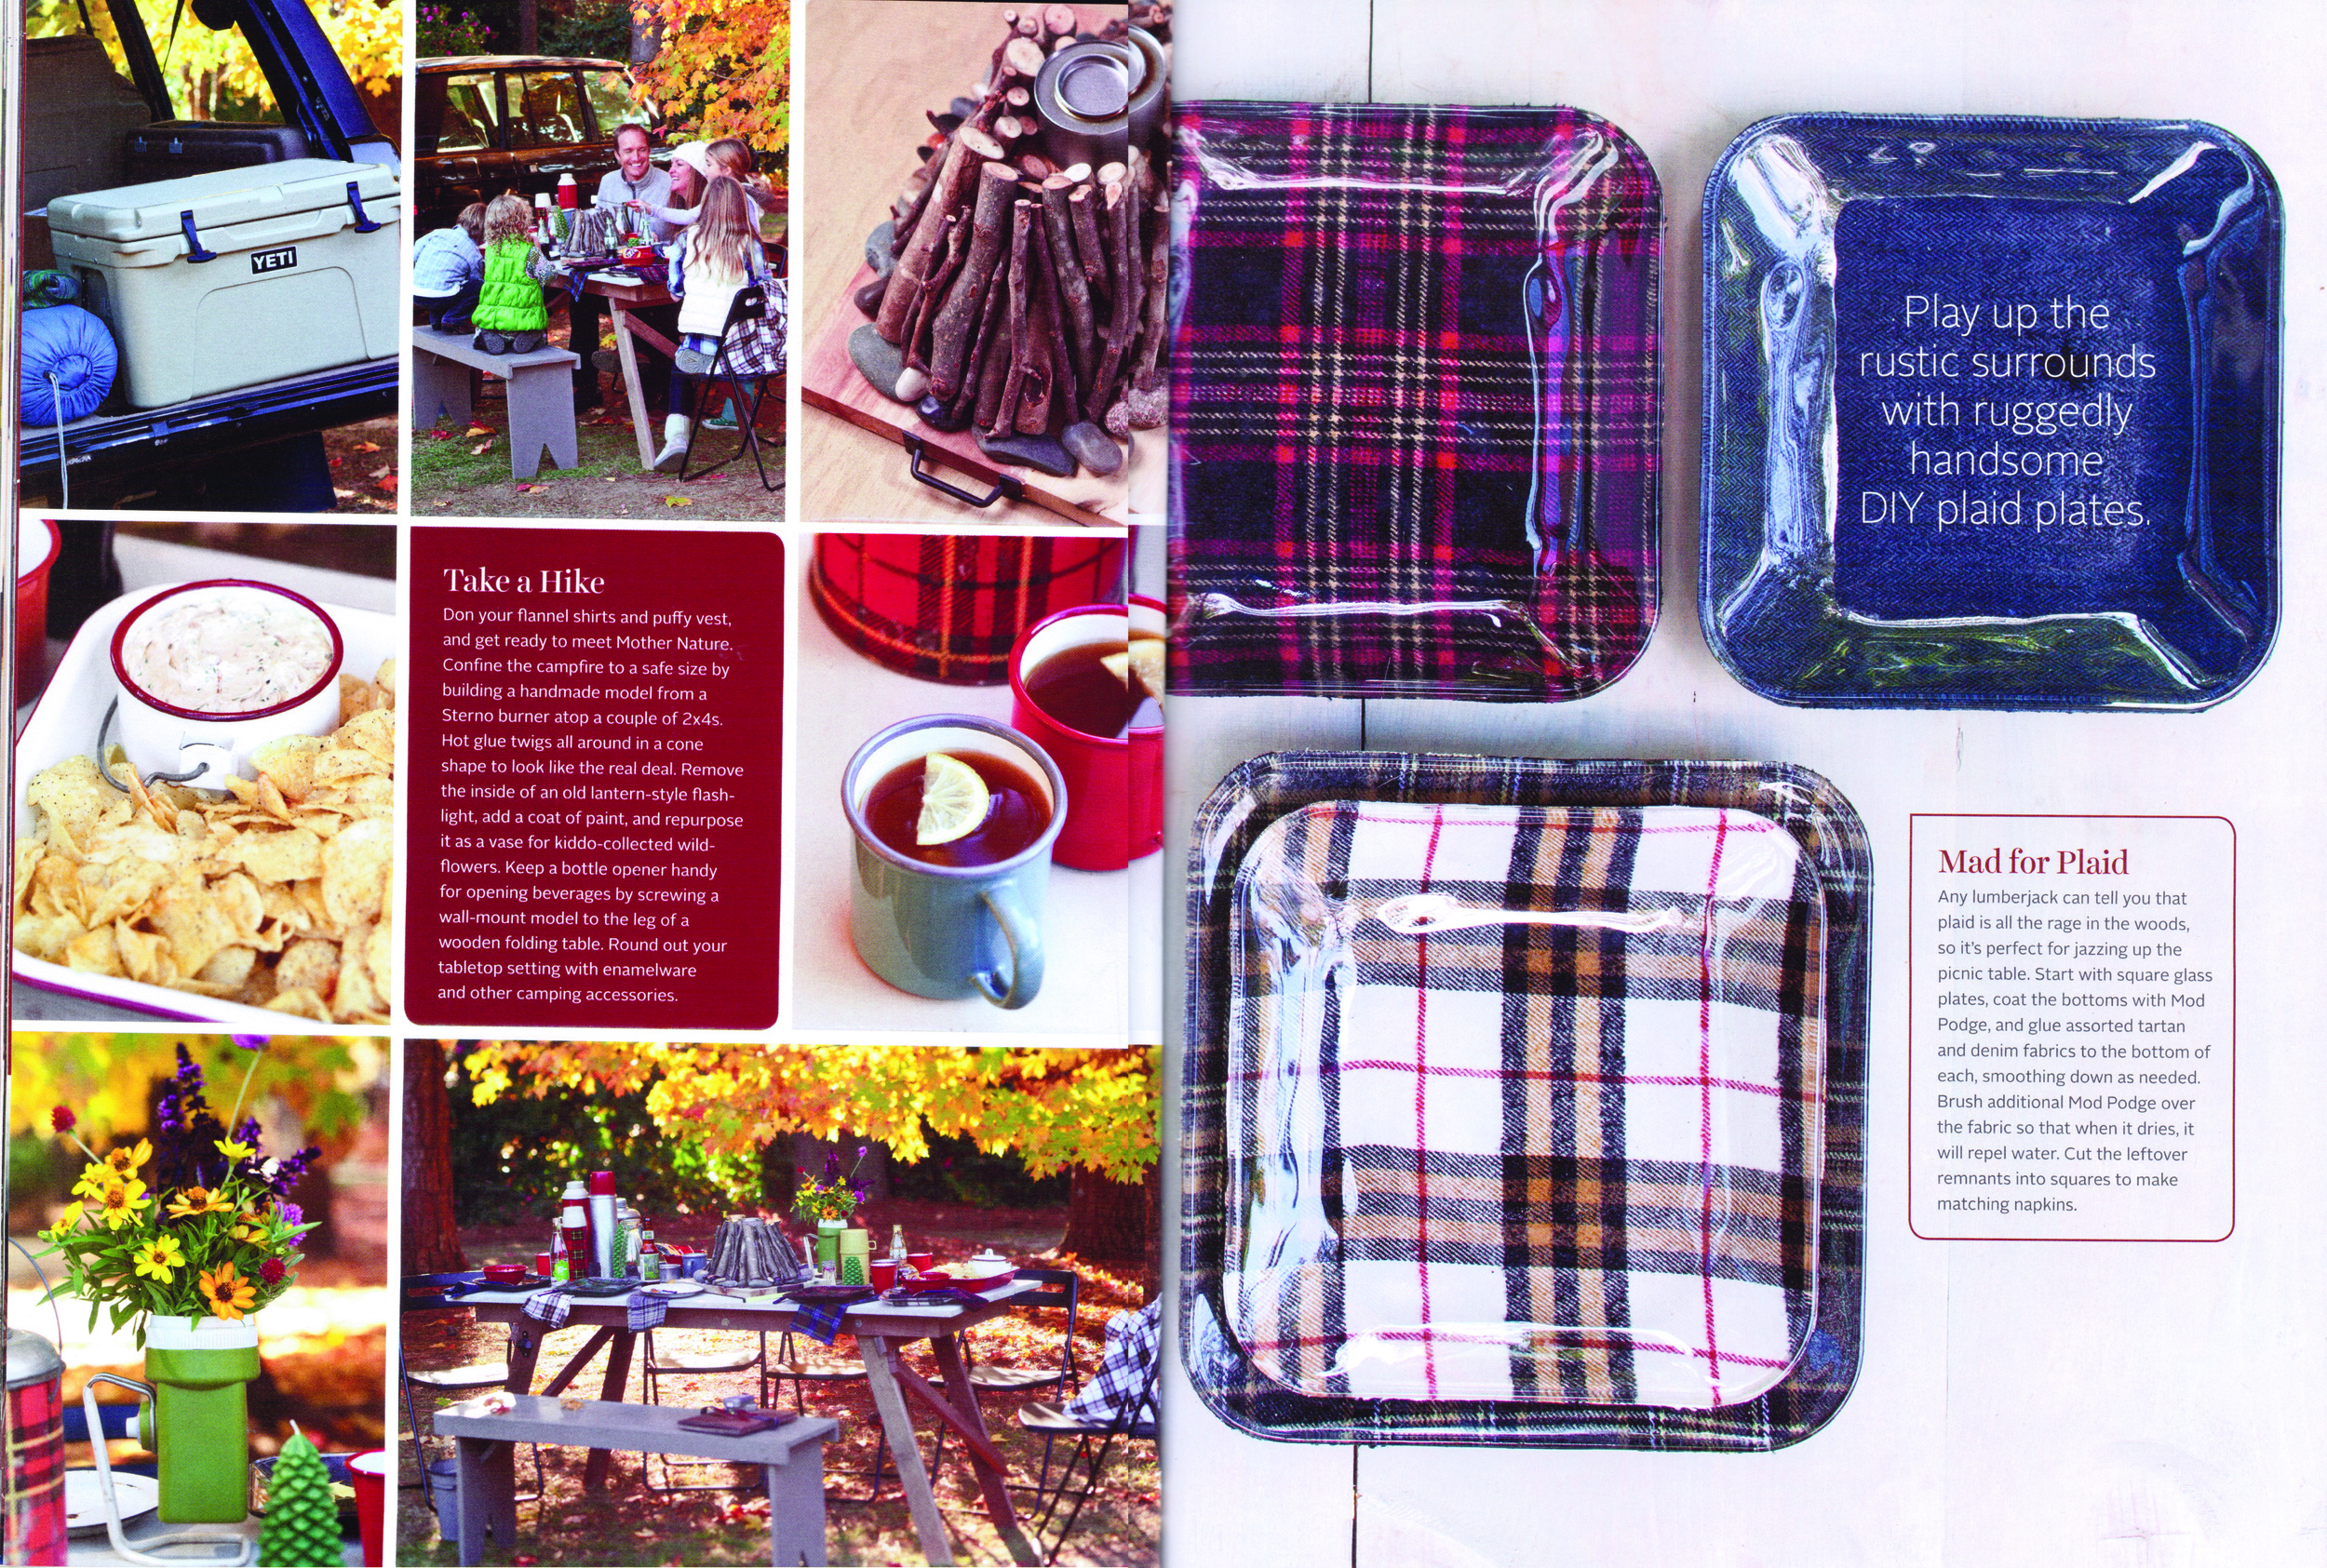
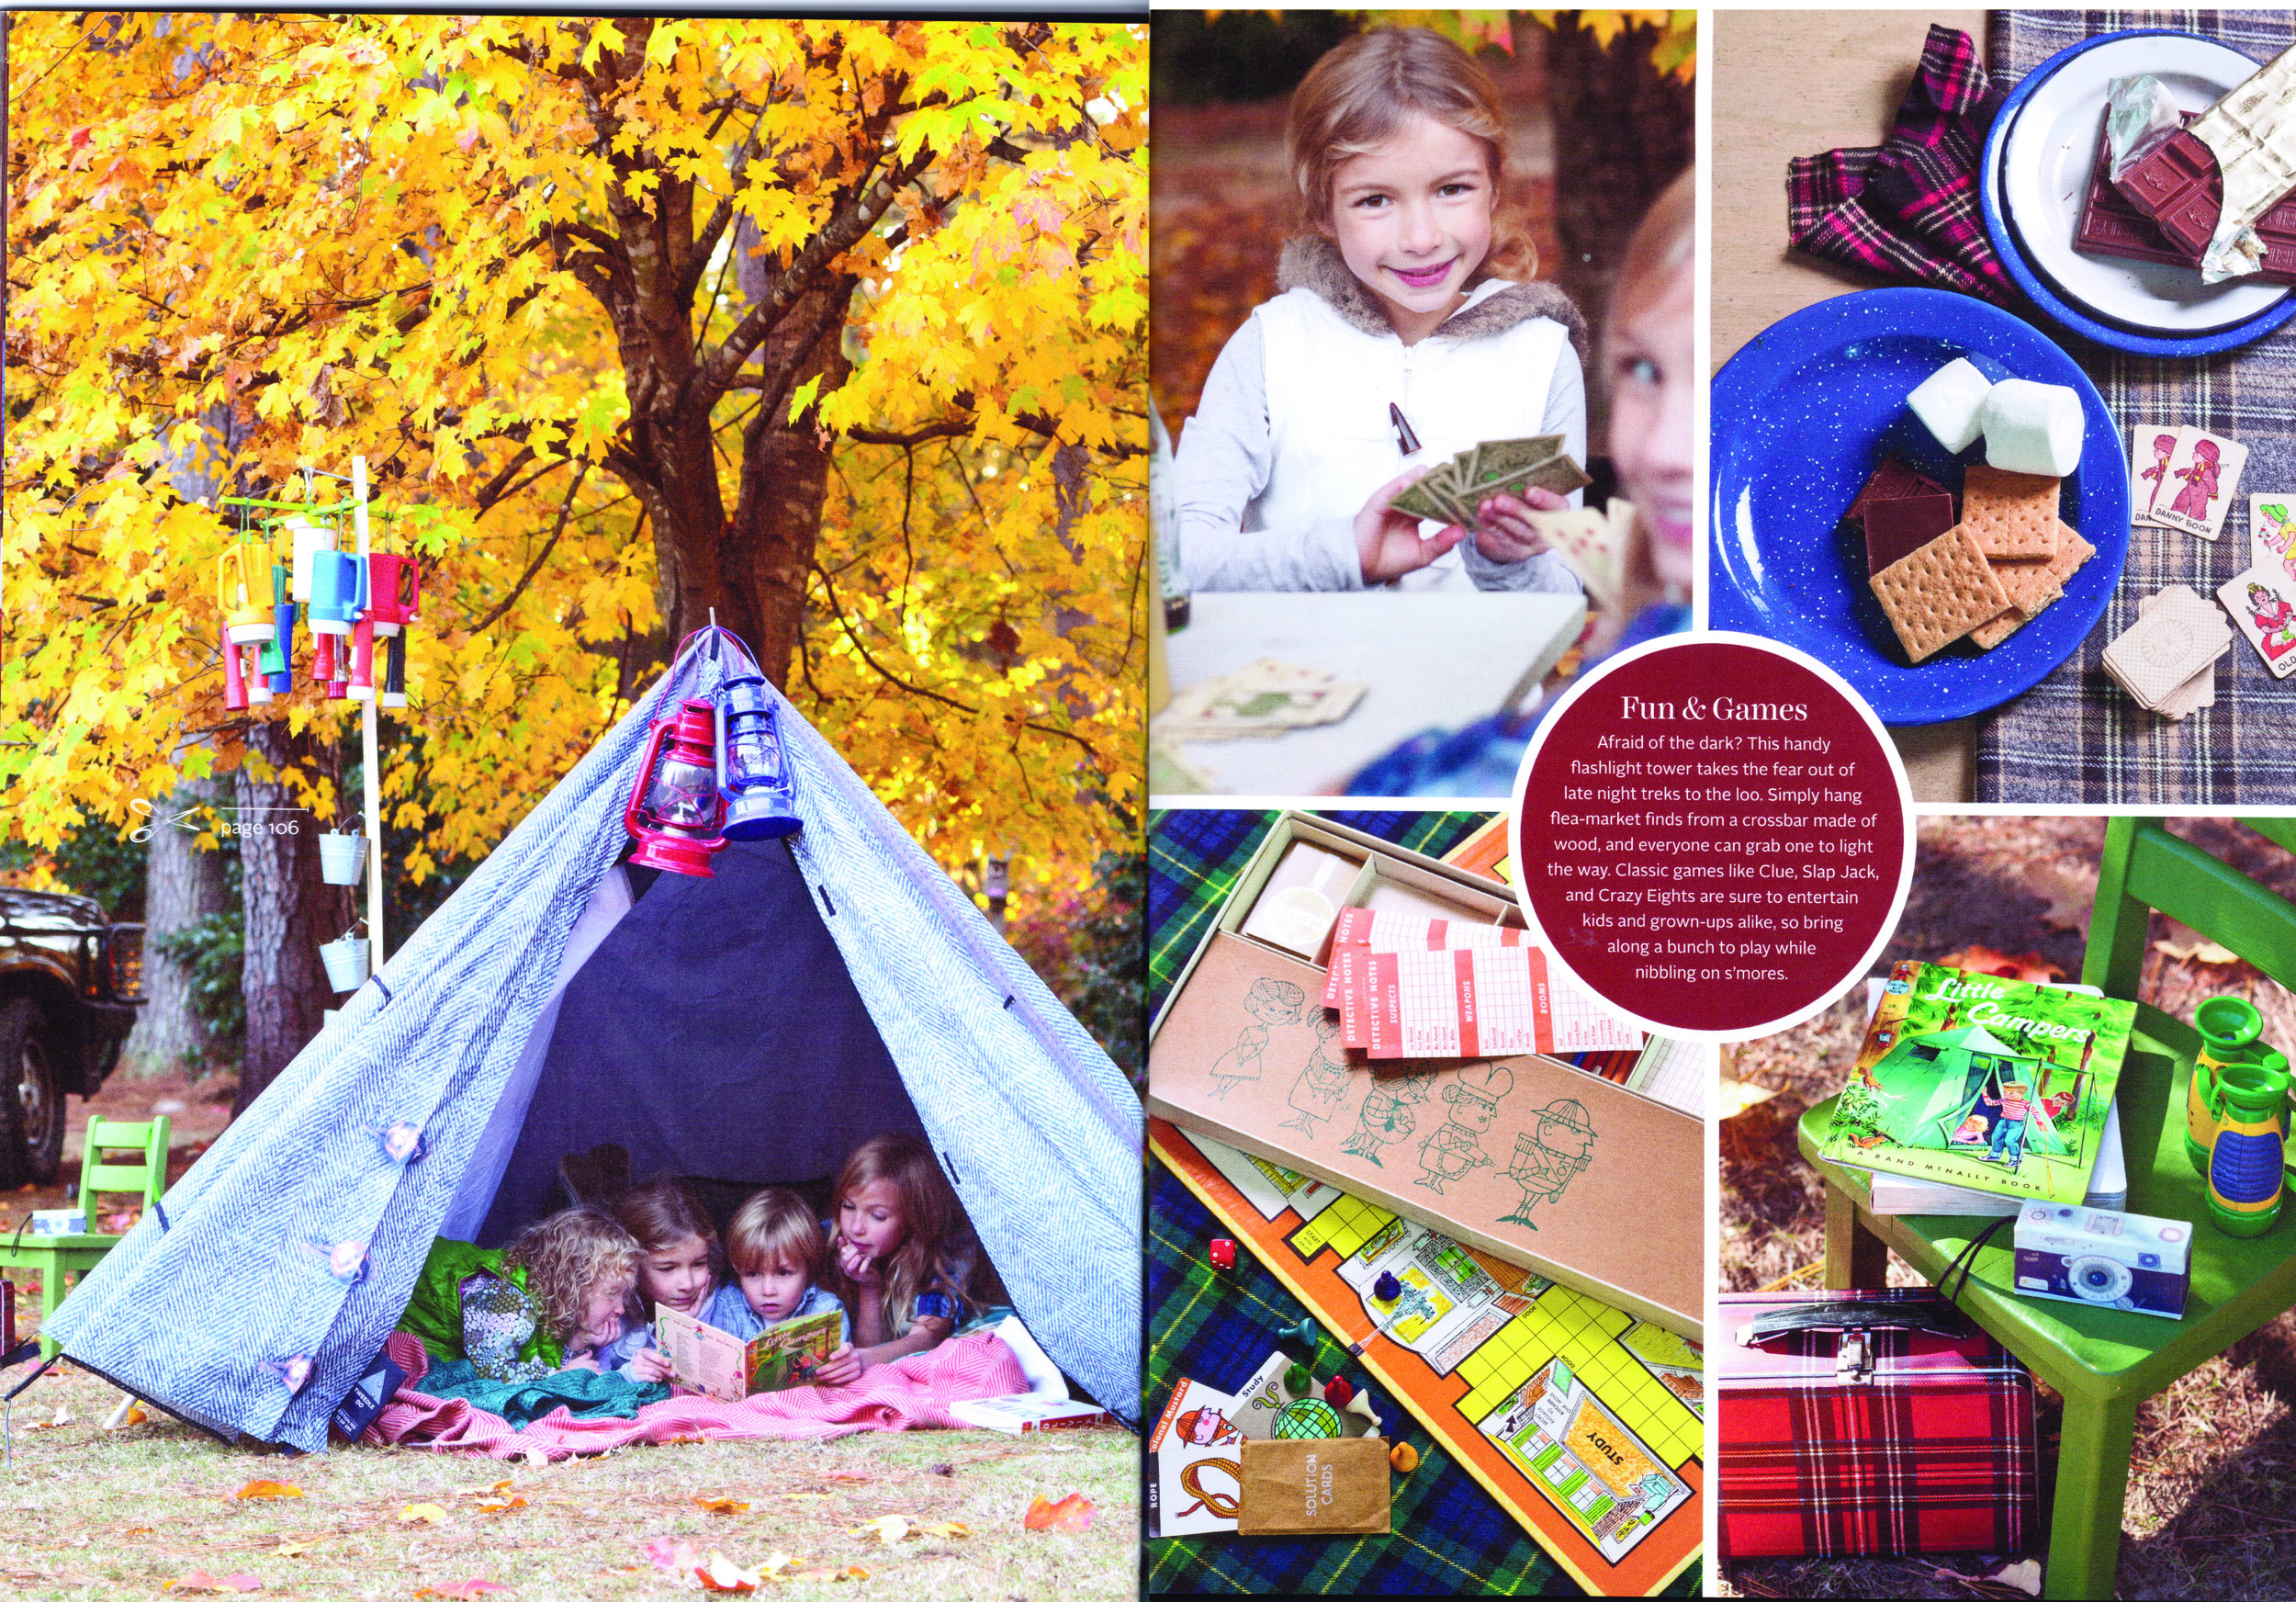
i want to share this cheerful camping story i produced and styled a couple years ago. soooo many fun projects, products, and talent for this one, the thought of it makes me want to brave the cold and do it again!
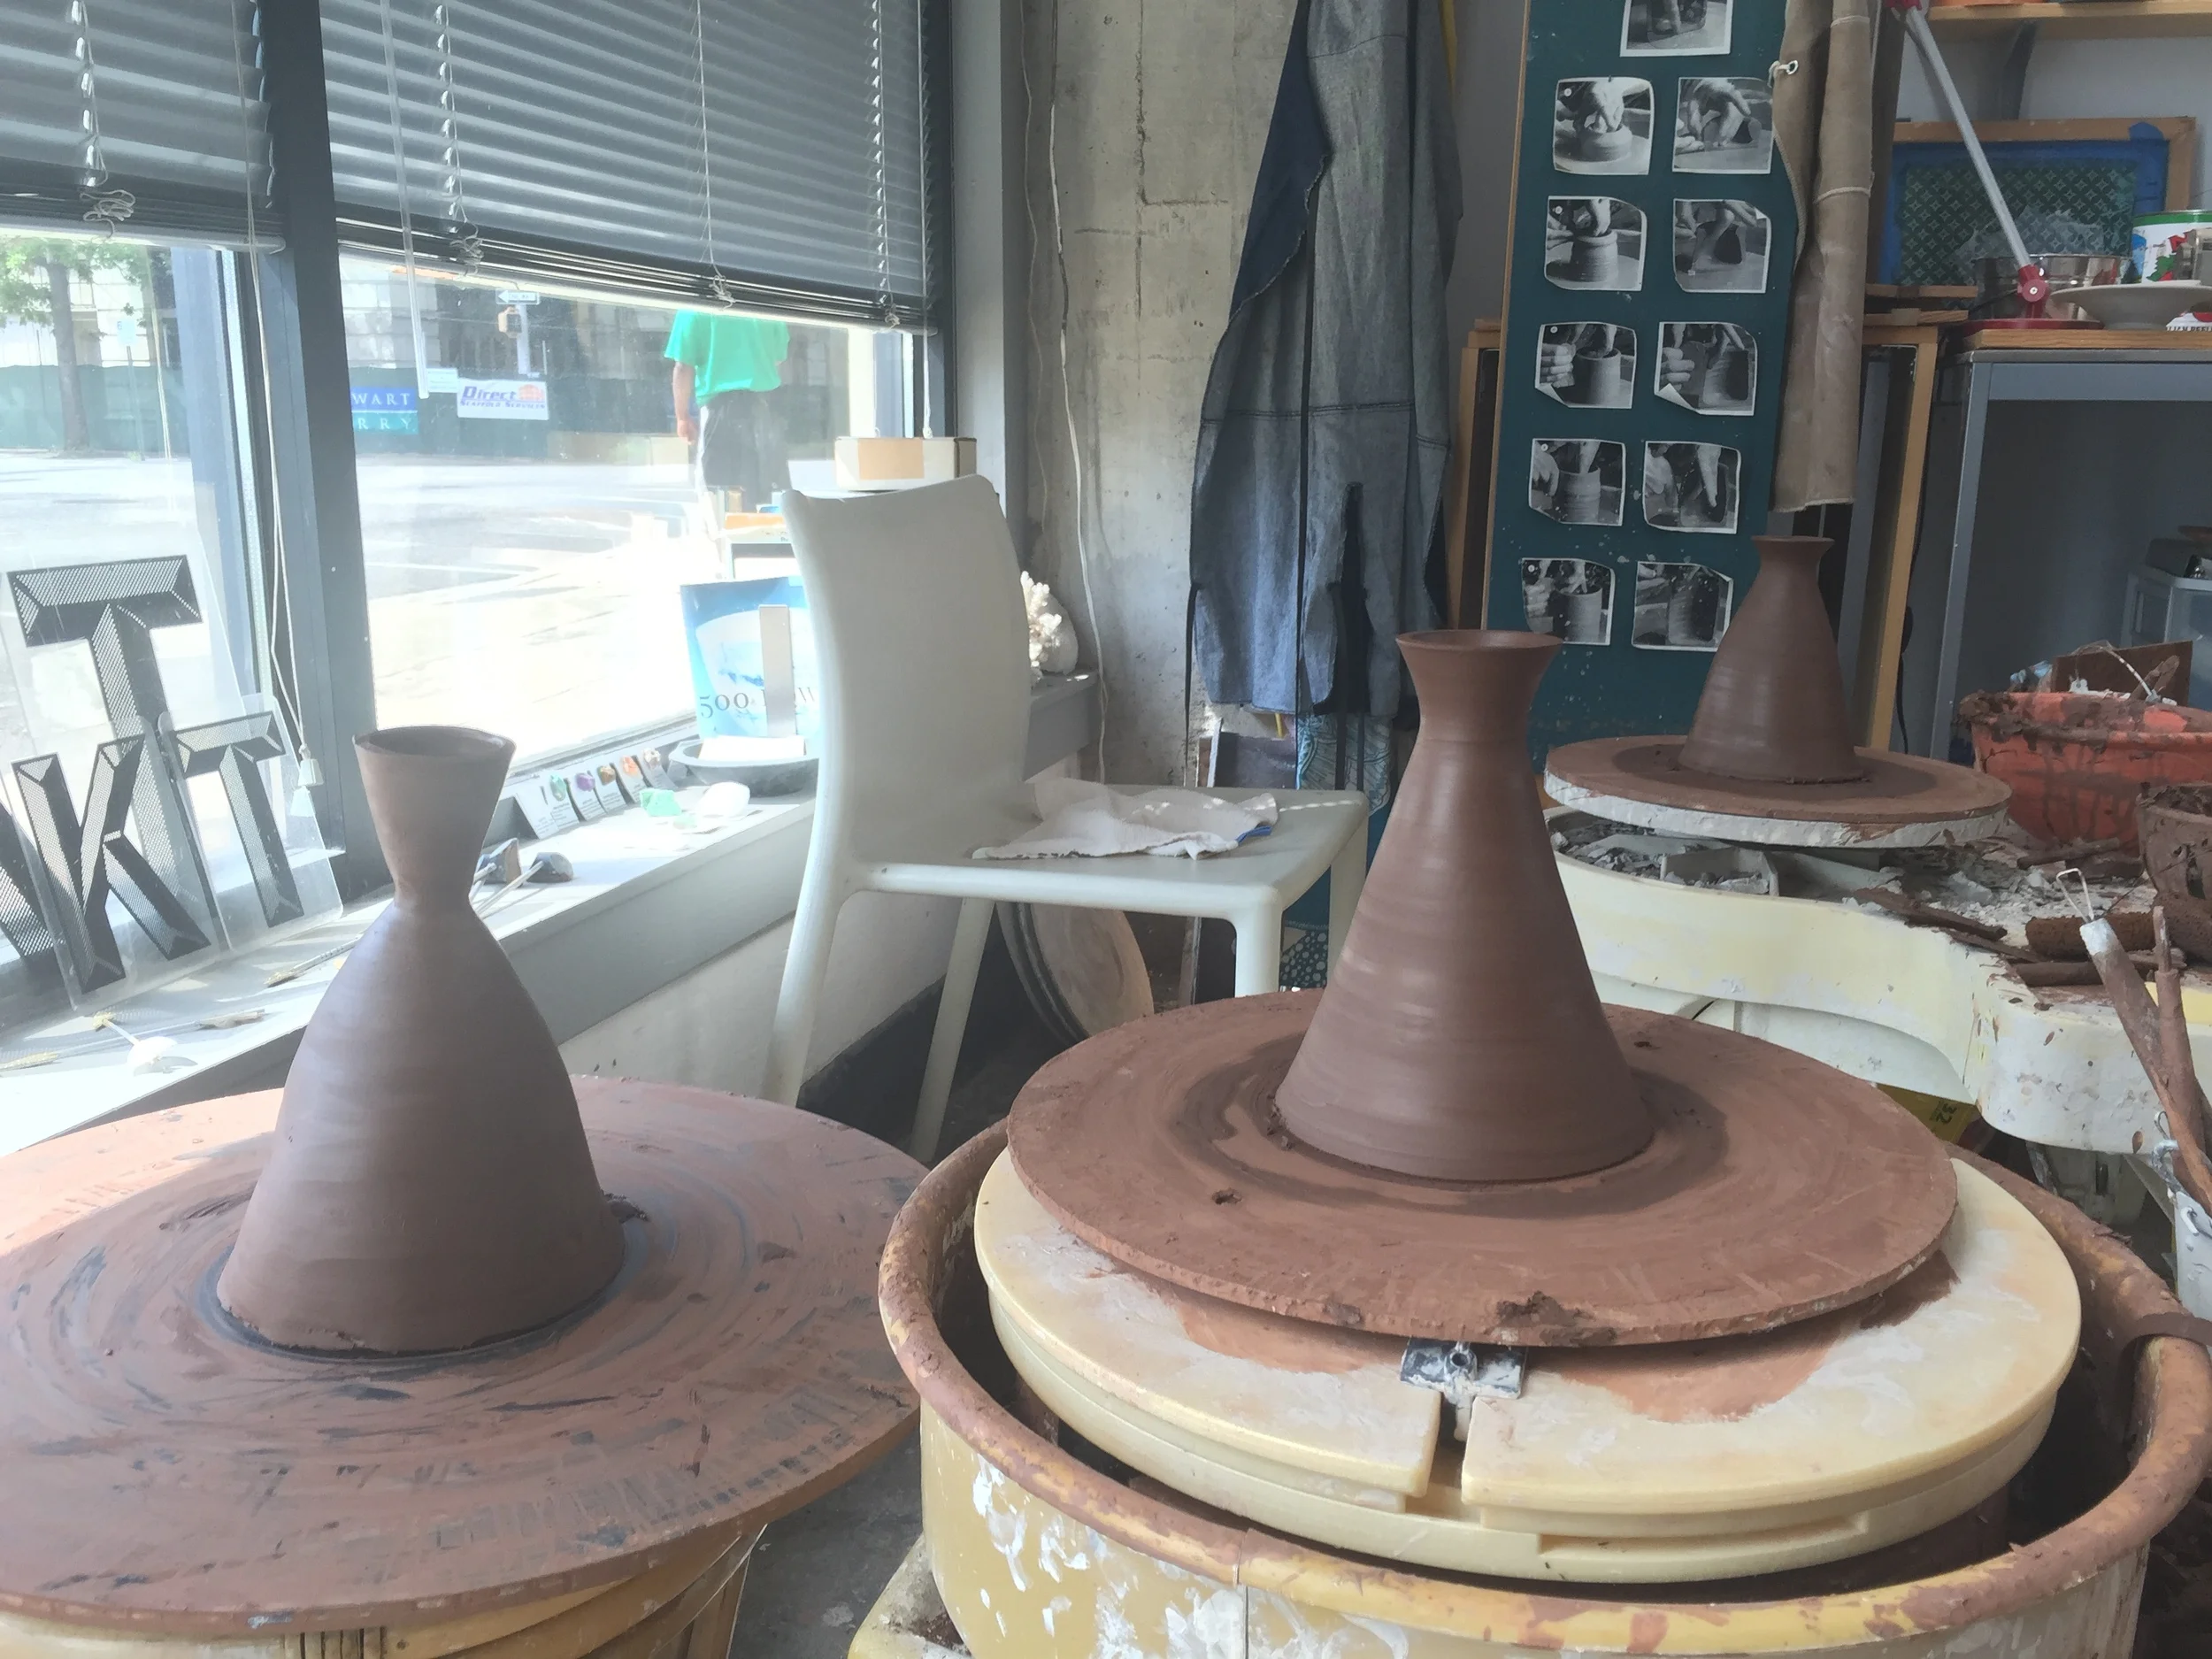
i finally found the time to start on my pendant lamps. i hope to someday have them available for purchase on my website. stay tuned if you are interested!
I had the chance to style a few drinks at Time Inc Digital studios for the amazing Whitney Wright & Southern Living, and believe me, we tasted them and they are delishhh.
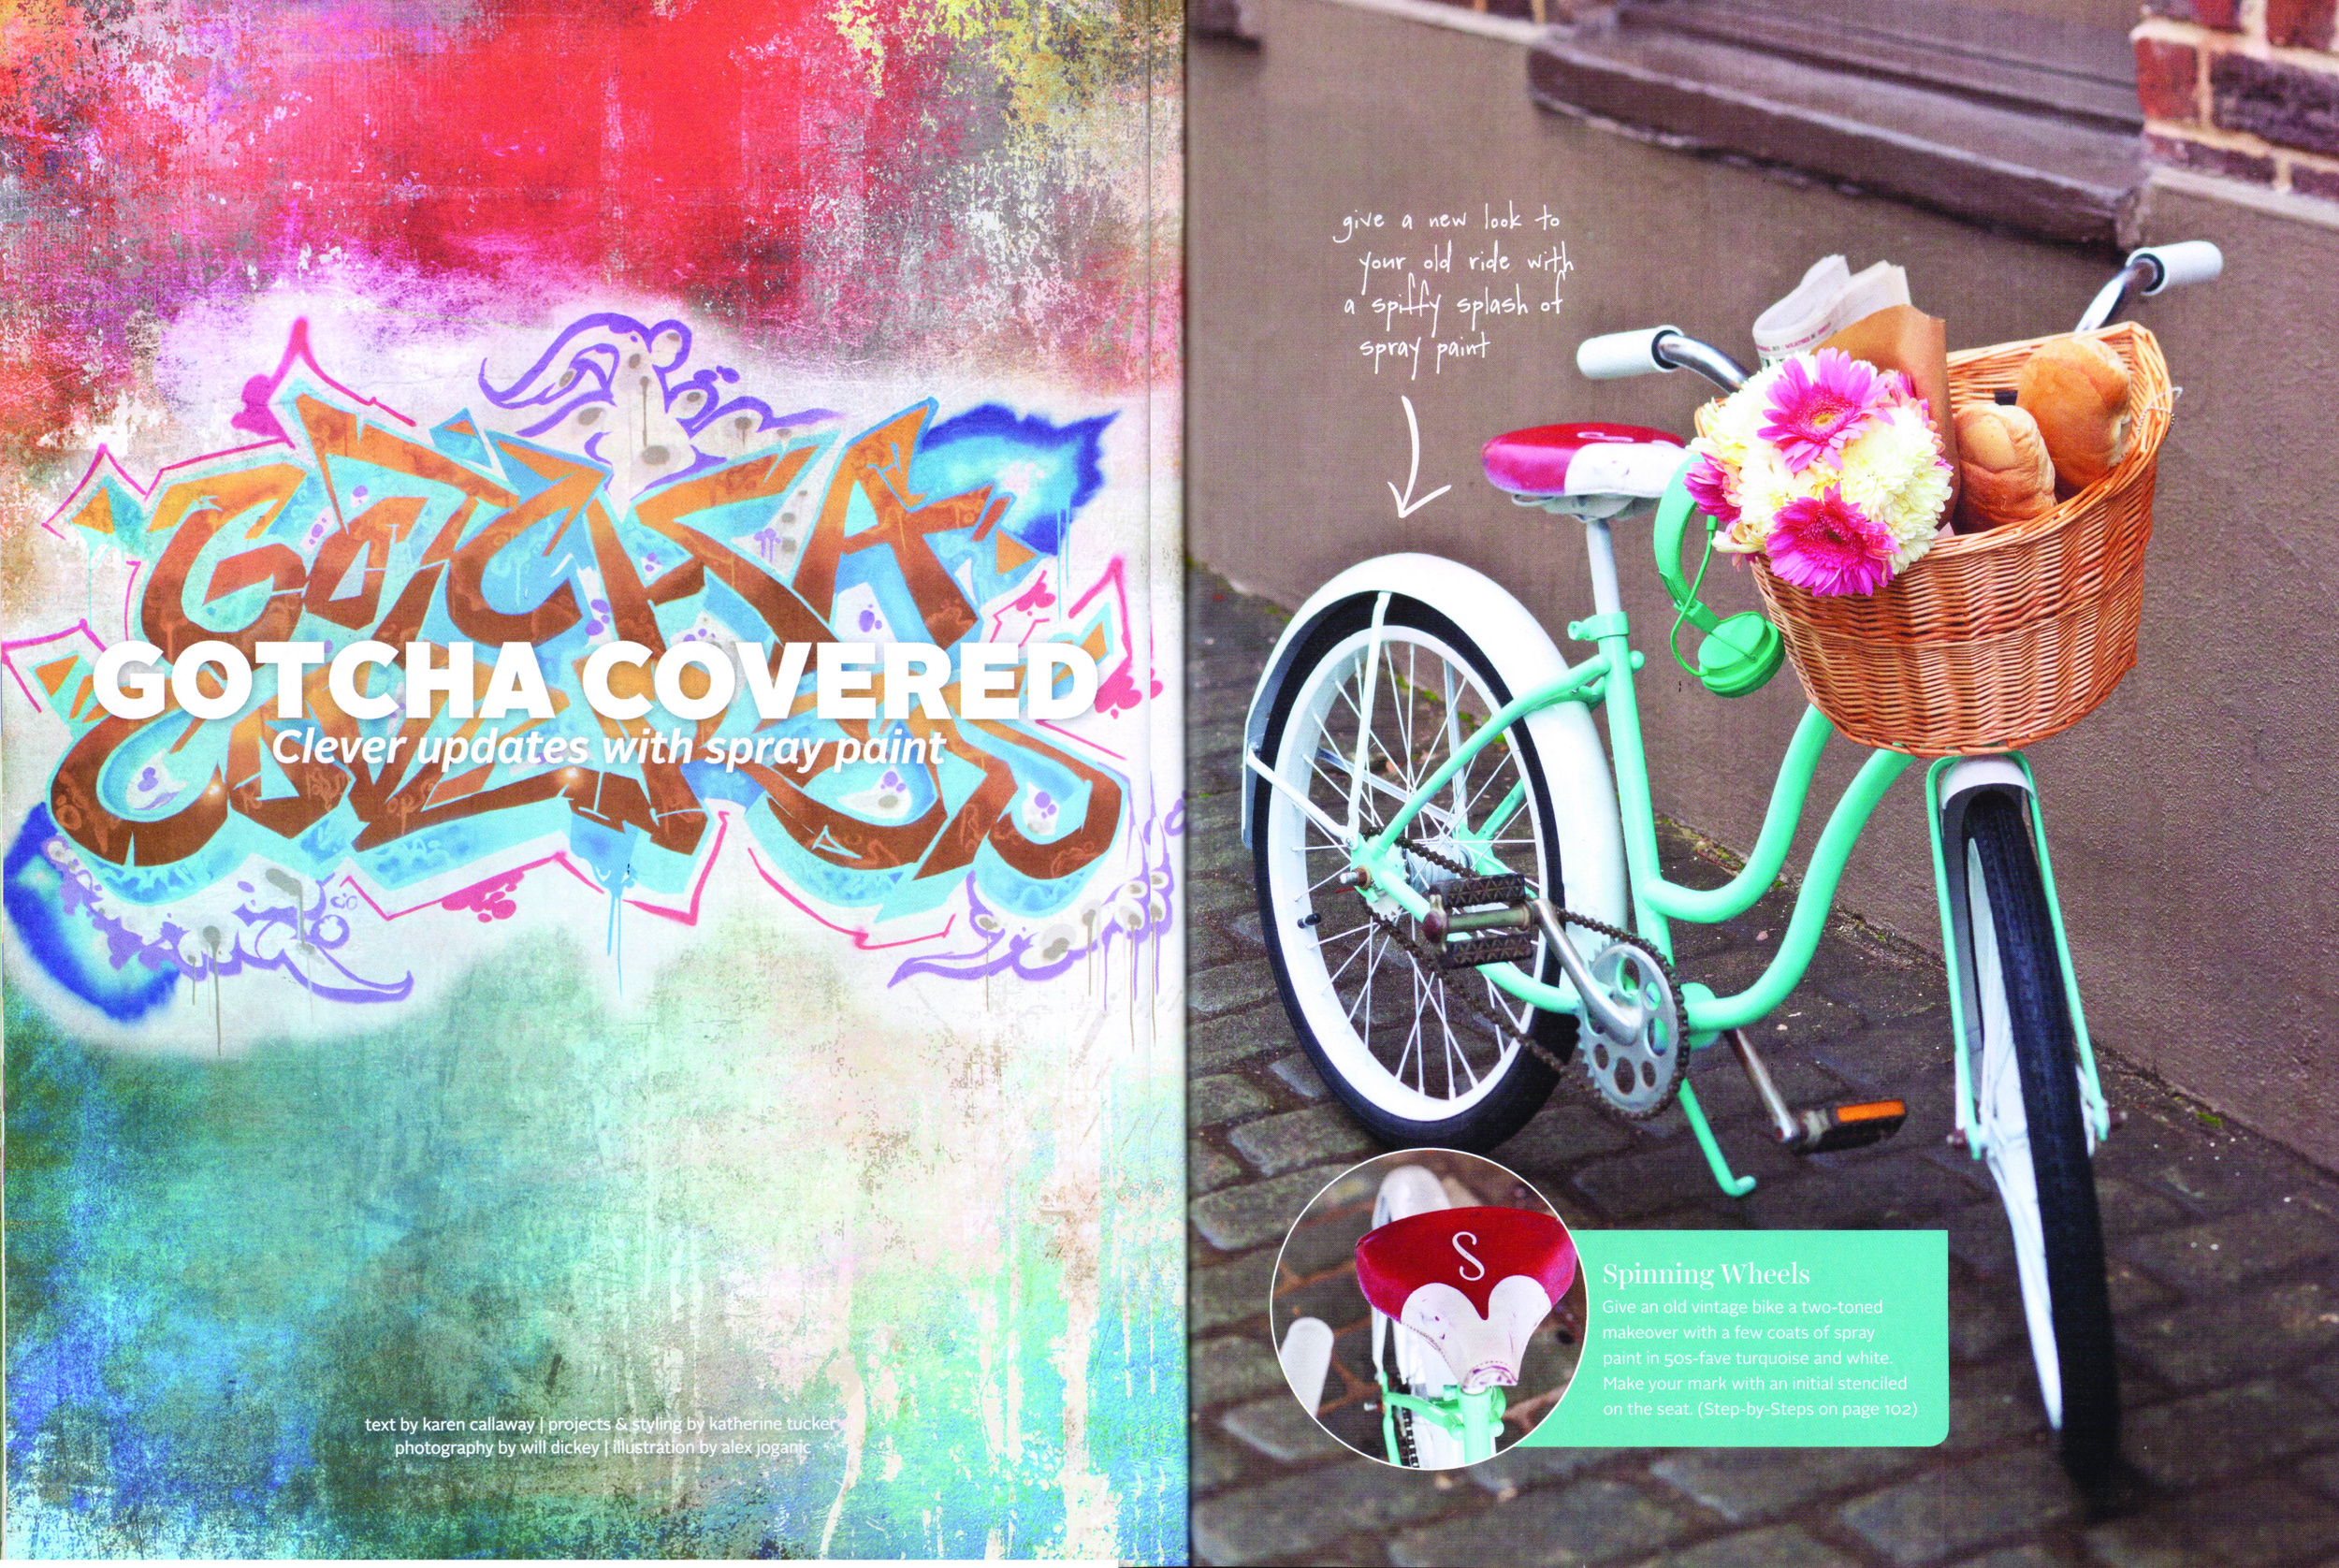
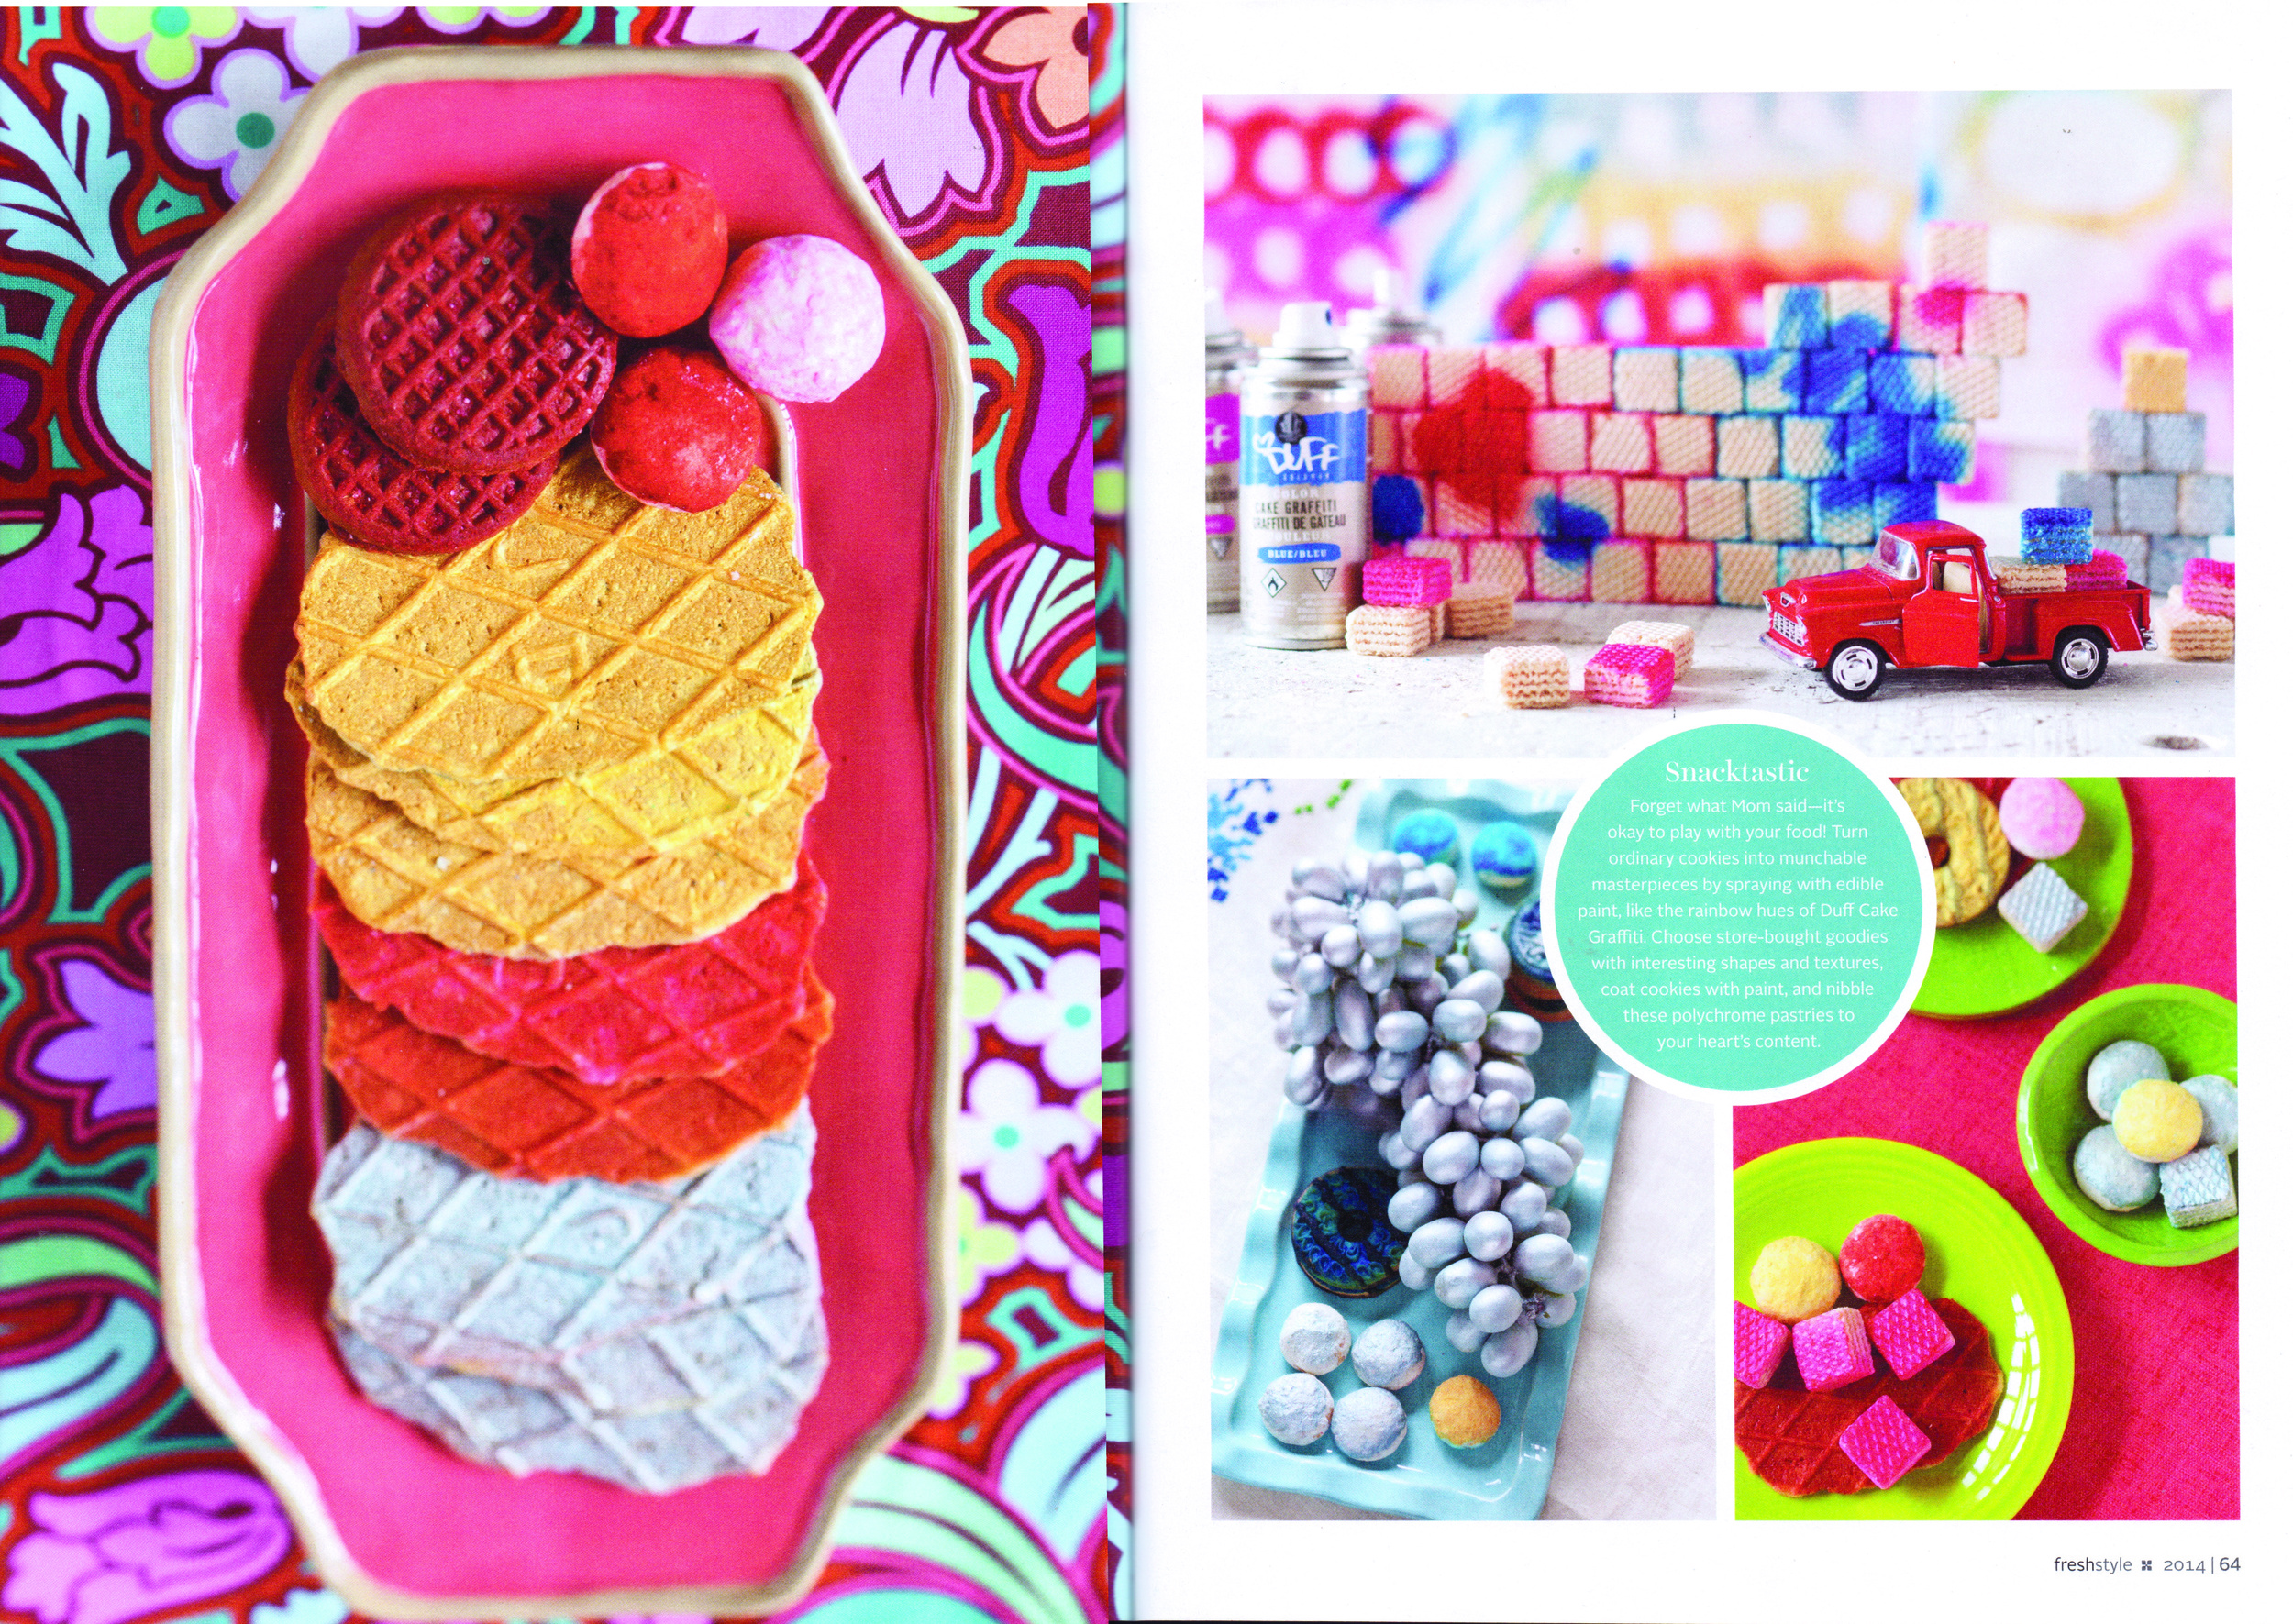
who doesn't love a good spray paint story? this one was surprisingly enjoyable tp produce and style. just goes to show, you can reinvent anything in minutes with spray paint.

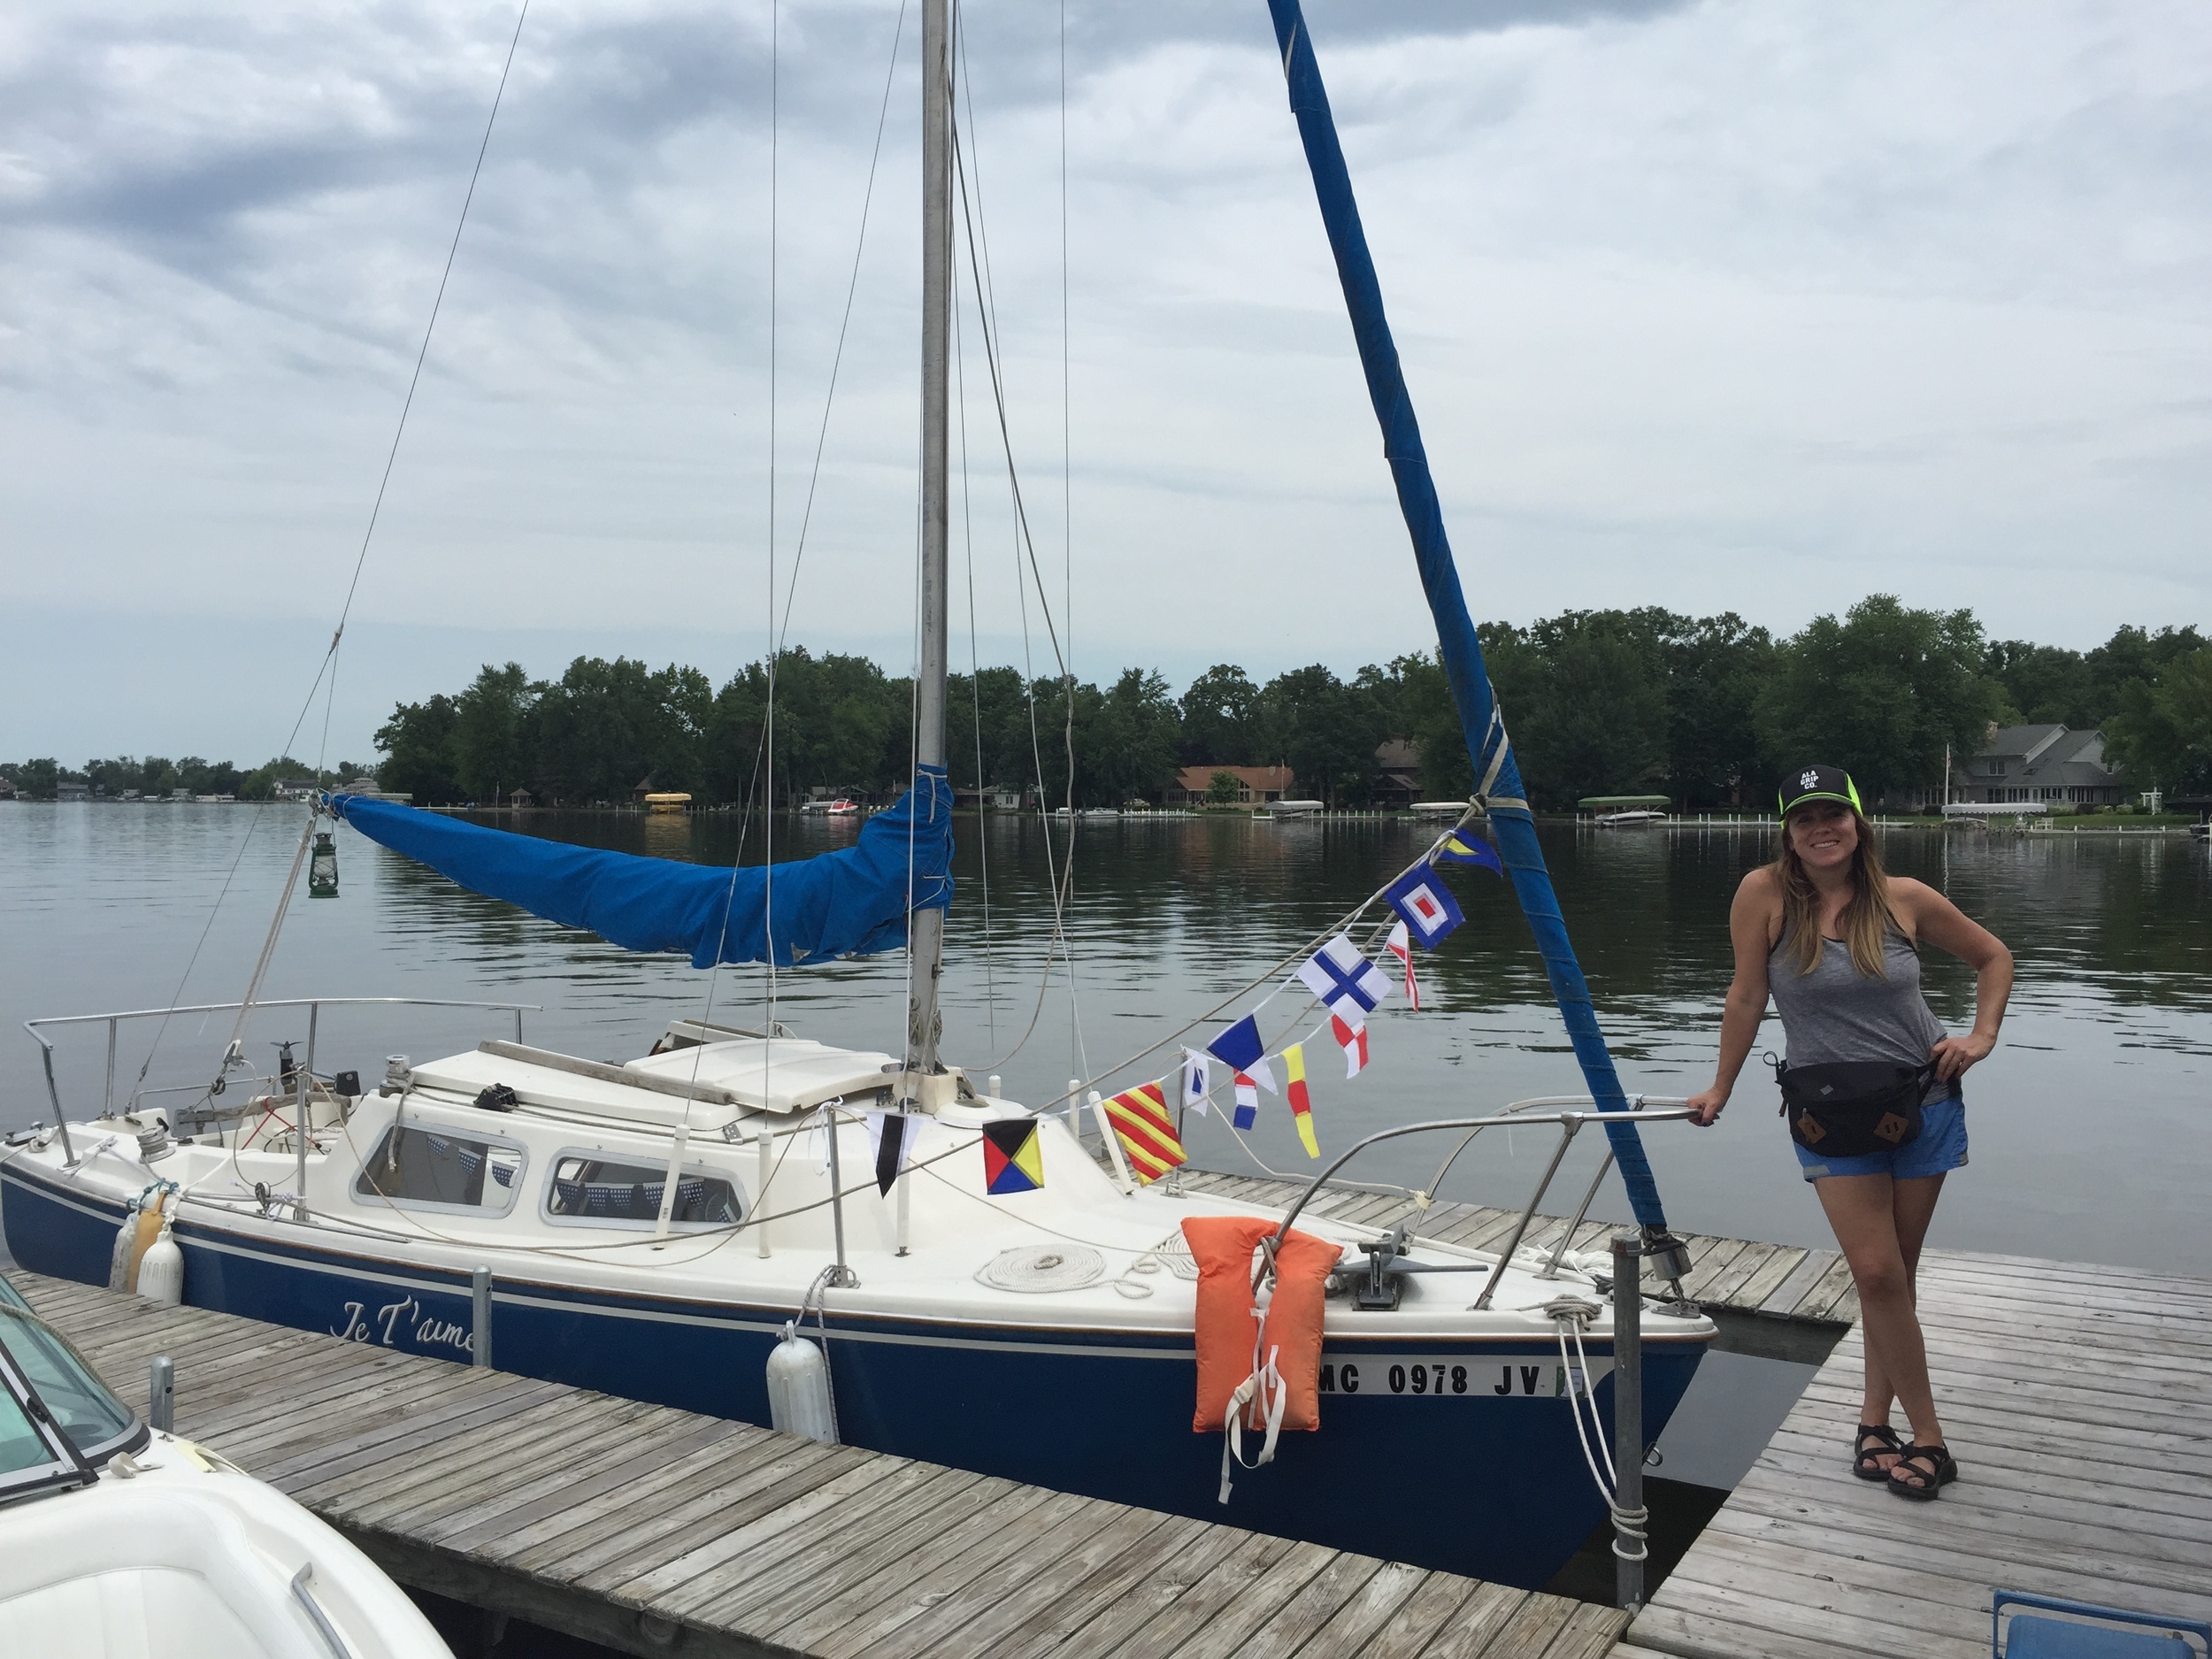
i really enjoyed spending the summer in Indiana working on a little love story called Nouvelle Vie. i grew up sailing when i was younger, so it was a real treat to discover one of the main sets// characters in the movie was a sailboat & then there was the opportunity to work with Terry O'Quinn "John Lock" which was another treat as welllllll. movie is set to release in april 2016.
i love styling for the folks at Time Inc., & MyRecipes especially when it's classic recipes like this one, because i learn so much watching the demonstrations. this dessert made from fresh organic ingredients is great to make with the kiddos & ummmmmm ummmmm good.
more styling at the Time Inc Digital Studios for My Recipes today... Bread Pudding!!!
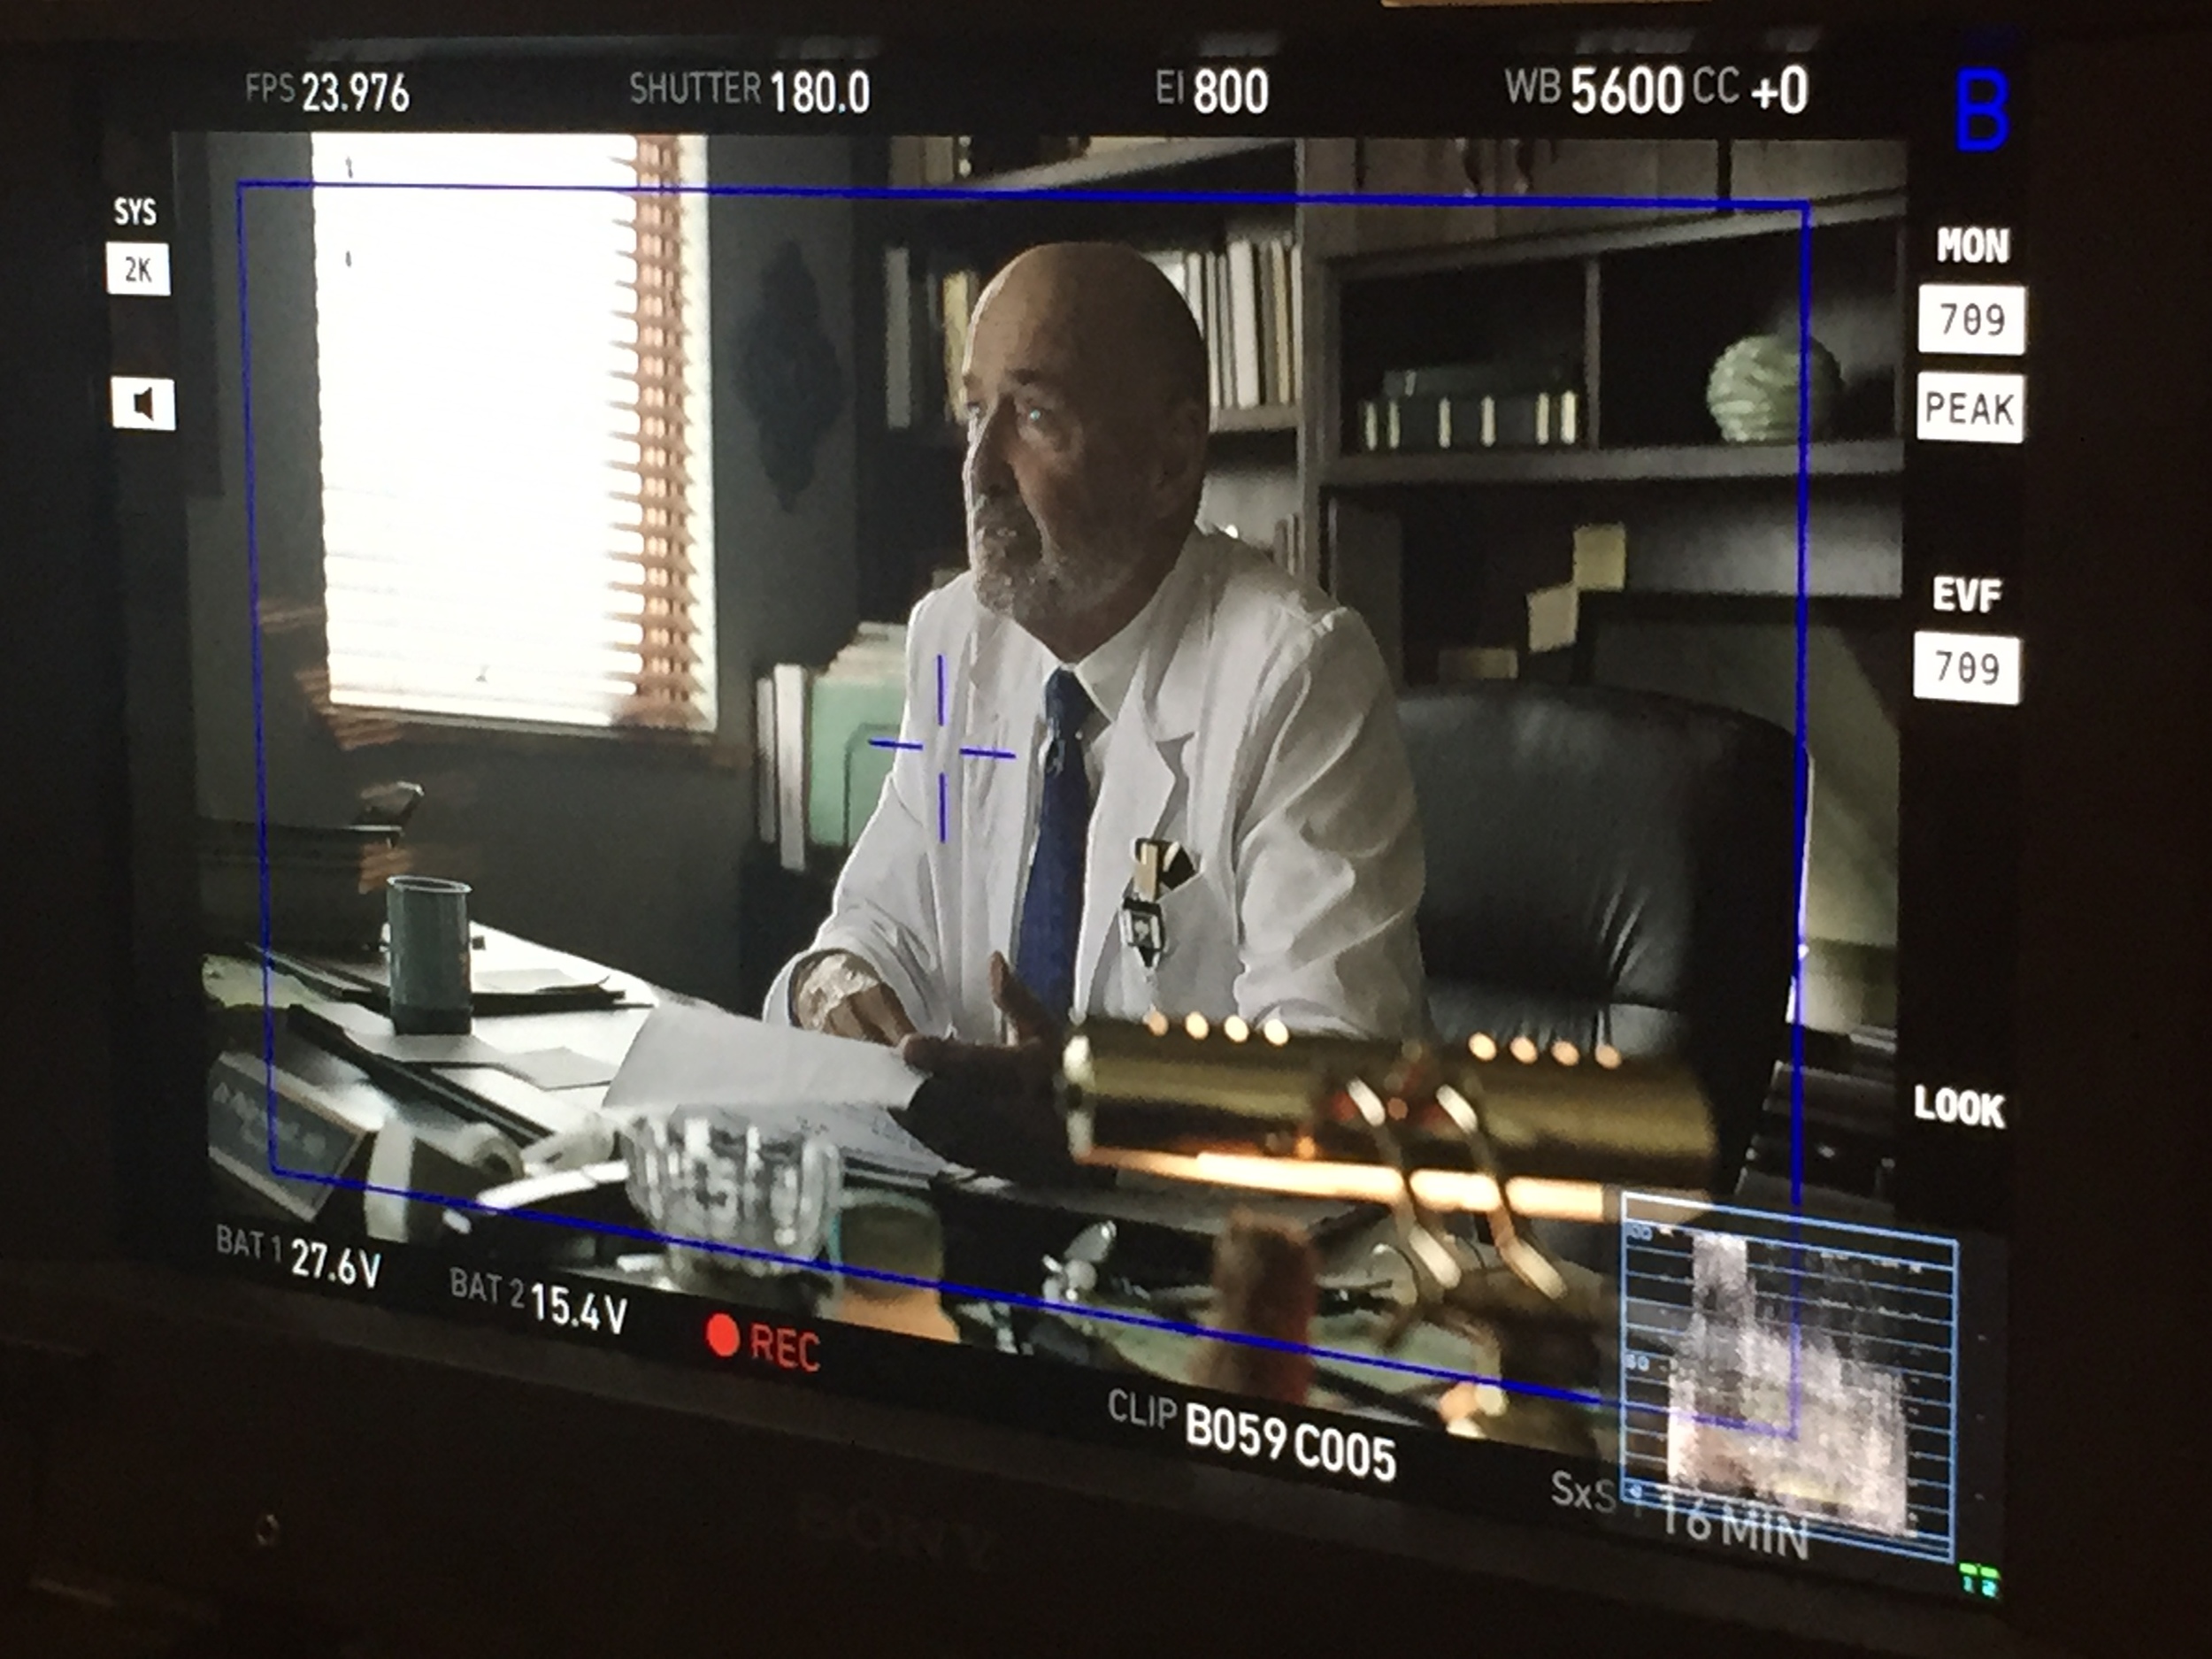
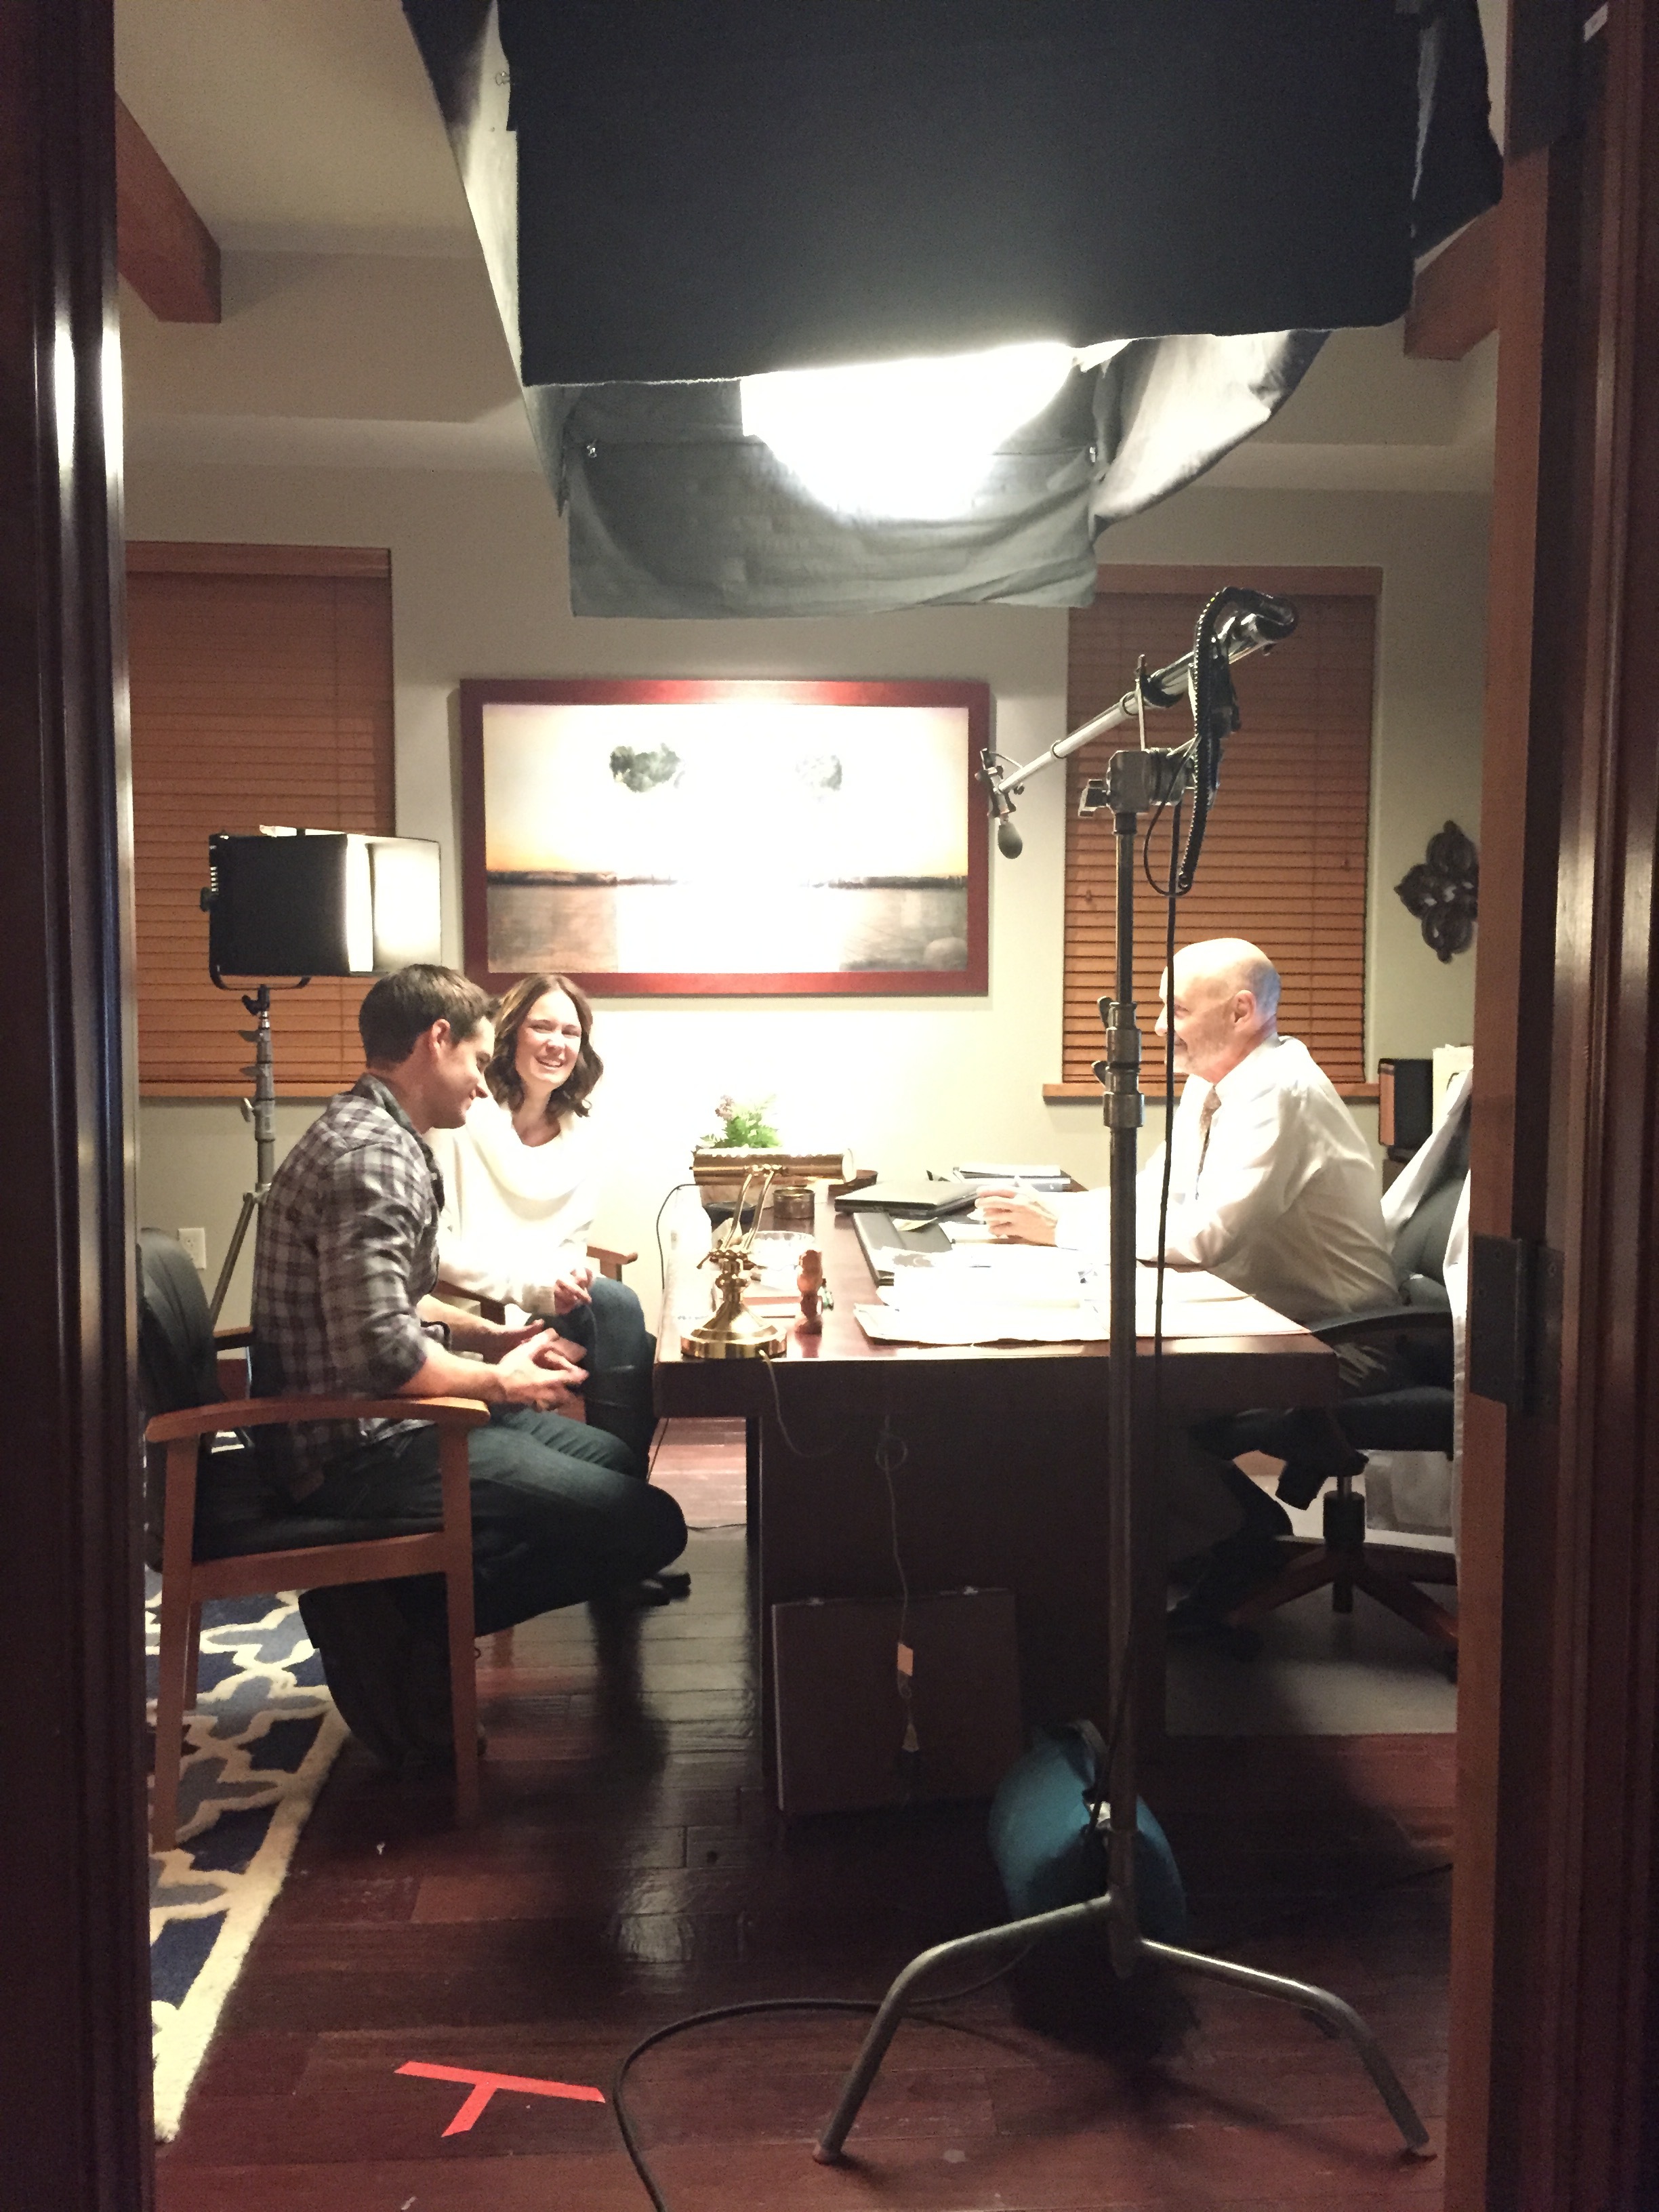
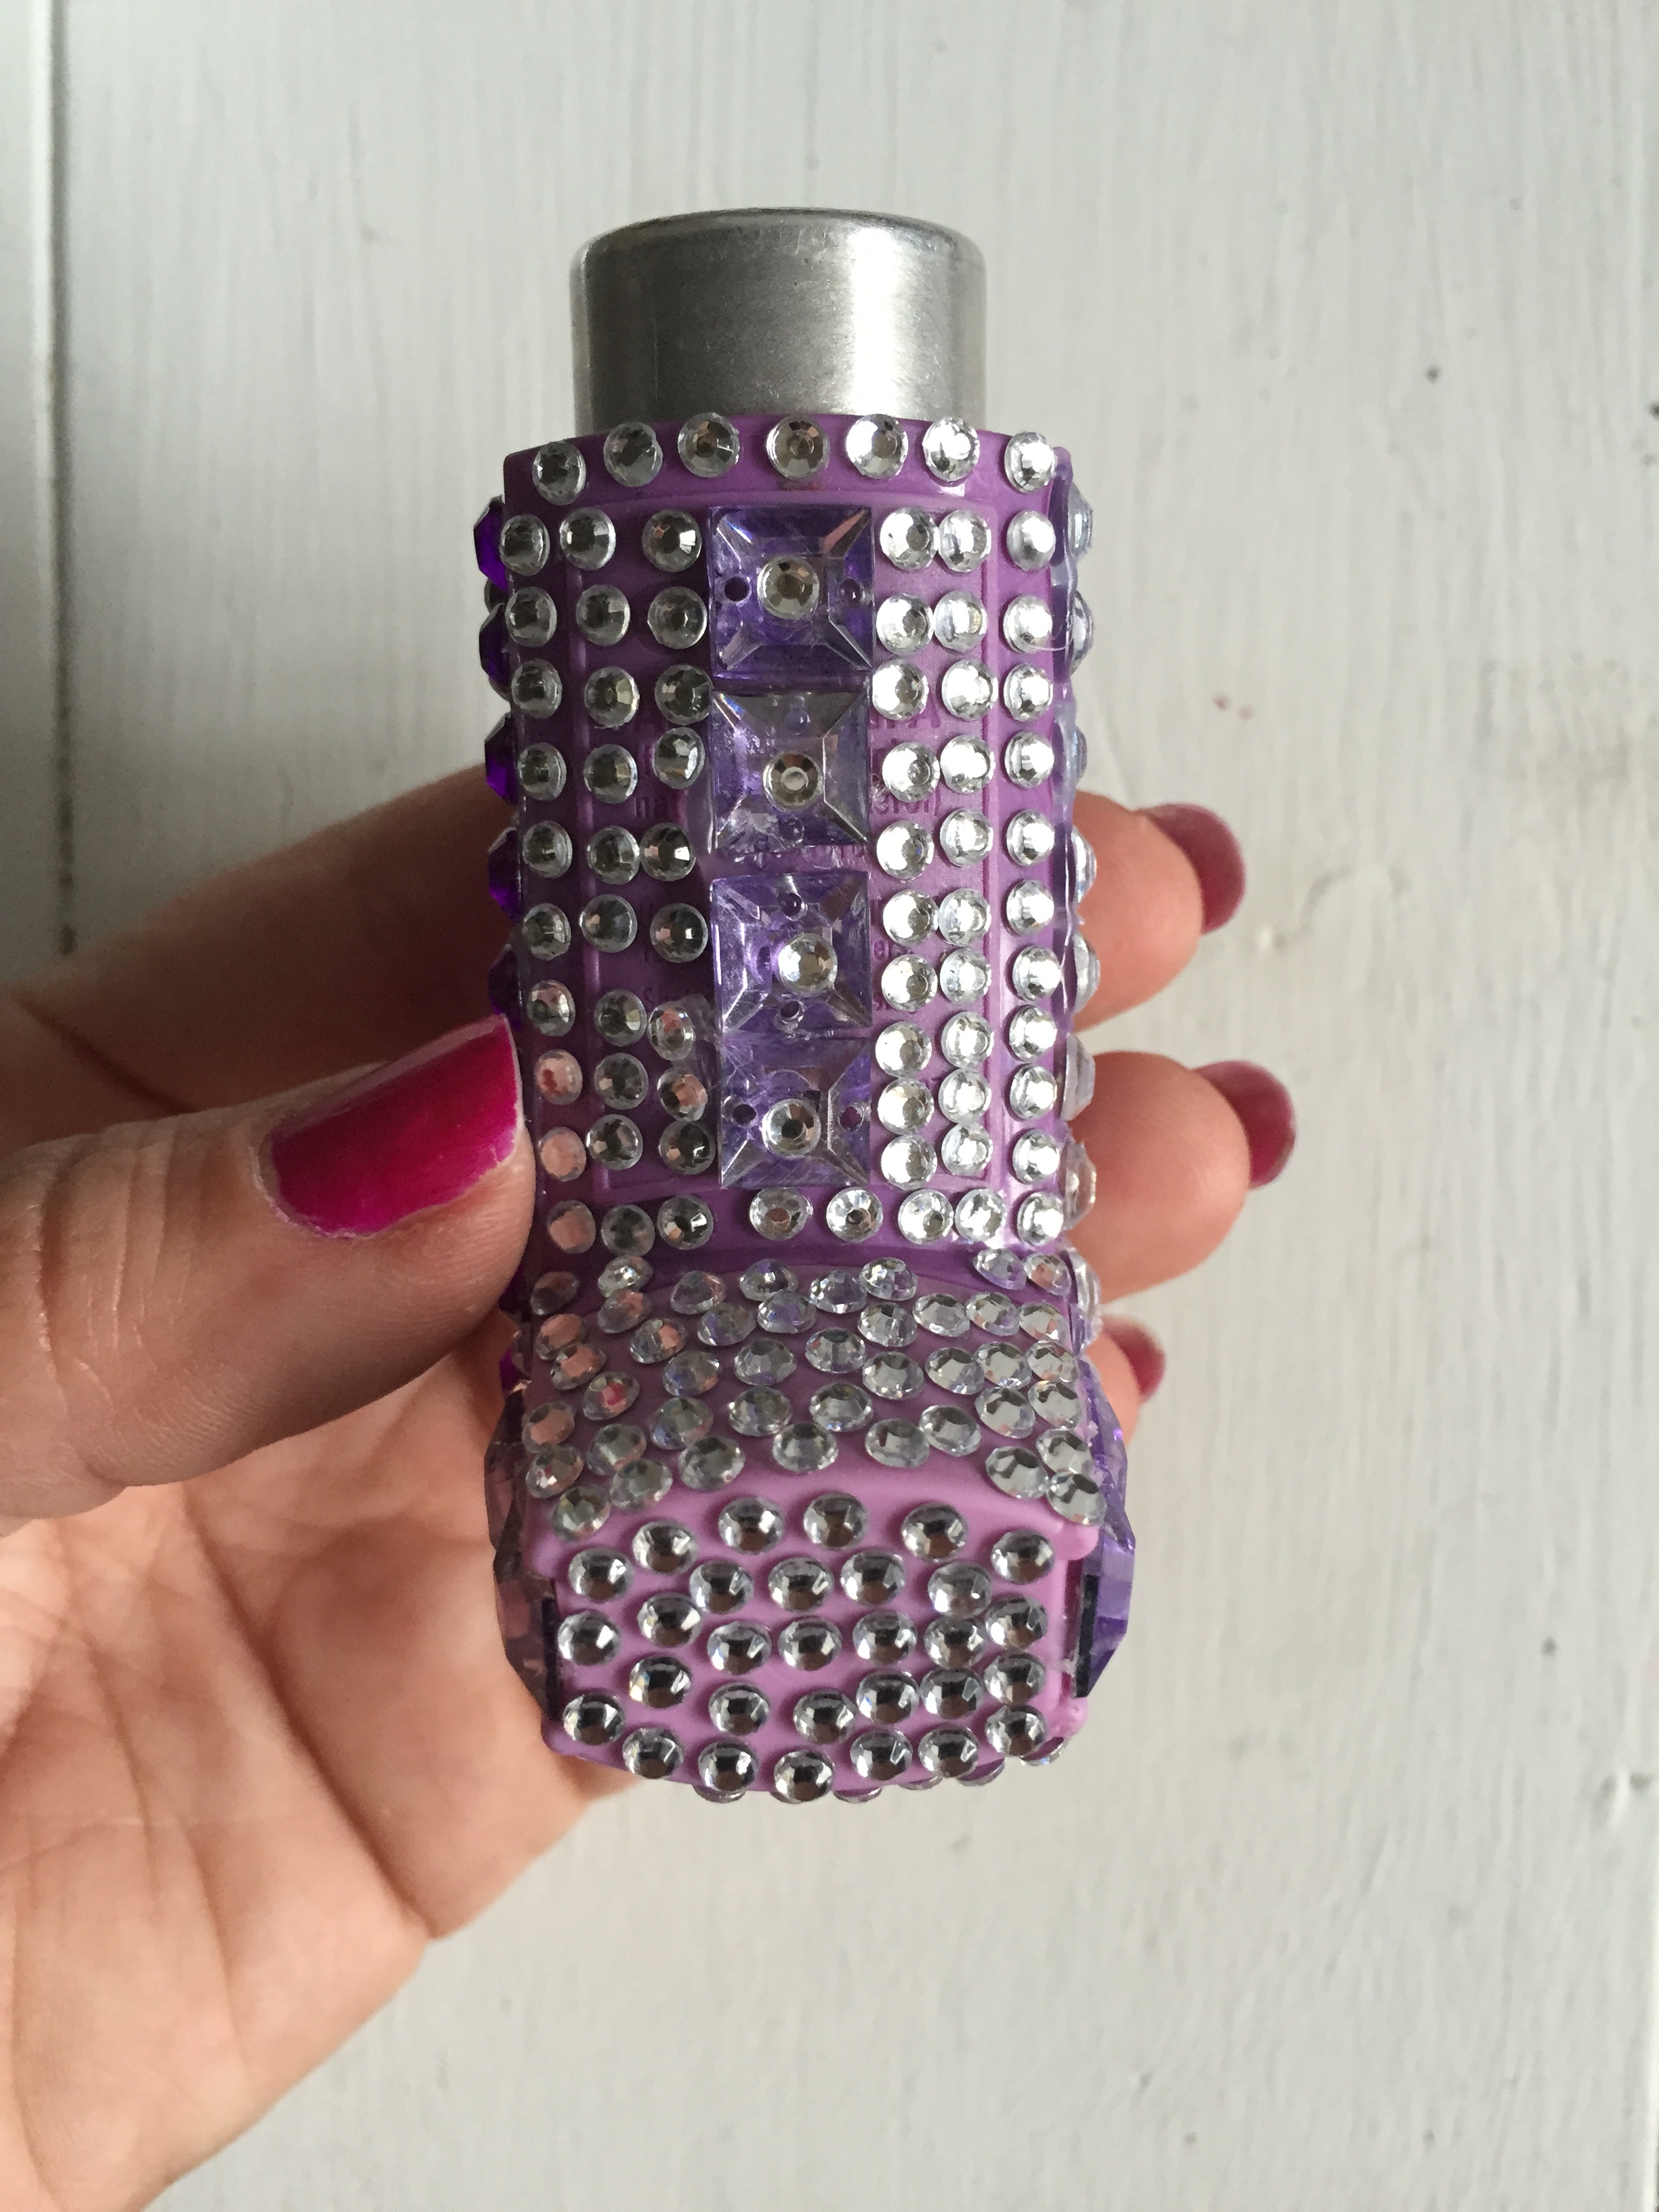
not everyday you get to bling out an inhaler, dress a doctors office, and dress an outdoor camping area in 3 days... but this week we did! it was 3 spots for Blue Cross Blue Shield of Alabama and Intermark and you bet Wallis Visuals killed it.
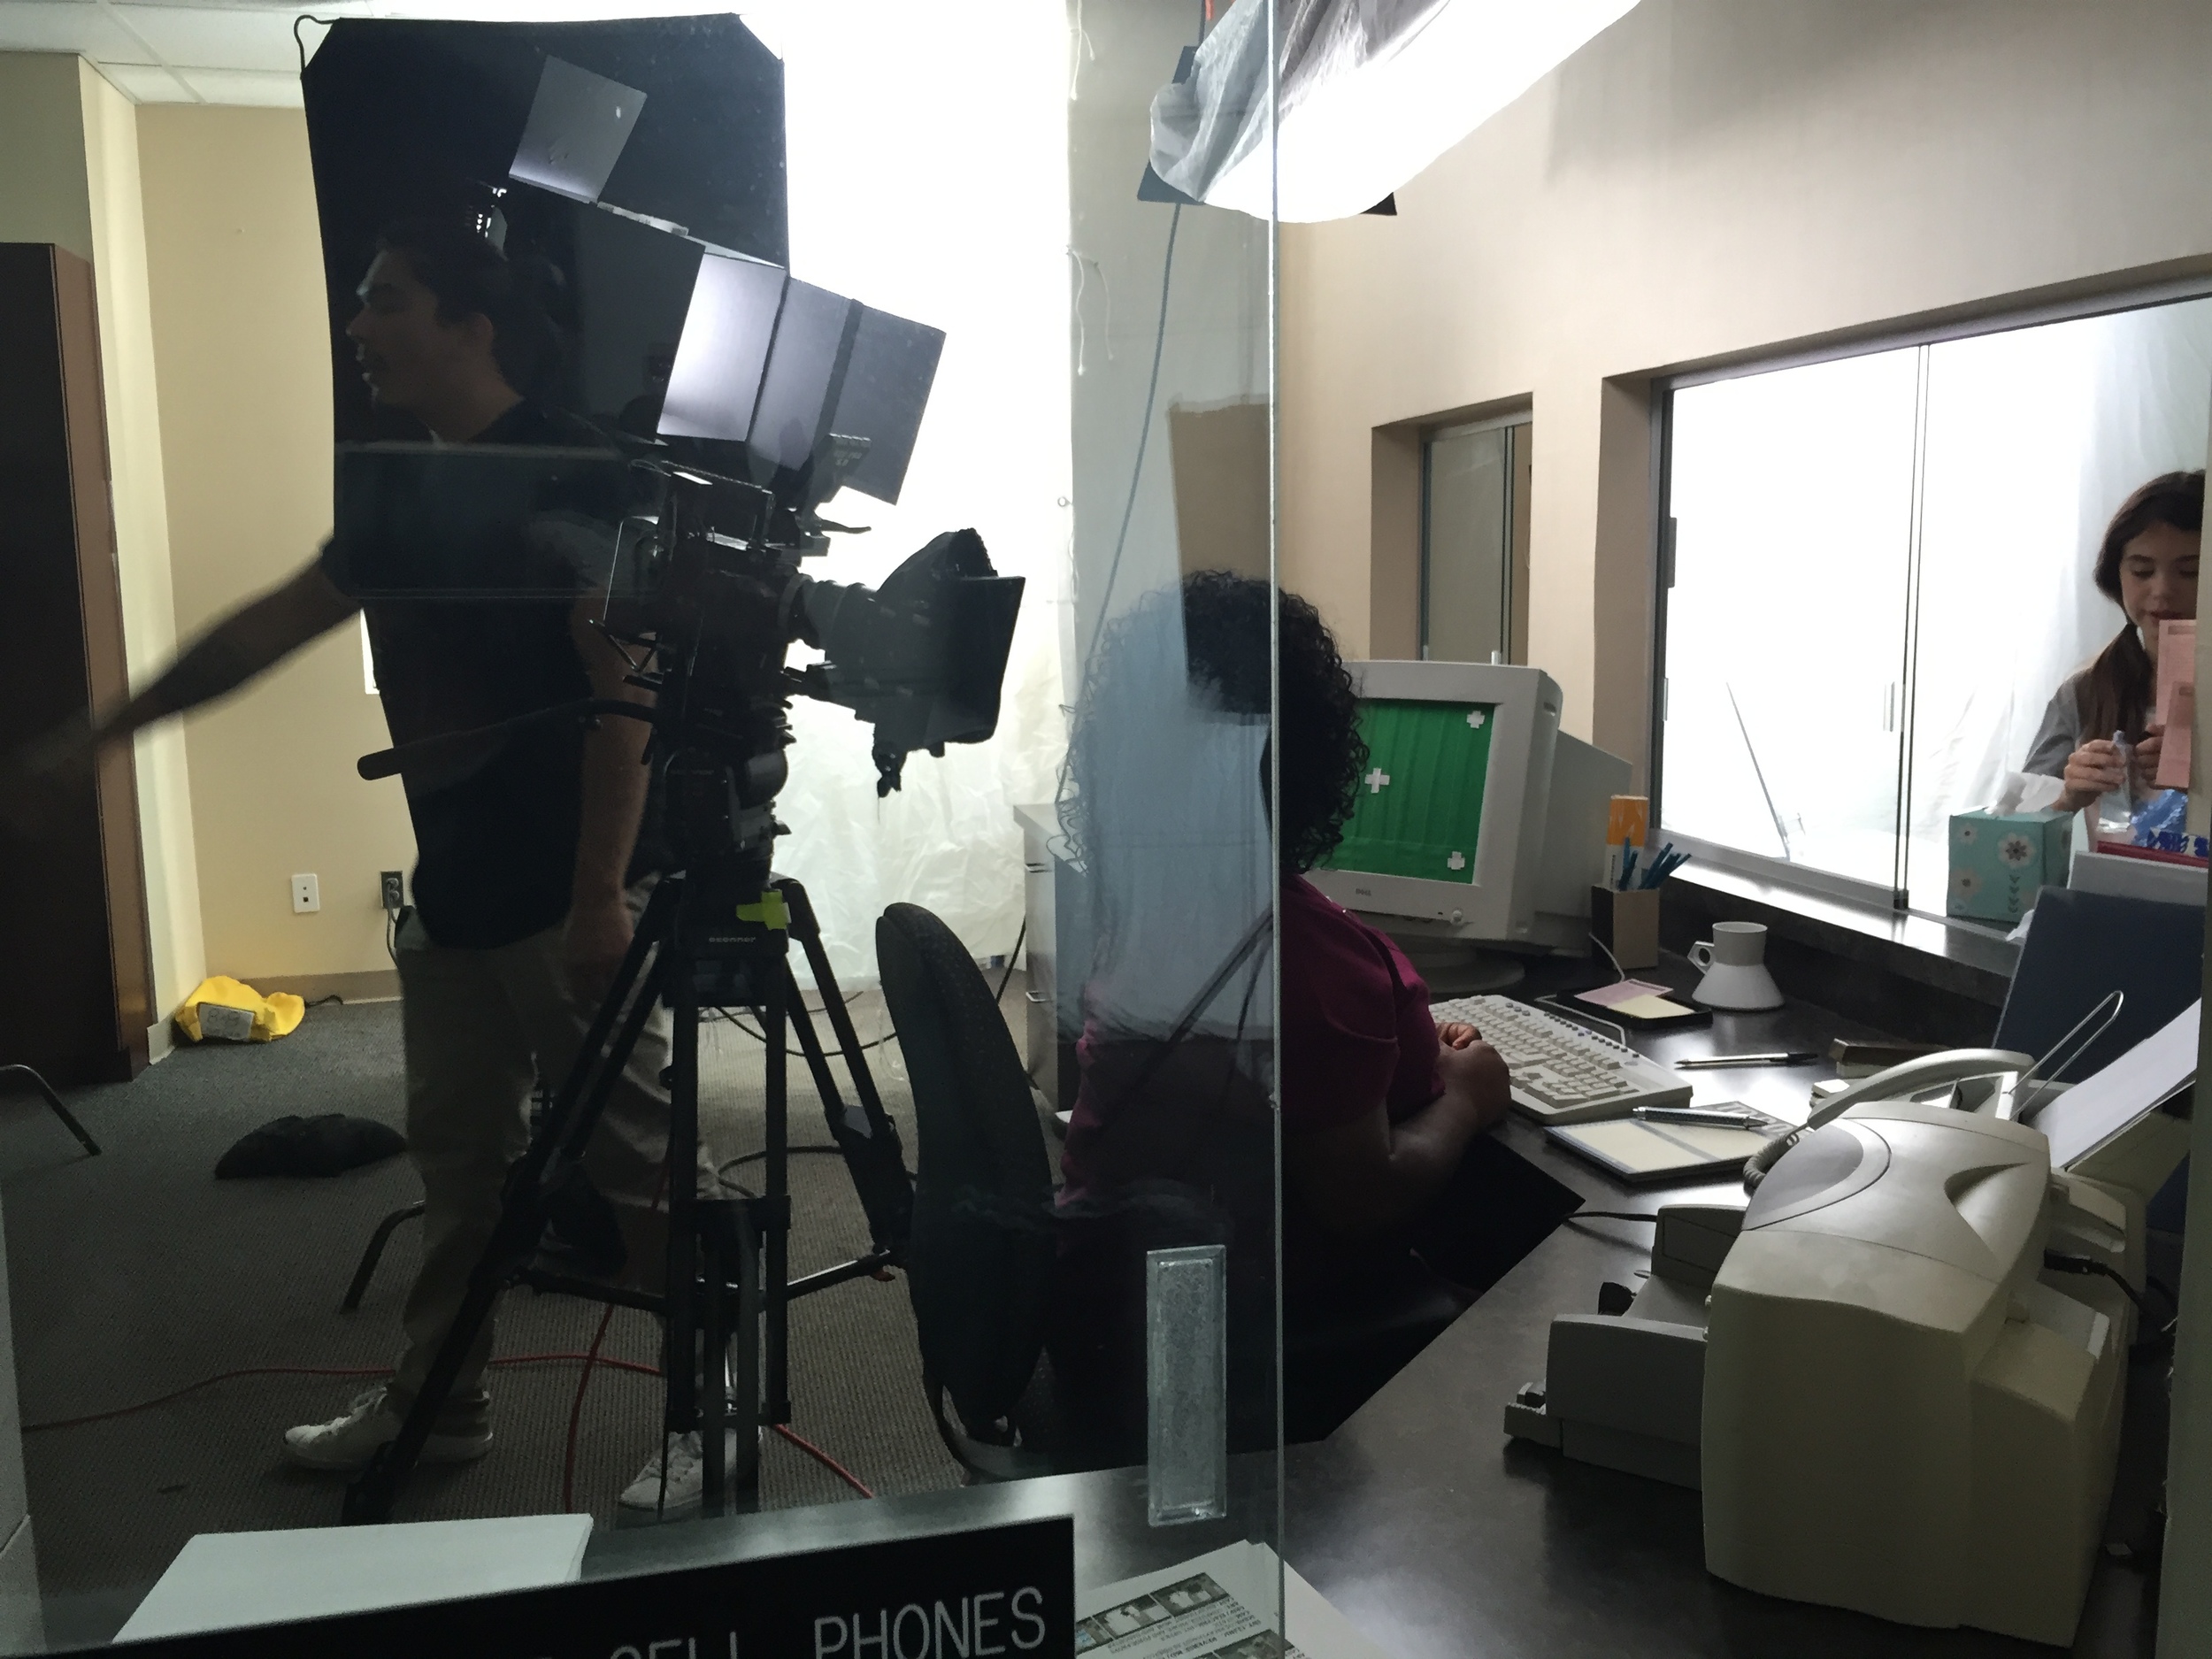
tight quarters today styling for steel city pops & six foot five productions. stop motion is a beast of a task, but with these guys and all you can eat steel city pops, we had a blast.